While planning our kitchen remodel, I came across a ton of beautiful kitchen subway tile backsplash ideas that will inspire you to give your kitchen a fresh new look!
Today, subway tiles come in a variety of colors, finishes, and sizes, but they still retain their distinctive rectangular shape and association with the iconic subway stations that inspired their name. The term “subway tile” has become synonymous with this particular style of ceramic tile, regardless of its application.

About Subway Tile
The term “subway tile” originates from the early 20th century when this style of tile became widely used in the construction of subway stations like for the New York City Subway System. The first subway system in New York City, which opened in 1904, featured walls lined with these rectangular ceramic tiles.
The defining characteristics of subway tiles include their rectangular shape, typically measuring 3 inches by 6 inches, and their glossy finish. Originally, they were white, providing a clean and bright aesthetic that helped illuminate the underground spaces of subway stations.
Over time, the popularity of subway tiles extended beyond subway stations and into residential and commercial interiors. Their simple yet versatile design made them a popular choice for kitchens, bathrooms, and other areas where a clean and classic look was desired.
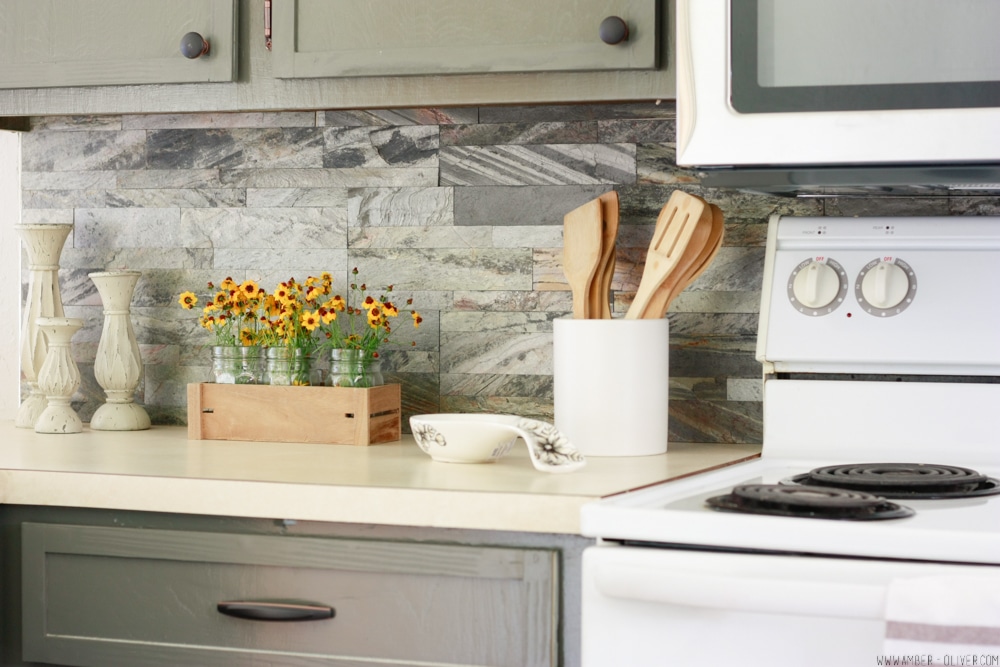
Kitchen Remodel on a Budget
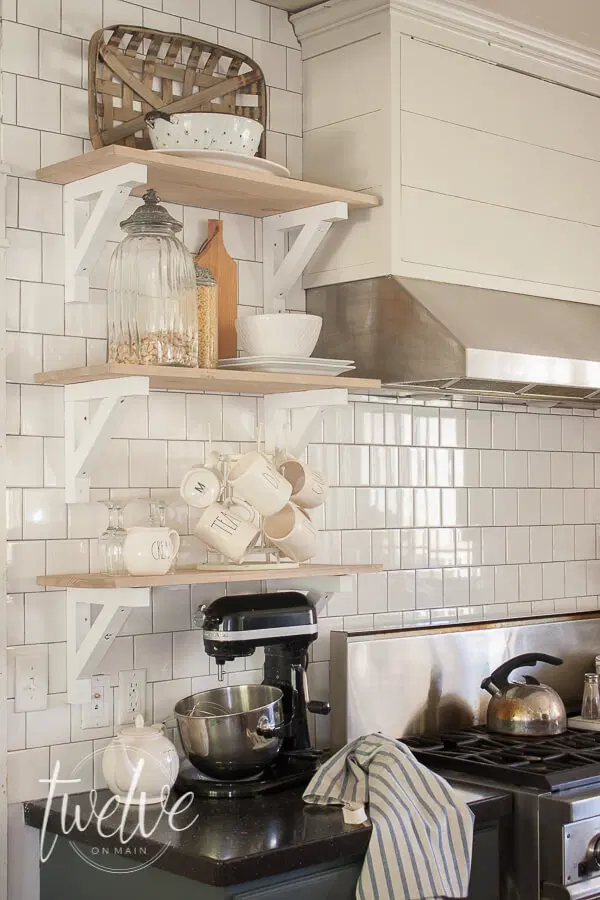
This kitchen remodel features dark painted cabinets, peel and stick backsplash, and updated old cabinet doors!
Subway Tile Patterns
Subway tiles are incredibly versatile, and there are several patterns in which they can be arranged to achieve different visual effects. Here are some popular subway tile patterns:
Running Bond (Brick Bond):
This is the most common subway tile pattern, where each tile is offset by half its width from the tile above and below it. It creates a staggered, brick-like appearance that is timeless and classic.
Herringbone
In a herringbone pattern, subway tiles are arranged in a zigzag design, resembling the bones of a herring fish. This pattern adds visual interest and texture to the space and works particularly well as a focal point or accent wall.
Basketweave
Basketweave pattern involves arranging pairs of tiles horizontally and vertically to create a woven effect, similar to the pattern found in traditional woven baskets. It adds a touch of elegance and sophistication to any space.
Vertical Stacked
In this pattern, subway tiles are stacked vertically on top of each other, rather than offset like in a running bond pattern. This creates clean, modern lines and can visually elongate walls, making it an excellent choice for small spaces or rooms with low ceilings.
Crosshatch
Crosshatch pattern involves alternating rows of vertical and horizontal subway tiles. This creates a grid-like pattern that adds depth and dimension to the space, making it feel more dynamic and visually appealing.
Straight Lay
In a straight lay pattern, subway tiles are laid in straight, horizontal rows with each tile aligned perfectly with the one above and below it. This creates a clean, minimalist look that is perfect for contemporary spaces.
Diagonal
Diagonal pattern involves laying subway tiles at a 45-degree angle to the walls instead of horizontally or vertically. This adds visual interest and can make small spaces appear larger by drawing the eye outward.
Chevron
Chevron pattern is similar to the herringbone pattern but with a more pronounced V-shaped zigzag. It creates a bold and dramatic look that adds a sense of movement and energy to the space.
These are just a few examples of the many ways subway tiles can be arranged to create unique and visually stunning designs. Depending on the pattern chosen, subway tiles can add texture, depth, and personality to any space, making them a popular choice for both traditional and contemporary interiors.
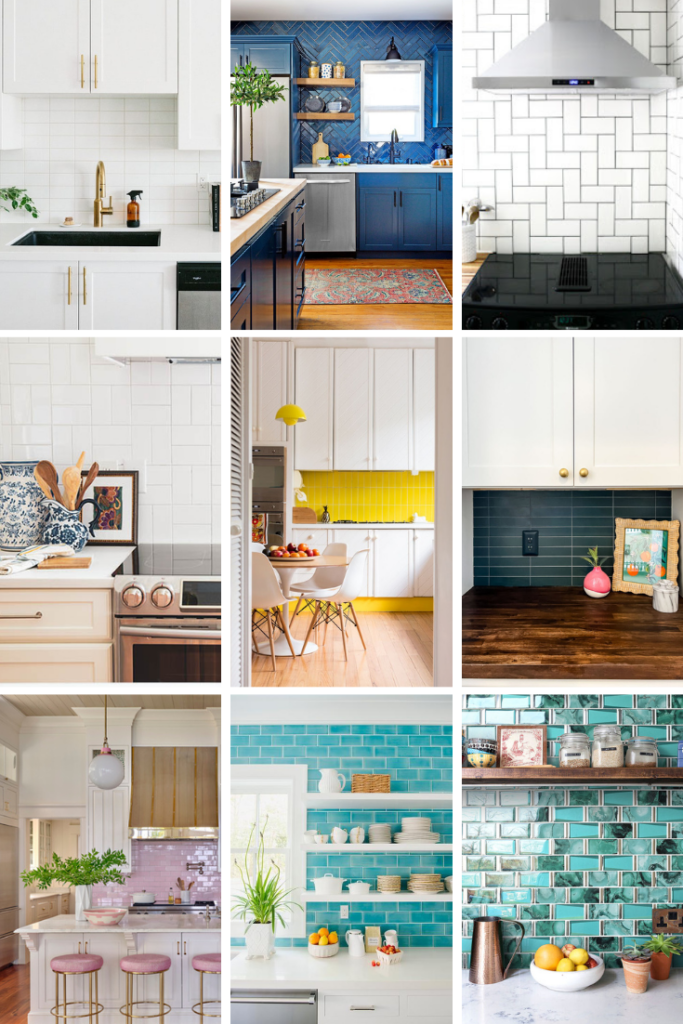
Kitchen Subway Tile Backsplash Ideas
Subway tile is a classic style that can be used many different ways. They are inexpensive and a great way to elevate the look of these simple tiles is trying different layouts. If you’re looking for kitchen subway tile backsplash ideas we have many different styles and colors to inspire you!
Kitchen Subway Tile Backsplash Ideas
Here are 30+ beautiful kitchen subway tile backsplash ideas that will inspire you to give your kitchen a fresh new look!
Stephanie has an absolutely stunning home! She has a modern white bohemian kitchen that has the most beautiful white subway tile in a basketweave pattern.
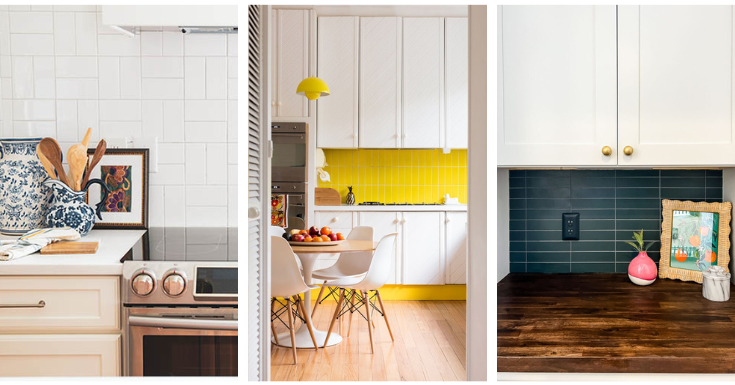
Here's a slightly different take on the classic white backsplash. This kitchen uses 2×6 handmade tile in “weathered white” instead of the simpler white version. This gives lots of texture to the space and those brass accents are the cherry on top!
I know, I know, this is a bathroom! But how beautiful would this be going from countertop to ceiling behind the stove in the kitchen!? We love all the bright different colors and this could easily be replicated in any color palette!
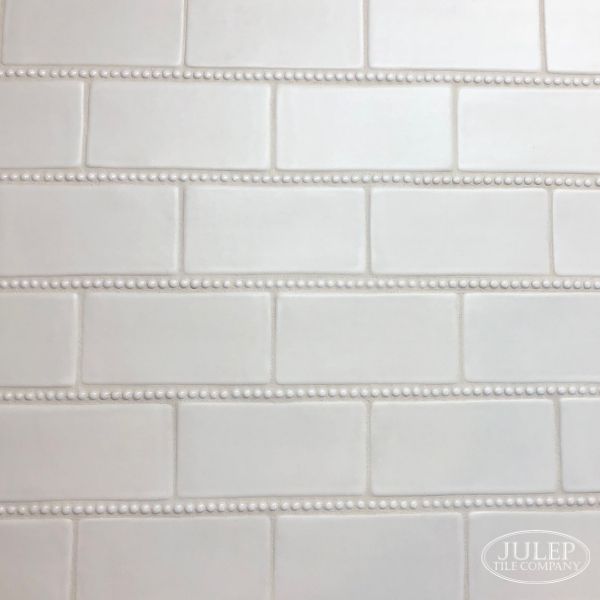
This is the most unique subway tile design I came across while looking for subway backsplash ideas! I love the little "pearls" that were added between each line of the tiles. Once they are grouted only the little pearls show and they look stunning! Just add these little liners between two tiles. You could get super creative and go for an eye-catching pattern!
A beautiful subway tile in green. This kitchen has a lot of natural materials, warm copper metals, real wood accents, that all pair beautifully with the deep green subway tile.
This simple herringbone subway tile backsplash is a unique design that is a change up from the traditional! Instead of white grout they used a soft gray that looks great!
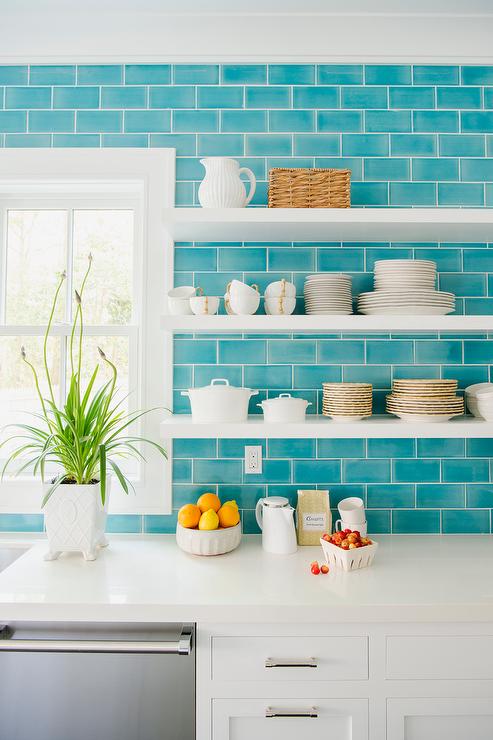
We love this beautiful turquoise subway tile backsplash paired with bright white accents!
This project uses peel and stick subway tile! They come in sheets and once together they create a seamless look. This is a beautiful white subway tile backsplash that's easy for beginners to install!
The different shades in this backsplash are definitely a different take on the traditional white subway tile!
The complete opposite of what you generally see with subway tile. This black subway tile is a unique take on the classic style.
These simple square tiles with gray grout is a pretty twist on traditional subway tile.
This beautiful natural stone adds visual interest to your backsplash!
Learn how to install a kitchen backsplash wall of subway tiles laid in a straight herringbone pattern with this tutorial.
This is an amazing European style kitchen with a modern spin on a farmhouse design. The stunning tile is a perfect backdrop for that massive range hood!
Gorgeous ombre backsplash idea could easily be customized in any color of your choice! This would work best in an area that could go all the way to the ceiling like behind these open shelves.
Who doesn't love pink! The gorgeous soft pink tiles like amazing with the gold accents and white cabinets.
Create a border or stripes with this creative option.
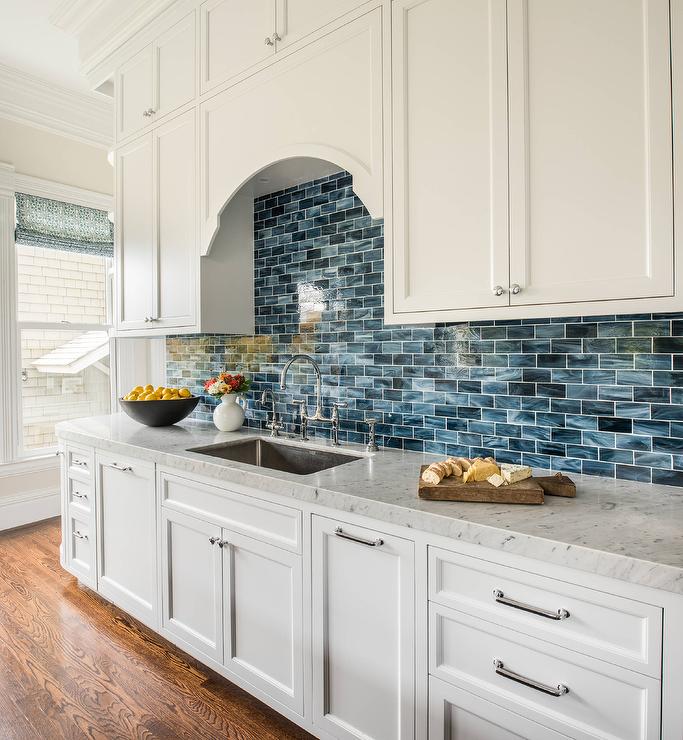
Color drench your kitchen with matching backsplash and cabinet colors. Especially beautiful in a bold, beautiful blue as seen here.
We've covered the entire rainbow with this purple subway tile idea!
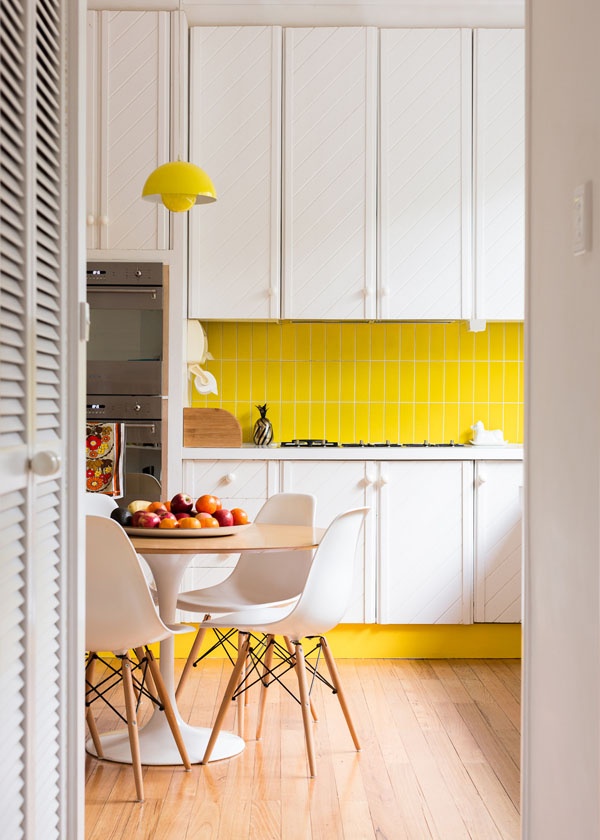
We love this amazing bold color! They used a creative vertical pattern for a modern look. Use subway tile to add a pop of color to your kitchen design.
These gorgeous pearlescent tiles look like water!
This has a similar
This gorgeous example is from FireClay Tile. They have an amazing selection of colors to choose from!
These simple black subway tiles look great with dark grout. Paired with dark or black grout gives an awesome contrast to white cabinetry. We love the look of this dark tile.
Marble tiles have special considerations you should make when installing. This tutorial shares lots of tips and tricks and shows some beautiful after photos!
This simple design was also a cheap one - she got the tiles for free! Get more inspo and her tips by following the link to her blog.
This is a cheap kitchen backsplash idea! This would be a great renter friendly option!
This pretty green glass subway tile looks darling in this small space. The tutorial shows you how to install it easily!
We love this creative design Kati came up with! She gives a great tutorial on how to install a tile backsplash.
This website was difficult to navigate so I couldn't find a completed photo - but I love this herringbone subway pattern!
Another peel and stick option that doesn't require using any mortar or grout! You will need a glass cutter to install these and they are a little tricky because you can't adjust once they are stuck on! Once they are in place they aren't going anywhere! You'll want to check and double check as you are installing to make sure you are installing them in a straight line!
Choosing Grout for Kitchen Backsplash
Choosing grout colors for a kitchen backsplash is an important design decision that can significantly impact the overall look of your kitchen. Here are some tips to help you select the right grout color:
1. Match the Tile Color for a Seamless Look
- Pros: Matching grout color to your tile creates a seamless, uniform appearance. This approach works well if you want the tile to be the primary focus without the distraction of grout lines.
- Cons: This can make the space look flatter and less textured.
2. Contrast the Tile Color for Emphasis
- Pros: Choosing a contrasting grout color emphasizes the shape and layout of the tiles, adding visual interest and highlighting unique patterns like herringbone or basketweave.
- Cons: High contrast can be more visually busy and might clash with other elements in the kitchen.
3. Neutral Grout for Versatility
- Pros: Neutral grout colors (like gray, beige, or off-white) are versatile and can complement various tile colors and styles. Gray grout, for example, can mask stains better than white grout.
- Cons: It may not create as dramatic an effect as a high-contrast grout.
4. Dark Grout for Bold Impact
- Pros: Dark grout (like black or charcoal) can create a striking contrast with lighter tiles and add a modern, industrial feel. It’s also more forgiving of stains and dirt.
- Cons: Dark grout can sometimes overpower the tile and make the space feel smaller if not balanced well with other elements.
5. Consider Maintenance and Stain Resistance
- White Grout: While it offers a classic and clean look, white grout can stain easily and requires more maintenance.
- Dark Grout: More resistant to staining but may show soap scum or water spots.
6. Harmonize with the Overall Color Palette
- Color Scheme: Choose grout that complements the overall color scheme of your kitchen. If you have a lot of bright colors, a neutral grout might help balance the look.
- Materials: Consider the materials and finishes in your kitchen, such as countertops, cabinets, and appliances, to ensure the grout color harmonizes with them.
7. Experiment with Samples
- Test Grout Samples: Before making a final decision, test a few grout colors with your chosen tiles. Place sample tiles with different grout colors to see how they look in your kitchen’s lighting.
8. Think About Grout Lines and Tile Size
- Tile Size and Pattern: Larger tiles with smaller grout lines may need a different approach than smaller tiles with wider grout lines. The pattern of the tiles can also influence your grout color choice.
Our Home Addition
We are building a living room add on and remodeling the kitchen at the same time.
Introduction
It’s finally time to share the details of our our home addition!
Foundation
We had a brand new foundation poured for our living room home addition!
Framing
After the foundation was poured, the next step in our home addition was the framing! Here’s the process of framing to have a new room added to your home.
Interior and Exterior Finishes
After our living room home addition was framed, it was time to begin the interior and exterior finishes. Next up was the installation of insulation and drywall, painting the walls, then installing hardwood flooring and baseboards!
From classic white subway tiles to bold statement pieces, subway tile backsplashes offer endless possibilities for transforming your kitchen into a culinary masterpiece. Whether you opt for a timeless look or embrace modern trends, let your personal style and creativity take center stage as you embark on this exciting design journey. With the right combination of colors, patterns, and materials, you can create a kitchen backsplash that not only serves as a practical element but also as a stunning focal point that enhances the entire room.















Leave a Reply