Last updated October 25th, 2022 at 01:18 pm
Spray painting picture frames is an easy DIY that not only saves you money but it’ll look great in your home! Plus upcycling is great for the planet!
The post has been months in the planning! A few of my blogging besties have teamed up for a Thrift Shop Challenge!

The rules are simple:
– Purchase something from a thrift store that needs a little love. It can be clothing, furniture, decor, etc. The cheaper the better!
– Bring it home and give it a whole new look. Be creative!
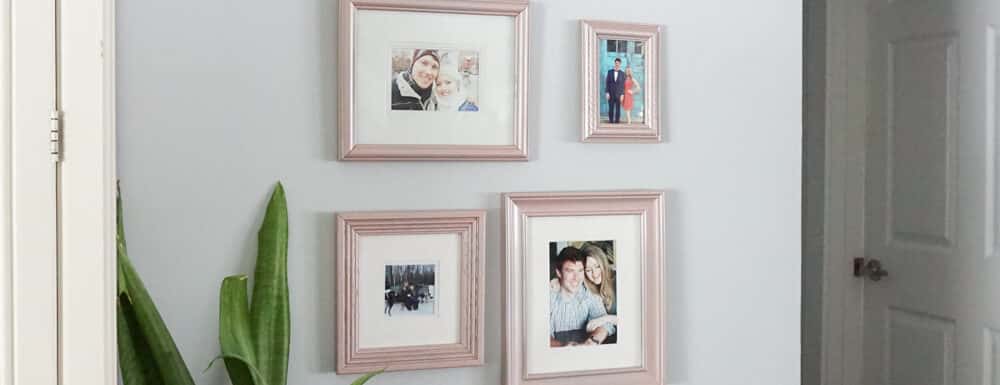
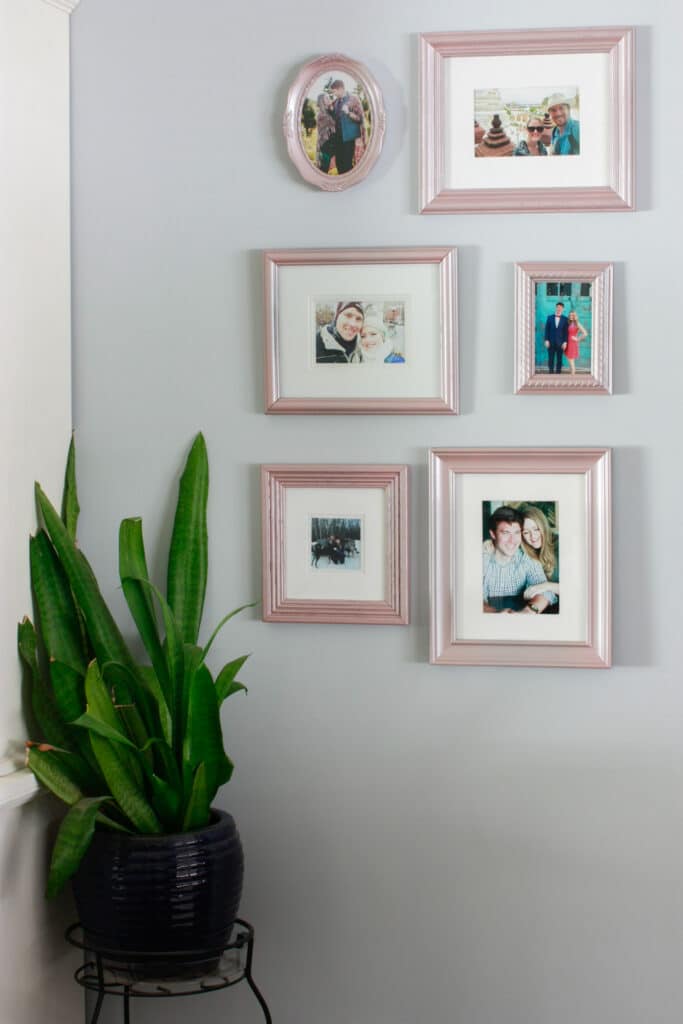
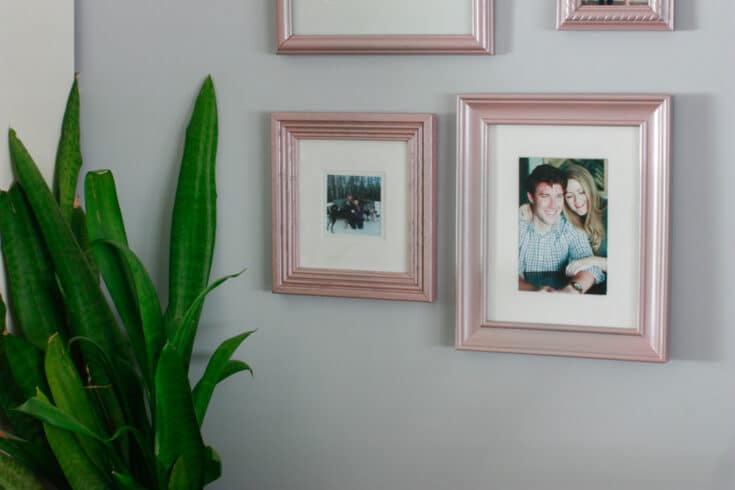
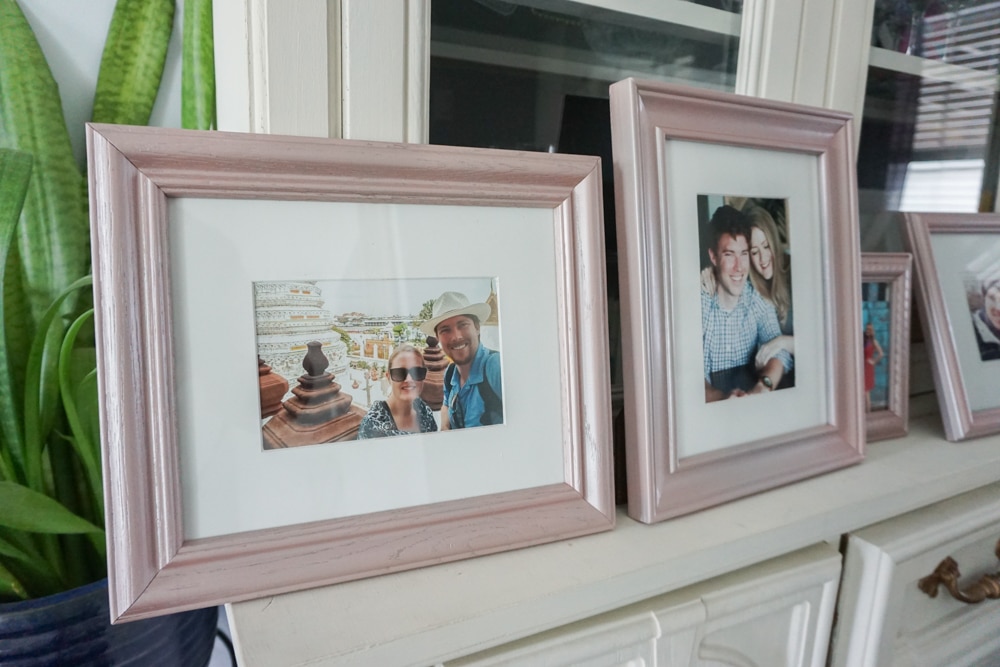
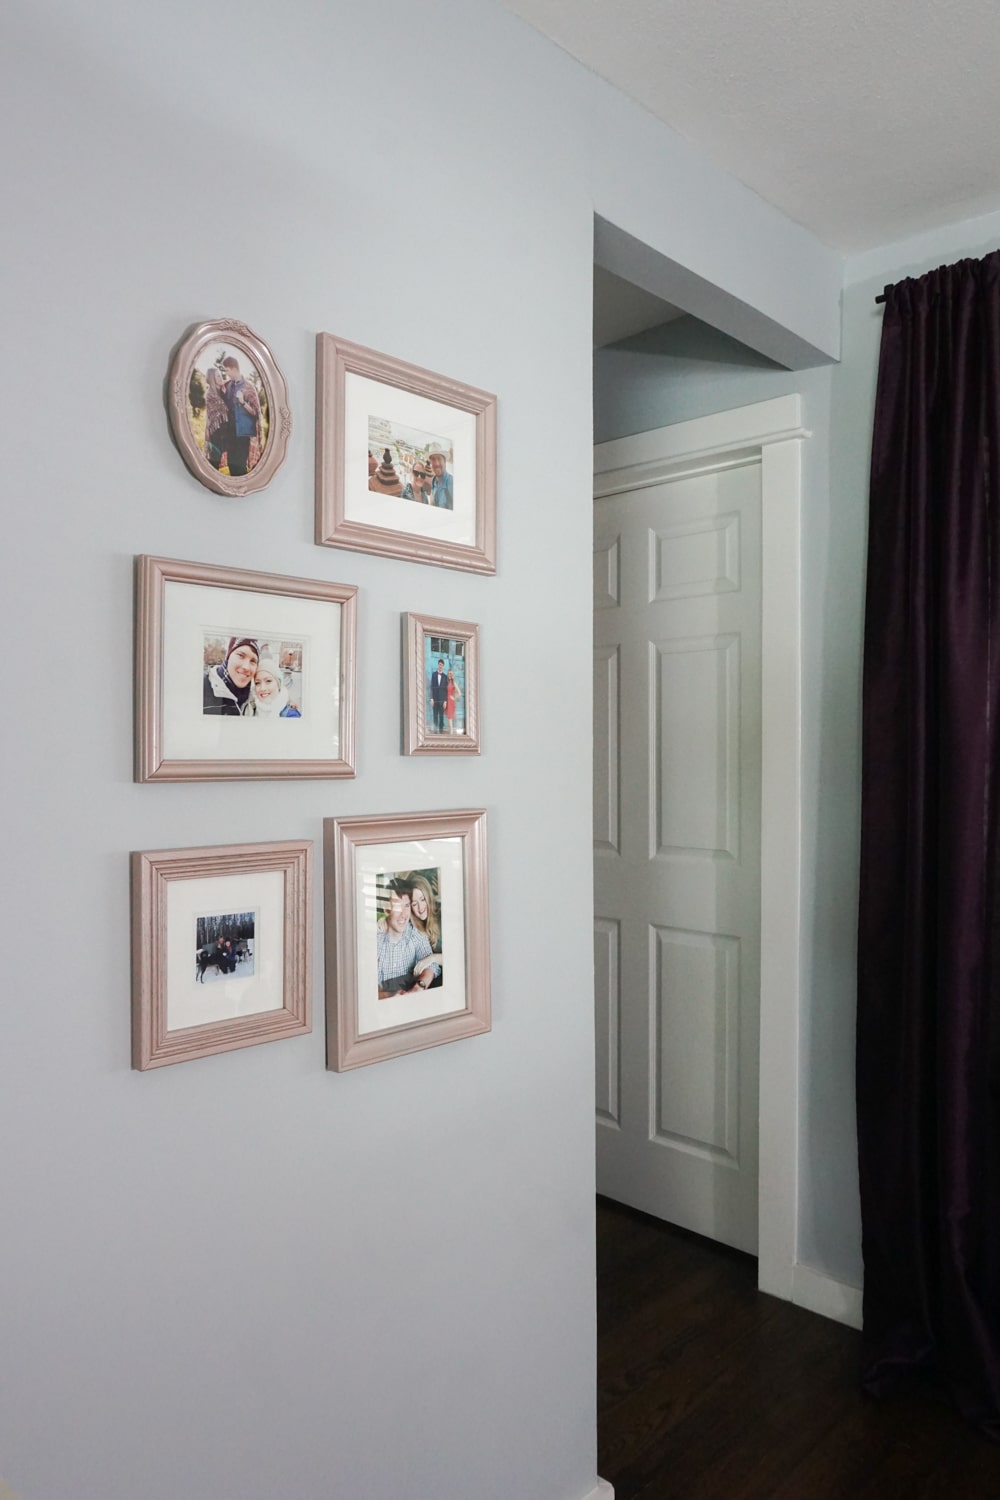
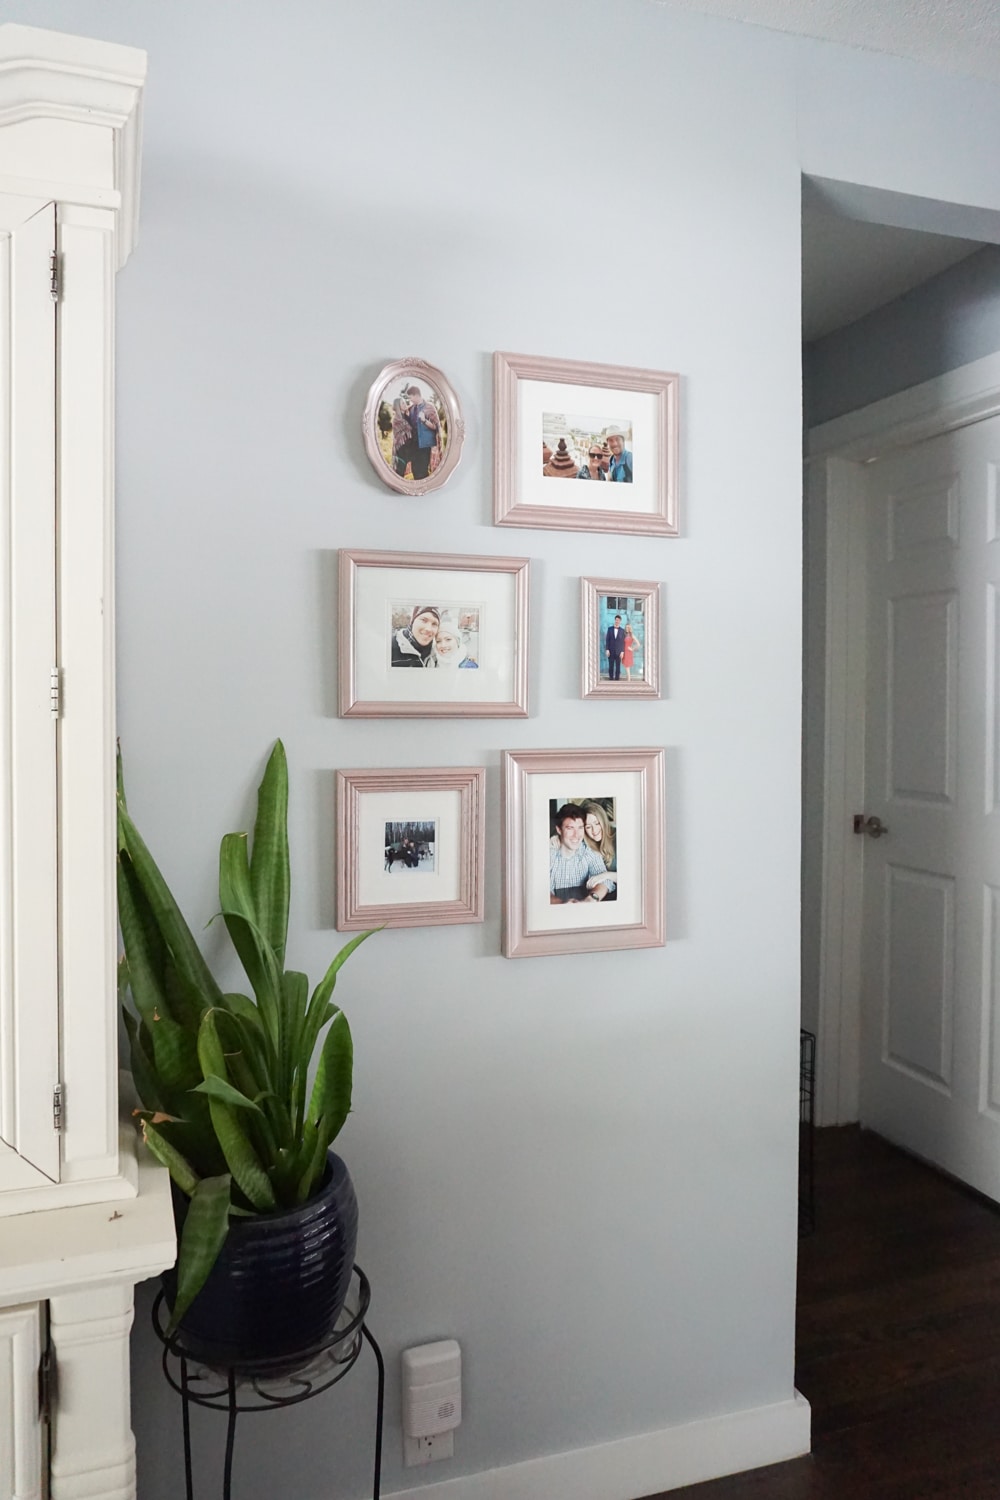
For my entry, I decided to try spray painting picture frames to create a cohesive DIY gallery wall! With a few coats of paint, I was able to transform mismatched frames into this beautiful wall:
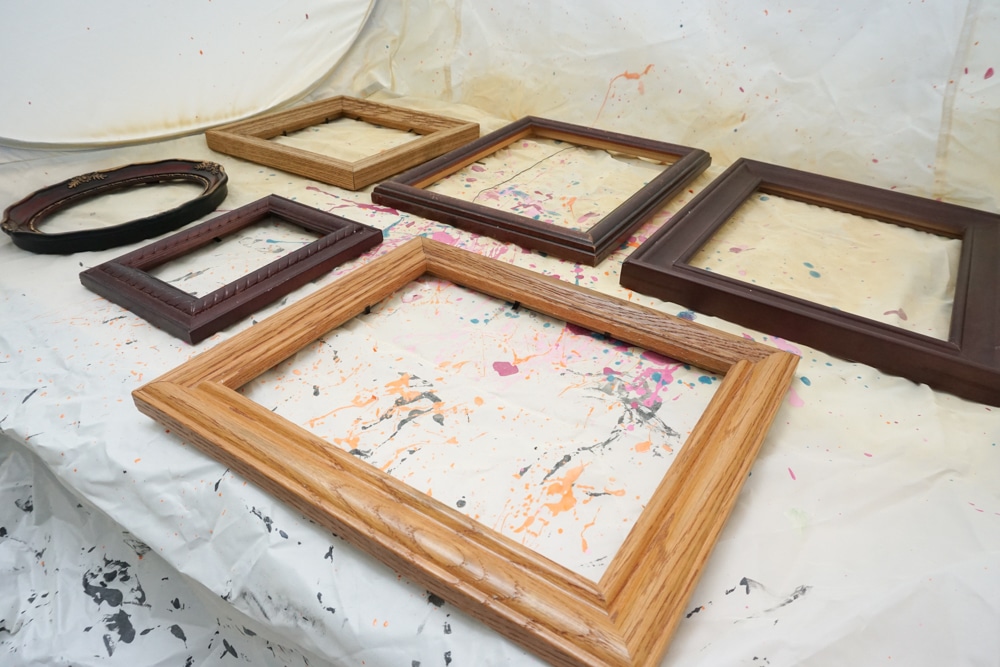
This is a project that *might* take a couple of trips to the thrift store to source enough quality frames to put together your DIY gallery wall. I was lucky enough to find 6 that I really liked in one trip! And the store I shopped at was having a discount day so I got all my picture frame materials for around twelve bucks!
You can use plastic frames, wooden frames, ones with a metal frame. While I totally encourage you to find these used or second hand, you can obviously use new frames too! But honestly the best part of this project is taking an old frame and making it new again!
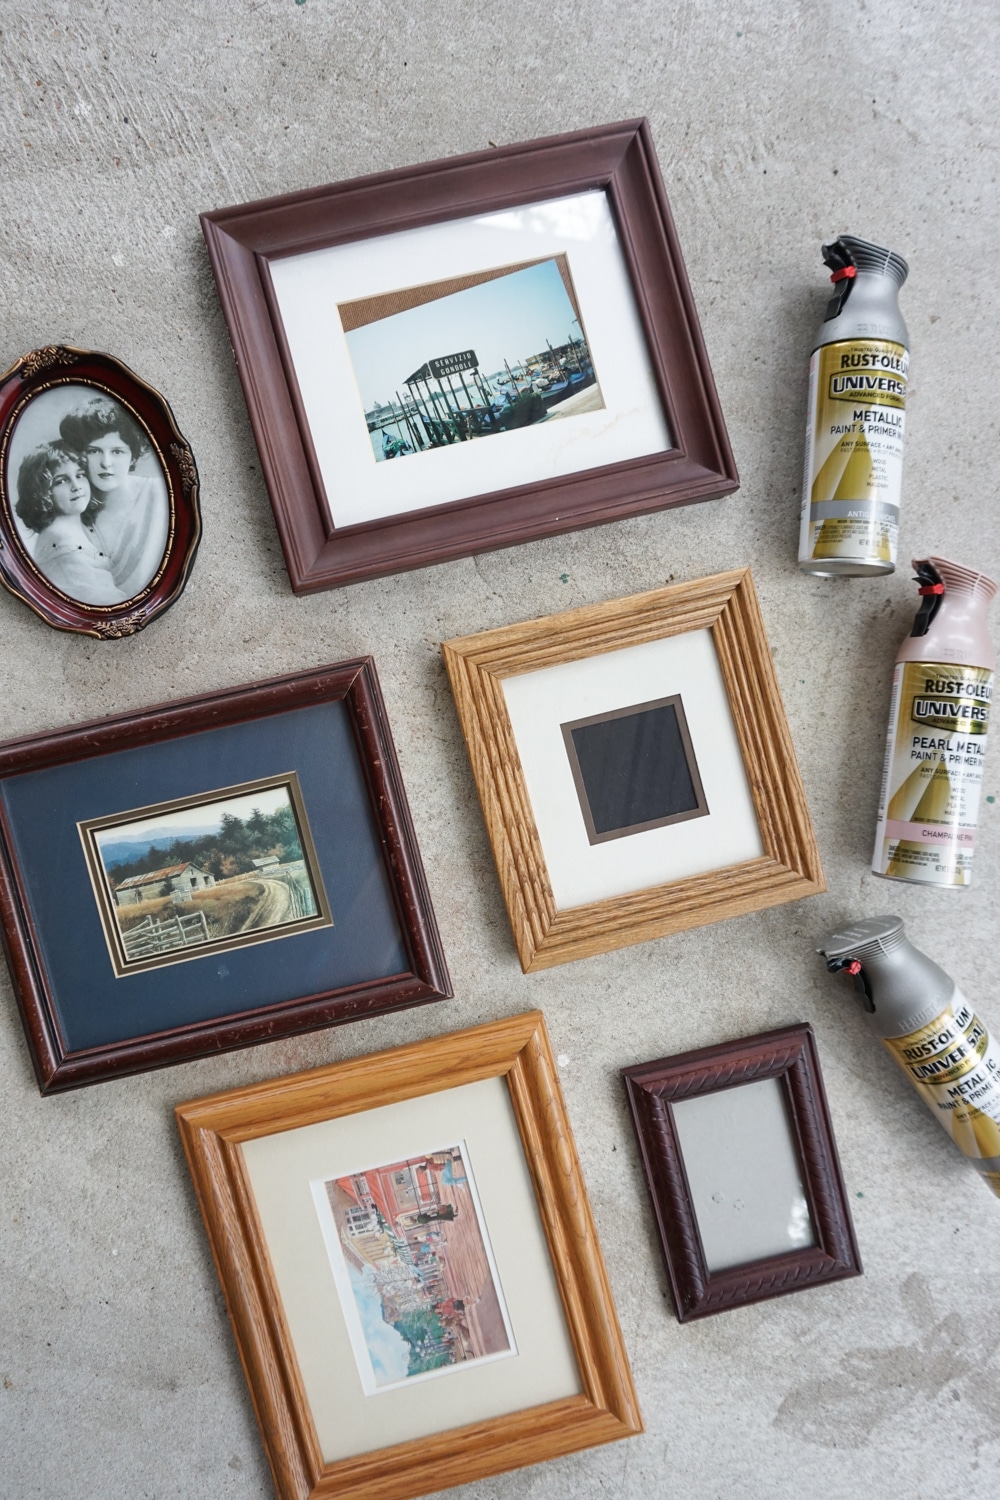
When shopping from picture frames to upcycle, I like to seek out ones that already have a mat. I also like to make sure the back is sturdy – I steer clear of the cheap frames from Walmart and Target. Those frames are okay but I won’t buy them second hand!
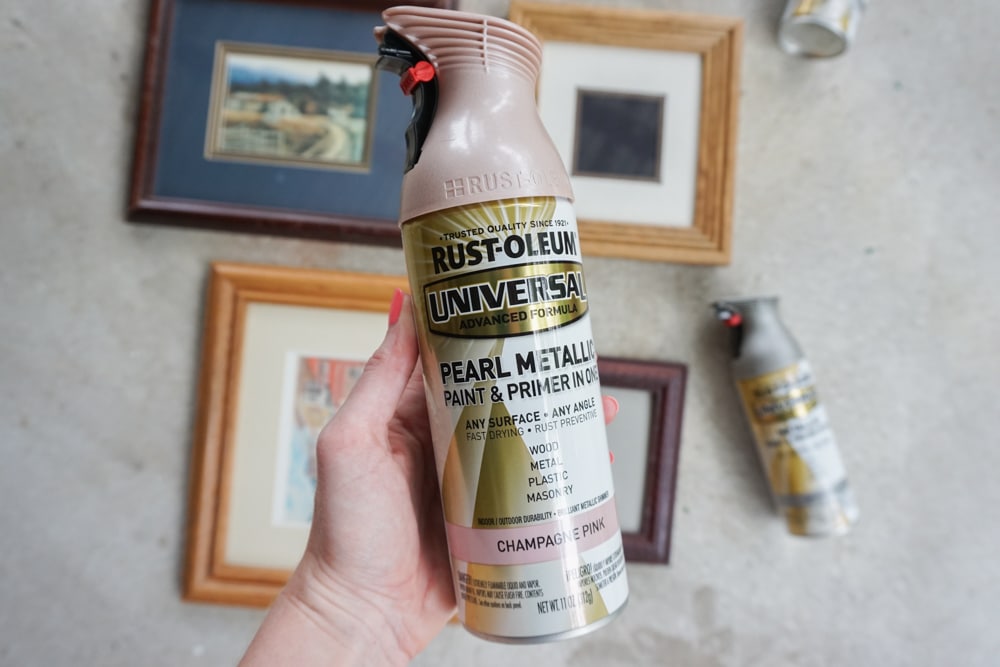
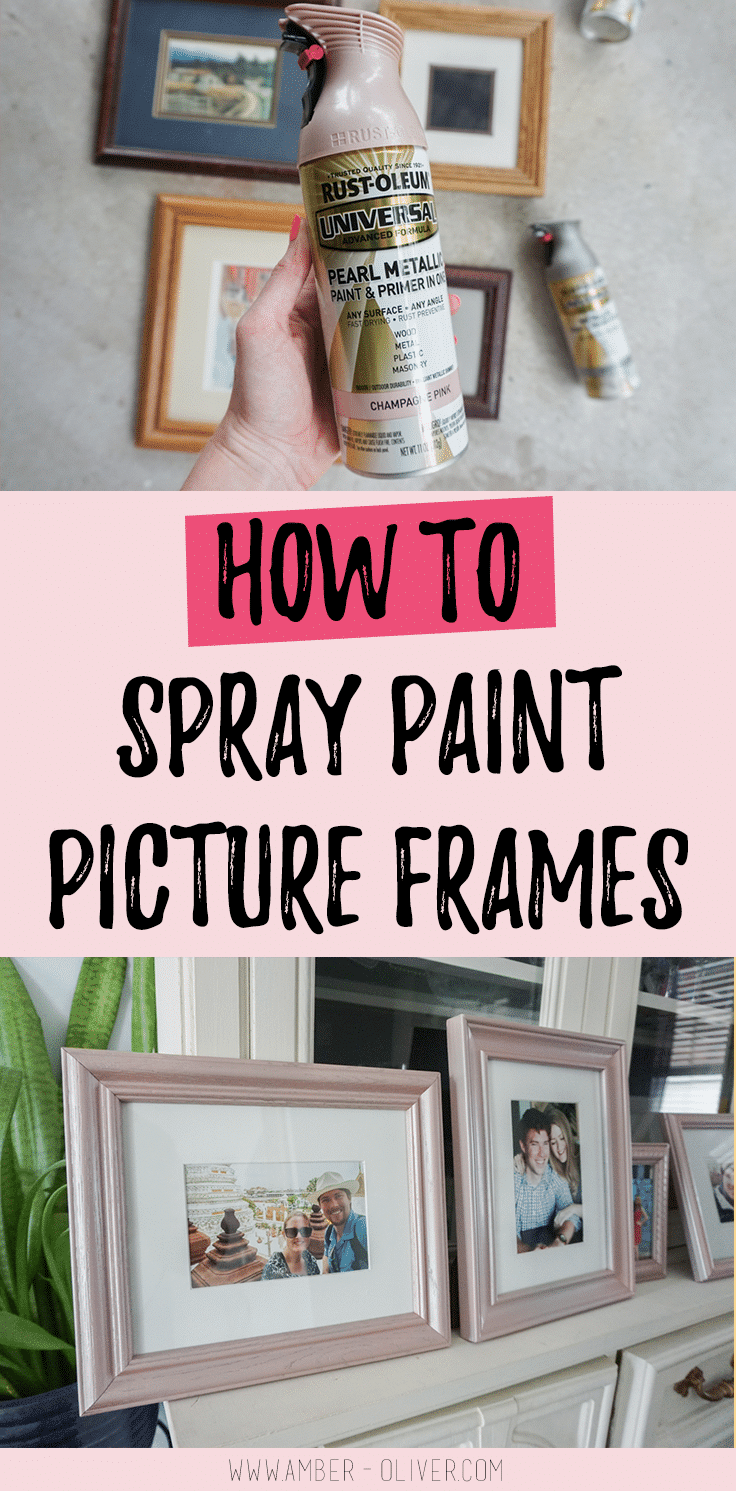
For this project I used Rust-oleum Universal spray paint. The Pearl Metallic has a beautiful finish and I love the Champagne Pink color! Always check the back of the can to see the dry times and other specifications for the best finished product!
Here are 3 suggestions for how to display family photos tasteful ways!
Spray Painting Picture Frames
Spray Painting Picture Frames
Make old wood frames look new again with a few cans of paint!
Materials
- old picture frames
- drop cloth
- tack cloth or microfiber cloth
Instructions
- Start by cleaning off your frames - make sure they are free of dust and grime.
- Lay out your frames where you can spray paint them. I like to use my Homeright Spray Shelter!
- Spray paint your frames! Start off the edge then move across the frames in a sweeping motion. Always start and stop OFF the surface to avoid pooling.
- Work in thin layers and don't try to get full coverage on the first coat. Make sure you get the sides of the frame and the edge of the frame but I didn't worry about the back of the frame.
- Let dry and add a second coat if needed!
I take the frames apart before painting so I don’t have to worry about using painter’s tape.
How to Paint Picture Frames
There are a ton of paint options out there. You can find a wide range of colors and even different textures. Chalk paint for example comes in a spray too! You could also use latex paint, acrylic paints, or any from the craft stores but they take a lot longer. I definitely prefer spray paint projects and think I get the best results when using spray paint. If you’re painting black frames or going from a dark color to a light one, your best option is to do a coat of primer. Most paints say they are paint + primer but this will help you get better coverage.
Don’t miss our inexpensive wall art project – it uses cheap wood shims to make a giant statement piece! You can also get creative with these super easy, and fun to make, DIY Cricut crafts and home decorating ideas. There are 28 different projects to see!
Be sure to check out the other ladies’ thrift shop challenge ideas and see how they updated their thrift store finds!
Metal Bar Stools by Love & Renovations
Thrift Store Play Kitchen Makeover by A Crafted Passion
How To Paint Candlesticks by Green with Decor
How to Upcycle A Shabby Chic Mirror by Home Beautifully
White Pumpkin Decor by Making Manzanita (that’s me!)
Thrift Store Lamp Makeover by Small Stuff Counts
DIY Modern Wind Chimes by Love Create Celebrate
Shop this project:

This painting project is quick and easy way to create a gallery wall and it’s an inexpensive solution to adding wall decor without breaking the bank. I’m always looking for an affordable way to decorate and this project shows you how a little bit of paint is the best way to make a huge difference in your home!
Don’t forget to PIN for later!
Love DIY projects? Be sure to stop by our project gallery! We have 100s of projects to inspire you!
UPCYCLE ARCHIVES
View our collection of Upcycling projects!
Chelsea @ Making Manzanita says
Love that color!! What a cute way to make a budget-friendly gallery wall that looks cohesive. Great job girl!
Hannah says
Love the colour, such a clever idea!