Last updated June 25th, 2024 at 03:58 pm
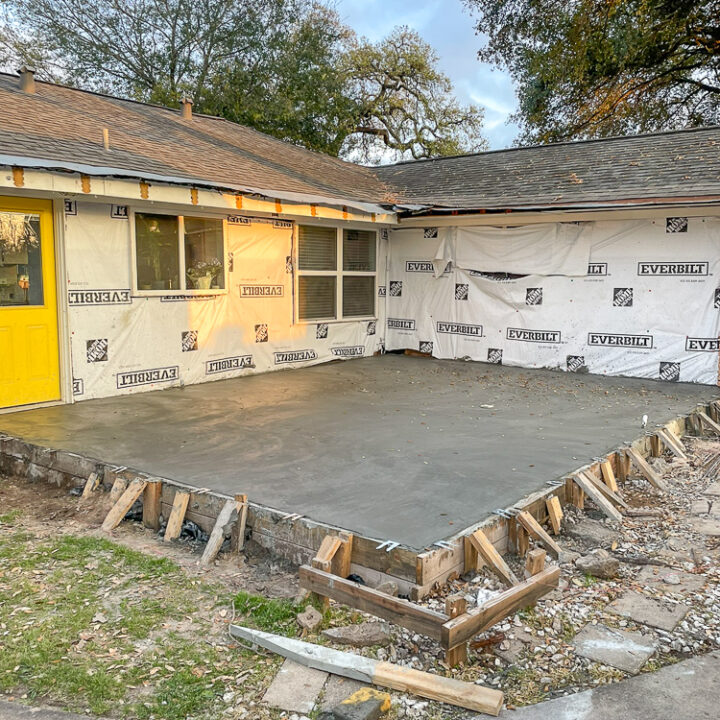
After the foundation was poured, the next step in our home addition was the framing! Here’s the process of framing to have a new room added to your home.
A few weeks into our home addition, things were finally starting to shape up. The walls were quite literally taking form! I was shocked at how quickly this step in our home addition project took. The exterior walls for example, were built and put in place in ONE DAY! There’s a lot of waiting in the the process of adding onto your home but once things start moving – they REALLY start moving!

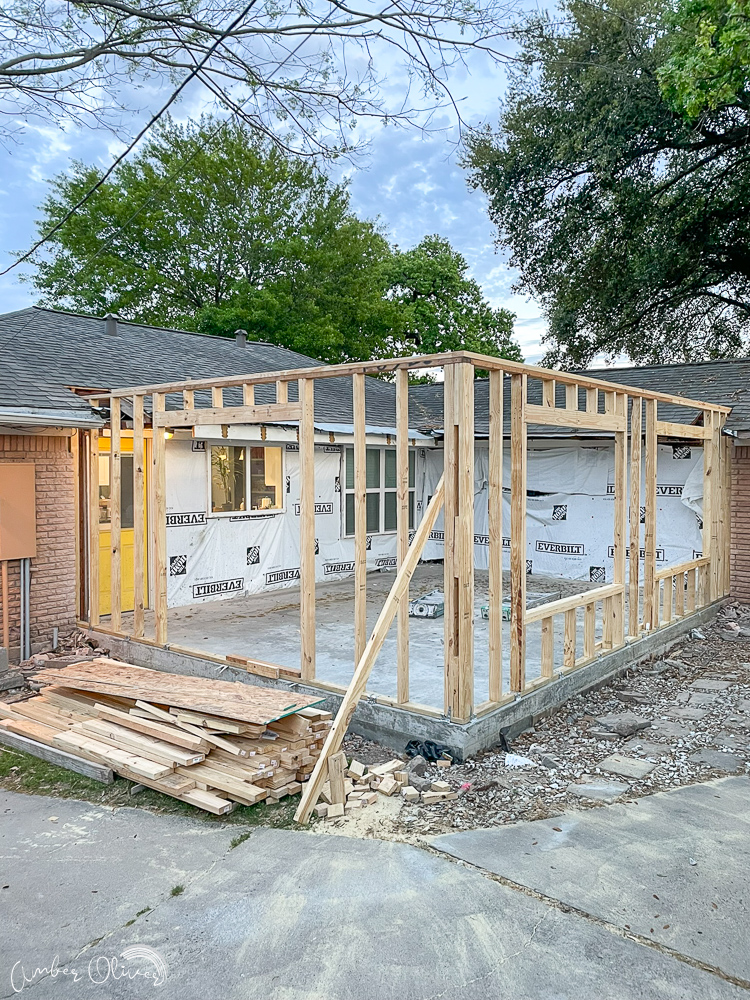
Because we were adding on to our existing home, the first step in the framing process was to cut into the existing walls. These exterior walls were about to become interior walls and one was about to be removed completely! They kept the door and windows in place for this part – not quite ready to open up yet. By removing parts of the soffits and cutting into the existing framing, the new walls were able to be easily tied in.

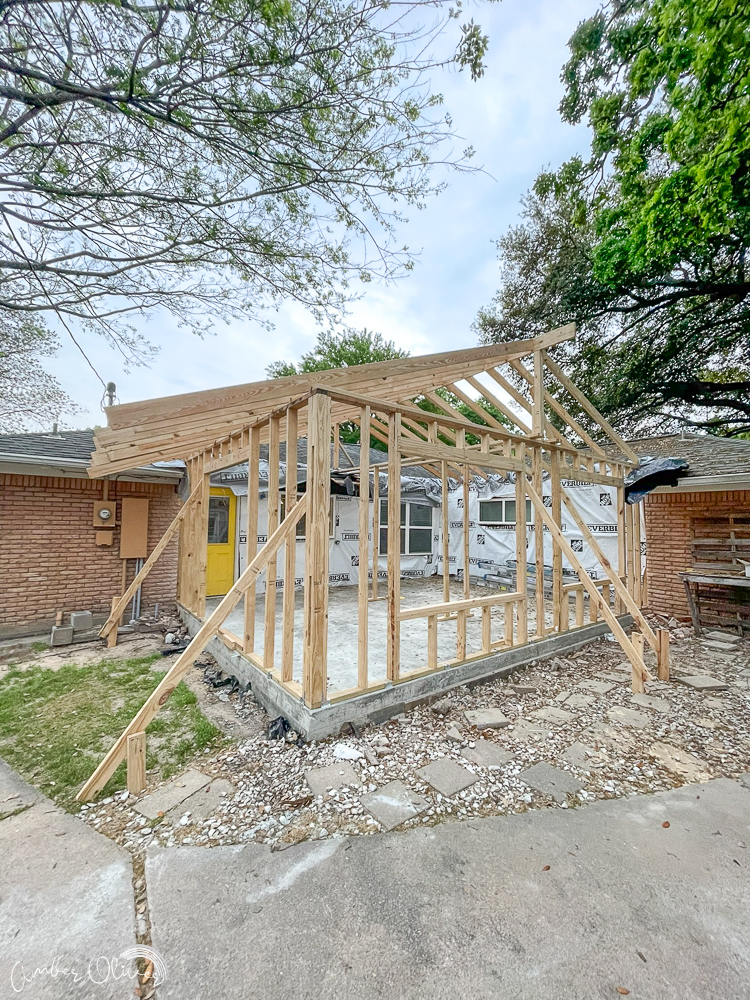
Facing the back of the house, the new wall on the left would now feature our back door. We opted to replace the existing back door with a sliding glass door. This would allow in a lot more light and with a screen I’ll be able to let fresh air in when the weather is nice. This is one thing I was most looking forward to! The new door way was framed with a header for the door to easily insert into place.
The new wall on the right would feature two large windows. Once was the existing window basically moved out and another window approximately the same size added next to it. I had a hard time finding the same window and finally figured out it was actually two windows put together. To put two windows together to create a larger window you use something called a mull or mulling kit. I learned so much in this process!
To frame a new wall, the measurements are taken for the overall size, then the wall is actually built first on the ground. This was something I never realized! I assumed it was built in place. But it’s actually assembled and then lifted as a whole piece and secured in place. I’ve done lots of DIYs and building projects but home construction was totally new to me. Here’s more of what I learned.
Parts of a Wall Frame:
- Top Plate: The horizontal board at the top of the wall that supports the ceiling and roof.
- Bottom Plate (or Sole Plate): The horizontal board at the bottom of the wall that anchors the wall to the floor.
- Studs: The vertical boards that form the main structure of the wall, usually spaced 16 or 24 inches apart.
- King Studs: The full-length studs on either side of a door or window opening.
- Jack Studs (or Trimmer Studs): The shorter studs that support the header over a door or window opening.
- Header: The horizontal board that spans the top of a door or window opening, supported by jack studs.
- Cripple Studs: The short studs above or below windows and doors that fill in the gaps and provide support.
- Bracing: Diagonal boards or metal braces that provide additional stability to the wall frame.
- Sheathing: Panels (usually plywood or OSB) attached to the outside of the studs to provide rigidity and a base for exterior finishes.
These components work together to create a strong, stable wall frame for your home addition.

Simple Guide to Wall Framing for a Home Addition
Plan and Measure:
- Measure the area where the wall will be.
- Mark the top and bottom plate locations on the floor and ceiling.
Cut the Lumber:
- Cut the top and bottom plates (horizontal boards) to the length of the wall.
- Cut studs (vertical boards) to the height of the wall minus the thickness of the plates.
Layout the Frame:
- Lay out the top and bottom plates side by side.
- Mark stud positions on the plates, typically 16 inches apart.
Assemble the Frame:
- Nail or screw the studs to the top and bottom plates at the marked positions.
- Ensure corners are square.
Raise the Wall:
- Lift the framed wall into position.
- Use a level to ensure it’s plumb (vertically straight).
Secure the Wall:
- Nail or screw the bottom plate to the floor and the top plate to the ceiling joists.
- Add additional bracing if needed for stability.
Finish Up:
- Install headers over door and window openings.
- Double-check measurements and adjustments.
Considerations When Wall Framing
Framing is the perfect time to consider the needs in your home and add extra features while the walls are open. This may include adding a horizontal 2×4 in the bathroom for a secure place to attach toilet paper or towel holders. We opted to include a cable channel in the wall where our TV would go! Now we’ll have hidden cords!

We also ran the new ducts for the air conditioning at this step in the process. As with any project – other expenses popped up. Turns out when need to have all our ducts replaced. This also increased our cost!

Problems with Our Home Addition
We had a major problem right here in the process. We got heavy rain right after the walls were framed. The 2×4 across the bottom of the door hadn’t been removed so the entire “room” essentially filled up with water. The existing exterior wall and door were still in place but all that water was pushed under our backdoor and flooded the kitchen.
We responded immediately and thought we’d got it dried up. Unfortunately we didn’t realize the water had gone under the floors all the way into the old living room and ended up being a very expensive mistake. We had to have all the existing floor sanded down to remove the warping and refinished along with the new floor. This more than doubled the cost we’d projected for flooring.

Changing the Design
We left for vacation right after the new exterior walls were placed. So the next part of the process we only got to see on our Ring Camera and when our contractor sent us photos. They framed the new roof and attached into the existing roof. This part of the project changed and I’m SO glad it did! We opted to go with a vaulted ceiling instead of standard 8 foot ceilings and it looks AMAZING! Here’s the plans:


Framing and Installing Velux Skylights

After the framing was complete, the doors and windows were installed. During the framing, the space for our new skylights was also put in! We are so excited to partner with Velux to try their Fresh Air Skylights! I can’t wait to show you how beautiful these look installed!

I went with these beautiful skylights because they can open and close to let in fresh air! We added remote controlled blinds to keep out the hot summer sun, but for most of the year we can let in all that gorgeous sunlight! I can’t wait for those cool spring mornings when we can open them up! They also include screens to ensure no little critters get inside. They are solar powered so no additional electrical install needed! Just frame and install! Look at the difference in light in the room:


Finishing the Framing
The final step in framing our new addition was the installation of sheathing. This closed in the new room and enabled the crew to finally remove the previous exterior wall! This entailed installing a special beam since this was 100% a load bearing wall!

Our architect outlined all the exact specifications for this and the plans were stamped by a professional engineer. After that, the City of Houston sent an inspector to ensure everything was done properly. This helped us feel confident and safe with our new addition!

I know there are lots of complaints about the permitting process, but I for one am glad we have the extra security. Ensuring our home is safe is top priority!

Seeing the new space, even though it was unfinished and had support boards in place during this part of construction, was SO exciting! We couldn’t believe it was the same area! This was a patio!? The process continues with our next post being all about the finishing out of the new family room. Lots of dust and paint coming soon!
Our Home Addition
We are building a living room add on and remodeling the kitchen at the same time.
Introduction
It’s finally time to share the details of our our home addition!
Foundation
We had a brand new foundation poured for our living room home addition!
Interior and Exterior Finishes
After our living room home addition was framed, it was time to begin the interior and exterior finishes. Next up was the installation of insulation and drywall, painting the walls, then installing hardwood flooring and baseboards!


Leave a Reply