Last updated March 12th, 2024 at 10:21 pm
Learn how to build a horizontal queen murphy bed using a DIY murphy bed kit with hardware and plans!
The next big project in our home was making over guest room and turning it into a home office that *occasionally* has guests. We realized that having a bed take up 80% of the room 80% of the time wasn’t ideal. We wanted to keep a bed available because we do have guests occasionally. But both of us work at home now and my husband needed a dedicated work space. Enter the MVP of space saving furniture: the murphy bed!
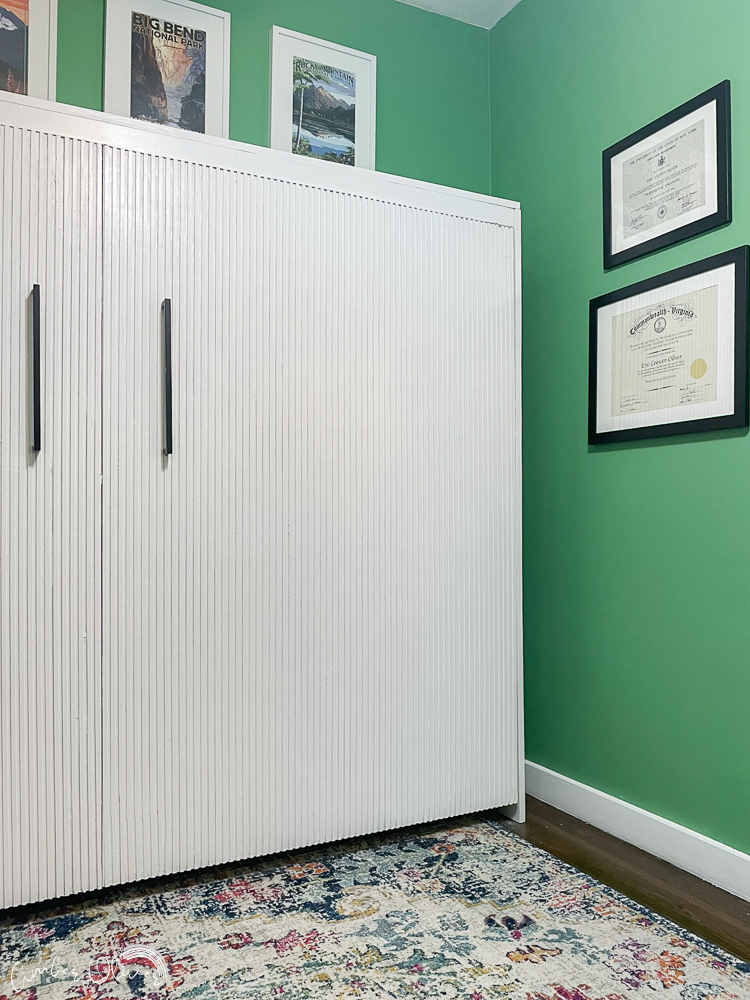
What is a murphy bed?
A murphy bed is a bed that is stored against the wall and can be pulled down to use. Murphy beds are also known as “wall beds” or “pull down beds”. These are amazing space saving option for anyone living in a small house or apartment. With so many people working from home now, I can see murphy beds becoming very popular!
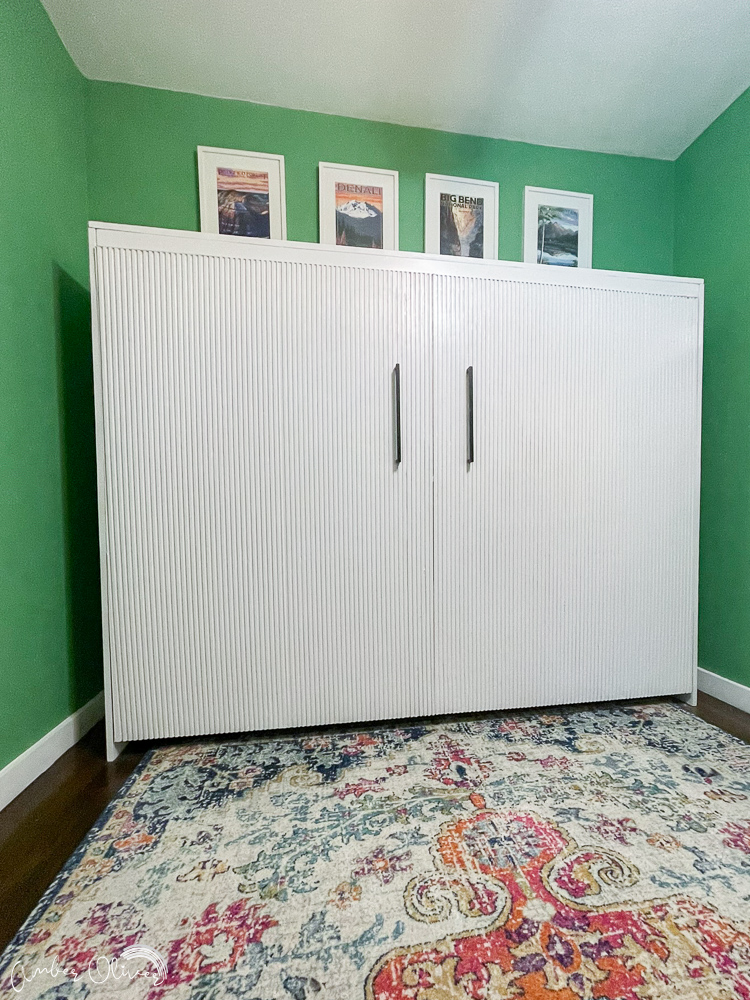
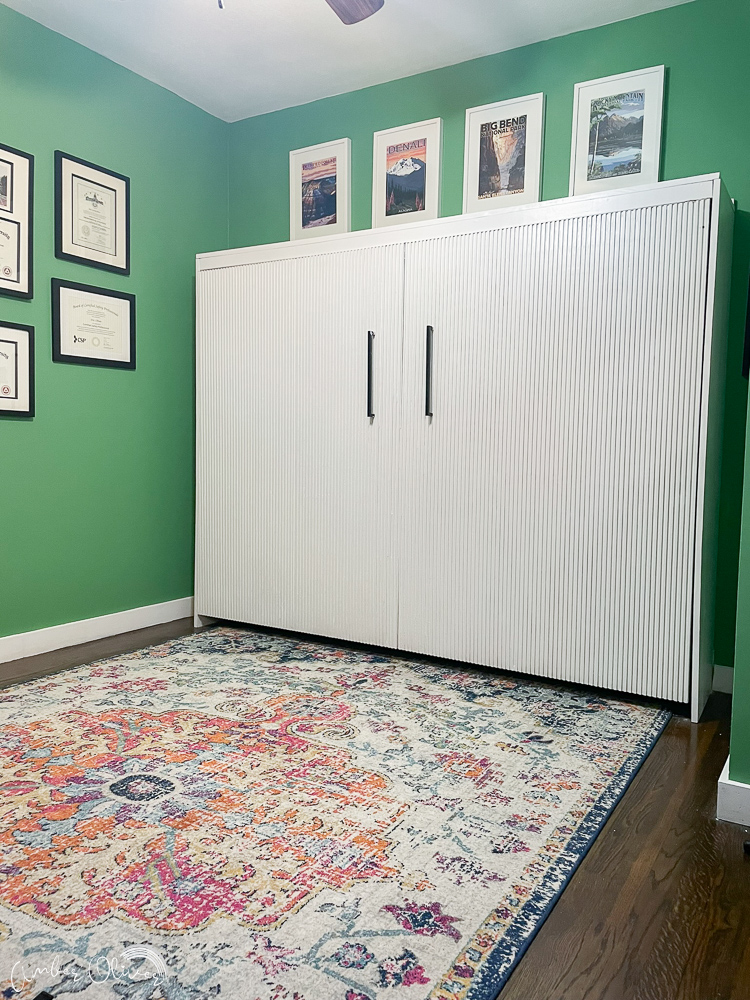
A modern murphy bed
We looked first at purchasing one, but saw the costs were way too high. Plus, it took is nearly 8 months to get our couch delivered so we decided to just BUILD one! There are a lot of safety considerations when it comes to building and installing a murphy bed. The safest DIY murphy bed option was to use a murphy bed hardware kit that included basic building instructions.
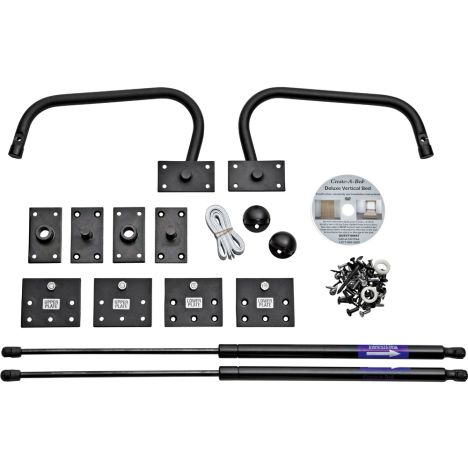
There was no need to reinvent the wheel so to speak as we knew Rockler offered quality products we could build with confidence. We used the Queen-sized horizontal murphy bed hardware kit to build our own custom, modern murphy bed! That kit includes the hydraulic lift mechanisms so you can open and close easily and safely!
Getting Started – Gathering the Right Tools and Supplies
Thank you to Rockler Hardware for providing the Queen Horizontal Murphy Bed Hardware Kit for this project!
The first step in embarking on your DIY Murphy bed project is ensuring you have all the essential tools and supplies. Here’s a quick checklist:
- Circular saw or Table Saw
- Stud finder
- Tape measure
- Drill and bits
- Wood glue
- Screws
- Murphy bed hardware kit (including gas springs)
- Sheets of plywood
- Veneer tape
- Elastic bands
Building a Horizontal Queen Murphy Bed might seem like an ambitious endeavor, but with the right tools, a bit of patience, and a sprinkle of DIY enthusiasm, it’s a feat that’s well within your reach. By following the step-by-step instructions in your DIY Murphy bed plans and utilizing a reliable Murphy bed hardware kit, you’re well on your way to creating a stunning and functional piece of furniture that seamlessly blends into your home.

Rockler Products Used for our DIY Horizontal Murphy Bed
Murphy Bed Hardware Kit

Building a Murphy Bed (The Construction Part)
Planning and Preparation
Before diving into the construction, it’s crucial to familiarize yourself with the detailed instructions provided in the Murphy Bed Hardware Kit. These guidelines will give you a clear understanding of the process, helping you anticipate each step and ensure a smooth journey. Additionally, study your workspace and make sure you have ample room to maneuver as you craft this innovative piece of furniture!

Crafting the Inner Wood Bed Frame
The inner wood bed frame serves as the foundation for your Murphy bed, and creating it accurately is essential for a sturdy result. Begin by cutting the pieces of plywood according to your cut list. We were able to get our large cuts done at Home Depot when we purchased the plywood. Plan ahead and have the cuts organized and you can do the same!

Once you’ve got your pieces ready, use wood glue and screws to assemble the inner wood bed frame. The provided instructions will tell you exactly which length screw etc. to use. We were able to build this section of the murphy bed inside. Work on a rug or blanket so you don’t scratch wood floors!
Assembling the Bed Frame: Side Rails, Food Rail, Head Rail
With the inner wood bed frame is complete, it’s time to move on to the bed frame itself. Assemble the frame side rails, foot rail, and head rail using your Murphy bed hardware kit. Make sure to create pilot holes to prevent the wood from splitting. This step is where the magic begins to take shape – you’ll start to see the fold-down bed concept come to life.

This is the part of the bed that will hold your mattress. It’s also the part that will pull down from the wall. This is over half the project right here! The instructions in the kit include templates you use to trace on and cut out pieces as well as for alignment. The instructions really did make it simple!
Adding Hardware
The hardware plays a pivotal role in the functionality of your Murphy bed. Follow the included instructions and use the templates to ensure accurate placement. Always measure twice and cut once! After adding the leg hardware, you’ll remove it for now. Kinda weird, but just go with it and follow the instructions!

The Queen Murphy Bed Cabinet Face Panels
Now you get to add the face panels! You’ll want to work on a clean surface to ensure you don’t scratch up or mark up the front of your bed.

I thought the plywood fronts looked a bit too plain so I originally planned to add trim detail to the front. I quickly realized that would be very $$$$$ expensive! Inspired by Love, Create, Celebrate’s DIY Modern Barn Doors, I cut lines into the plywood instead.

Adding Detail to the Murphy Bed Face Panels
To add this detail, we used the Rockler indexing dado jig. You can use a router and track saw like our friends Lindi and Russel did for their doors, or try one of these! You start aligned on the edge of your project and run the router to create the first line.

Next, you simply put your router in the groove you just cut and run it along there to create the next line. Then pickup the router with the jig and keep moving along! It was pretty time consuming; it took a few days of working for an hour or two at a time! Probably 6 hours total just for this detail – but to me it was totally worth it!


Before you start cutting on your murphy bed itself, try this on scrap wood! You’ll want to set the distance and depth before you begin, so you’ll want to test and see how they look first.

I thought the design looked much better on the MDF but it was way to heavy for this project. You will want to use wood filler and give a good sanding to the plywood after you cut the lines on your murphy bed cabinet before painting or staining.
Murphy Bed Cabinet Verticals and Bed Header
Constructing the cabinet where your Murphy bed project is stored is when it really starts resembling its final form. Use your circular saw and other tools to cut pieces of wood according to the instructions.
There’s more hardware to add at this step. Another place you want to be extra careful and ensure your measurements are precise. This will ensure your murphy bed opens and closes accurately! Assemble the cabinet frame with the sides and back (called the headboard). Don’t forget the finishing touches – the wood veneer to finish the edges!
The last piece is the Bed Header that actually consists of several parts: the header board, front rail with front rail support, mounting cleats, and the rear rail. Grouping each part of the bed together helps you break down the total assembly into more manageable parts!
Finishing the Horizontal Murphy Bed
We used our Wagner paint sprayer to paint our murphy bed. The sprayer was able to get down in all the cracks and give a smooth, professional looking finish!

Shop for the Flexio 5000 Wagner Paint Sprayer
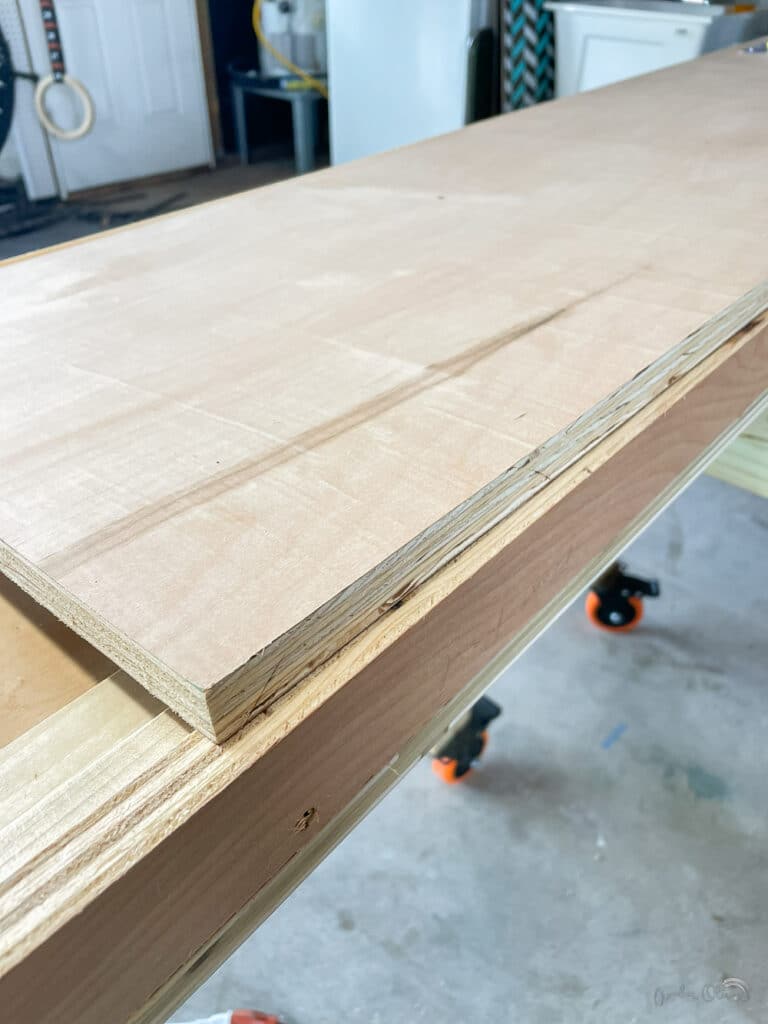
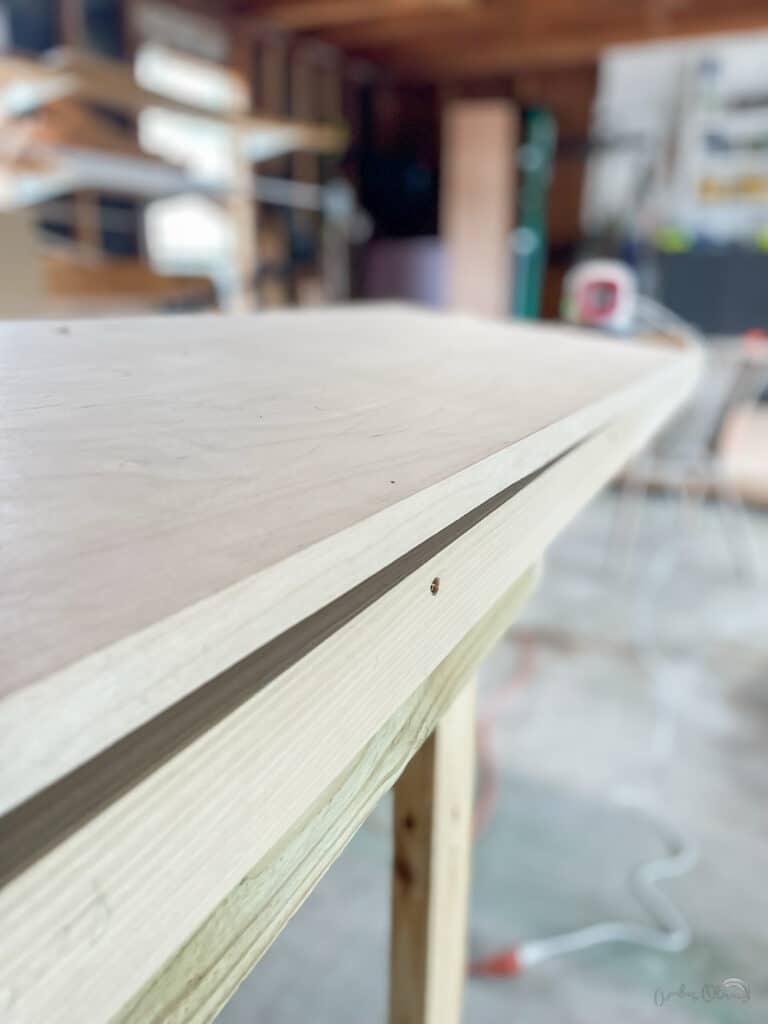
Note: You’ll also want to apply veneer tape to the exposed edges for a clean and polished appearance before you paint or stain!
Plywood is a composite material manufactured from thin layers, or “plies”, of wood veneer that are glued together. Edge banding is also known as edge tape or veneer tape, and is used to give your plywood woodworking project a finished look.
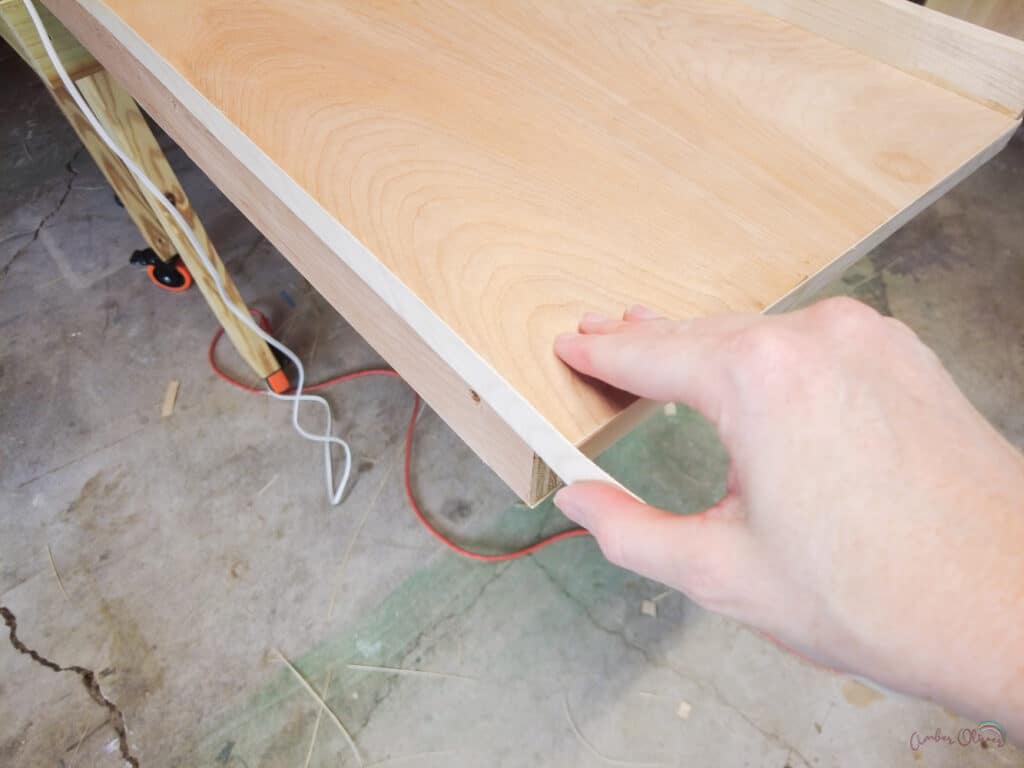
Applying Edge Banding
Learn how to apply plywood edge banding to give your plywood projects a finished look.
Applying plywood edge banding is easier than you might think, and by the end of this guide, you’ll be a edge banding pro:
Mounting the Murphy Bed Cabinet (The Installation Part!)
After you’ve painted or stained, it’s time to bring your masterpiece to the wall. Enlist a friend or family member to help you with this step, as it requires precision and teamwork. Secure the cabinet to the wall using the provided instructions and hardware. The satisfaction of seeing your DIY Murphy bed project finally in place is unmatched!

Completing Your Murphy Bed
As you near the finish line, it’s all about the final touches. Attach the mattress supports, ensuring they provide a stable foundation for your queen-sized bed. Add the mattress frame and foot of the bed, and watch as your creation transforms into a comfortable sleep haven.
You will most likely have to make a few cuts on the bed and on your baseboards in order to get the DIY murphy bed flush to the wall. We used an oscillating multi tool to cut these out before attaching the bed to the wall.


Congratulations! You’ve successfully built your own Horizontal Queen Murphy Bed. Whether you use it to accommodate overnight guests in your spare room or create a flexible space in your home office, your extra bed is a testament to your hard work, creativity, and dedication. Now is the time to relax, enjoy, and bask in the glory of your home improvement triumph.


Leave a Reply