Learn how to use the Kreg shelf pin jig to quickly and easily add a shelf that is both sturdy and adjustable!
Are you ready to tackle your next shelving project with ease? Look no further than the Kreg Shelf Pin Jig to add a shelf! This handy tool is the perfect solution for creating custom, adjustable shelving that is both sturdy and stylish. Whether you’re a DIY enthusiast, woodworker, or just looking to add some storage space to your home, the this jig will help you get the job done quickly and efficiently.
In this blog post, we’ll walk you through the process of using the Kreg Shelf Pin Jig and show you just how simple and straightforward it is to use. From start to finish, you’ll be amazed at how easy it is to create custom shelving that will fit any space.

What is the Kreg Shelf Pin Jig?
First, let’s talk about what the Kreg Shelf Pin Jig is and what it does. It’s is a tool that helps you drill precise holes for shelf pins, so that you can create adjustable shelving in your cabinets, bookcases, and other furniture. It’s designed to be easy to use, even for those with limited woodworking experience. The jig consists of a guide block and a drill bit, which work together to ensure that your holes are perfectly spaced and aligned, every time.
How to Use the Kreg Shelf Pin Jig
Now, let’s get started! Attach the guide block to your drill and make sure that the drill bit is securely in place. Place the jig on the wall where you want to drill the first hole and pin it in place, using the built-in clamps. Then, use the drill to make a hole in the shelf, following the marks on the guide block. Repeat this process until you have drilled all of the holes that you need.
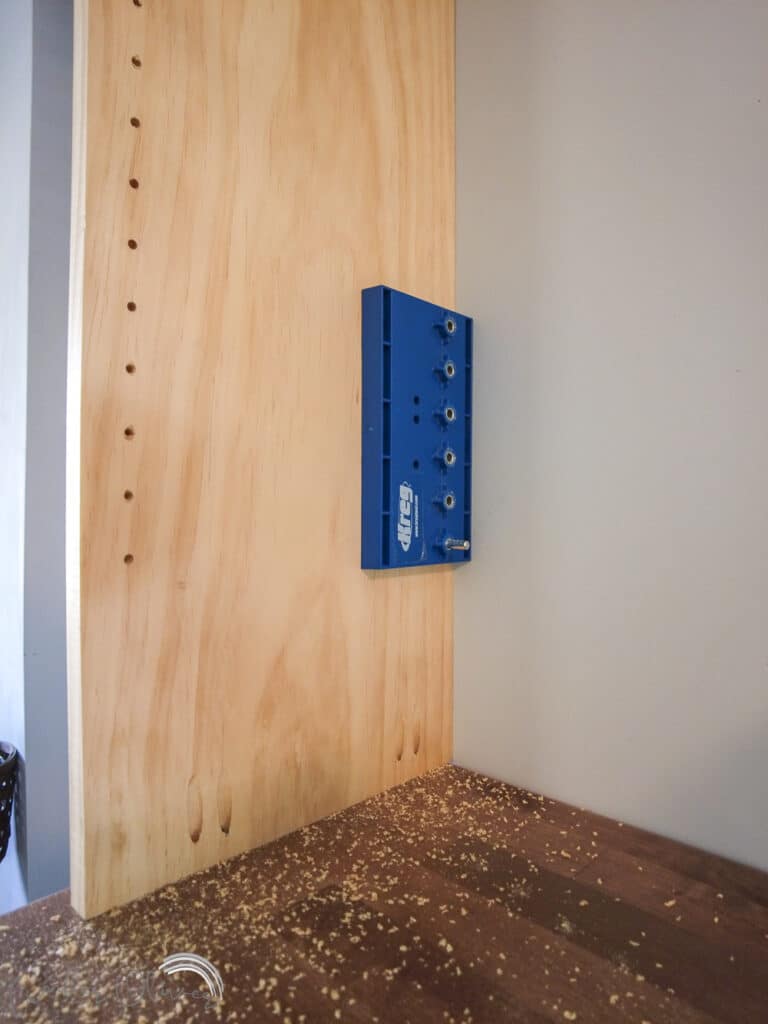
To do the back side, simply flip the jig over and continue drilling matching holes. You remove the clamp piece that helps you hold in place on the front of the shelves so you can put the jig flush to the wall. You’ll end up with lined-up holes near each of the 4 corners.
Once you’ve drilled all of your holes, it’s time to install your shelf pins. This is the fun part! Simply insert the pins into the holes that you’ve drilled and place your shelves on top of them. Voila! You now have a custom, adjustable shelf that you can rearrange whenever you need to.
It’s important to note that the Kreg Shelf Pin Jig is not limited to just drilling holes for shelf pins. You can also use it to drill pilot holes for other projects, such as attaching brackets to shelves, or for drilling holes for dowels. The jig’s versatility and accuracy make it a must-have tool for any DIY enthusiast or woodworker.

Tips for using the Kreg Shelf Pin Jig
Let’s talk about some tips for using the Kreg Shelf Pin Jig for the best results.
- Measure twice, drill once. Before you start drilling, make sure to measure the distance between the shelves in your cabinet or bookcase and mark this distance on the guide block of the Jig. This will help you keep your holes perfectly spaced and aligned. Double-check your measurements to avoid any mistakes.
- Use a clamp. To ensure that your Jig stays in place while you drill, use a clamp to secure it to the shelf. This will prevent the jig from slipping, which can lead to uneven holes.
- Practice makes perfect. If you’re new to using the Jig, you may want to practice on a scrap piece of wood before diving into your project. This will give you a chance to get the feel for using the jig and will help you avoid any mistakes that could impact the final result.
- Use the right drill bit. The Jig comes with a drill bit that is specifically designed for drilling holes for shelf pins. Make sure to use this bit for the best results. If you use a different drill bit, the holes may be too big or too small, and your shelves may not fit properly.
- Get creative. The Kreg Shelf Pin Jig is not limited to just drilling holes for shelf pins. You can use it to drill pilot holes for other projects, such as attaching brackets to shelves or drilling holes for dowels. The possibilities are endless, so get creative and see what you can come up with!
- Take your time. Drilling holes for shelf pins is a fairly simple process, but it’s important to take your time and be patient. Rushing through the process can lead to mistakes, so take your time and enjoy the process.
- Have fun! Creating custom shelving is a fun and rewarding project that can be tackled by anyone. Don’t be afraid to get creative and have fun with it!
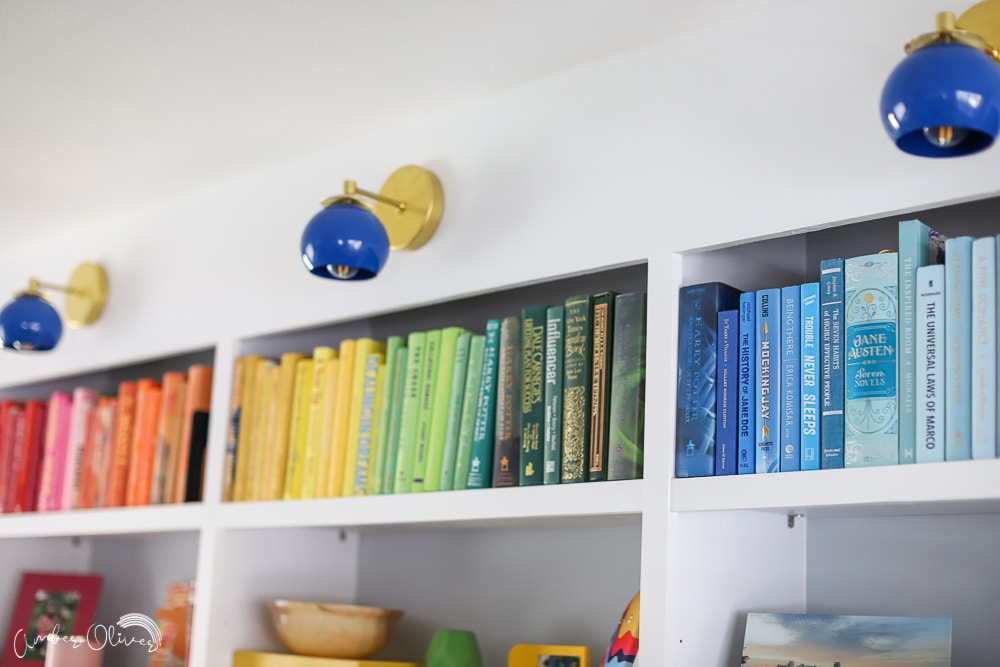
See 17 beautiful bookshelves ideas to DIY for inspiration!
In addition to these tips, it’s also important to keep safety in mind when using the Kreg Shelf Pin Jig. Make sure to wear eye protection and follow all safety precautions when using a drill. If you’re not comfortable using power tools, it may be best to seek assistance from a friend or professional.
How to Use the Kreg Shelf Pin Jig
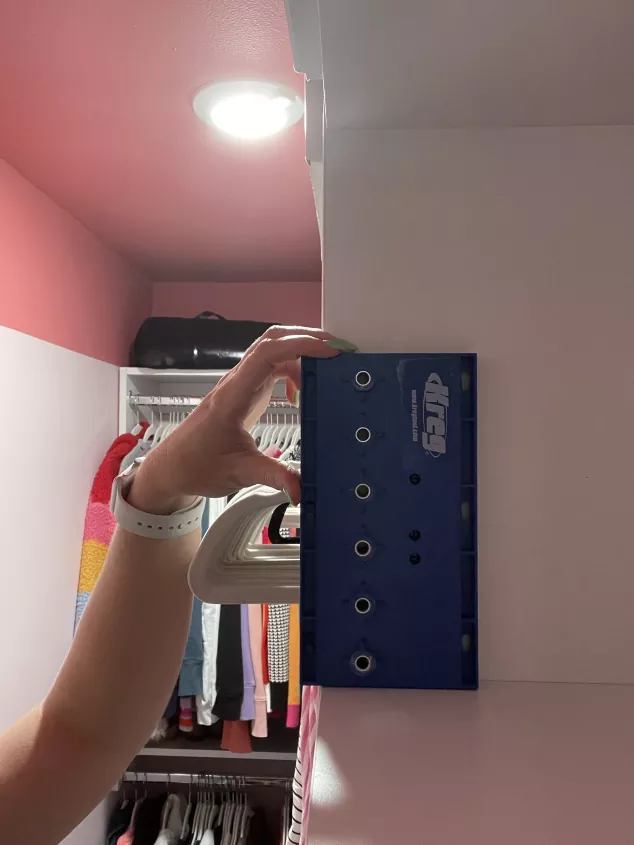
Here is a step-by-step guide on how to use the Kreg Shelf Pin Jig. Use this tool to add a shelf quickly and easily!
Instructions
- Gather your materials. You will need the Kreg Shelf Pin Jig, a drill, drill bit, drill stop collar, shelf pins, a clamp, and your shelves.
- Ensure your shelves will be level by making sure your starting point is level.
- Secure the Kreg Shelf Pin Jig to your shelf. Make sure the jig is level and straight.
- Attach the drill stop collar to the drill bit. The drill stop collar helps to control the depth of the holes you drill, so make sure it is securely attached to the drill bit.
- Set the drill depth. The drill stop collar should be set to the same depth as the length of the shelf pins you will be using. This will ensure that the holes you drill are the right depth for the pins to fit snugly.
- Drill the holes. Align the tip of the drill bit with the first hole on the guide block and gently press the trigger to start drilling. Keep the drill level and straight as you drill, and be careful not to push too hard, which can cause the drill to slip or bend the shelf pins. Repeat this process for each hole, spacing the holes the same distance apart.
- Move the jig up to the top hole you drilled and line up to continue the holes up the wall.
- Flip the jig over and do matching holes on the back side of the space.
- Then add holes to the other side.
- Insert the shelf pins. Once you have drilled all of the holes, gently tap the shelf pins into the holes until they are flush with the surface of the shelf. Repeat this process for each shelf.
- Install the shelves. Place the shelves into the cabinet or bookcase and make sure they are level and straight. Use the adjustable shelf pins to secure the shelves in place and ensure they are level.
In conclusion, the Kreg Shelf Pin Jig is a versatile and user-friendly tool that can help you create custom, adjustable shelving with ease. Whether you’re a seasoned woodworker or just looking to add some storage space to your home, the Kreg Shelf Pin Jig is a must-have tool for your toolkit. So why wait? Get your Kreg Shelf Pin Jig today and start creating your dream shelving projects!
Using the Kreg Shelf Pin Jig is a simple and straightforward process that can help you create custom, adjustable shelving in no time. Get yours today and start creating your dream shelving projects!



Leave a Reply