Last updated April 12th, 2024 at 03:26 pm
Welcome back to Week 2 of the One Room Challenge! I’m Amber and I like to share my DIY projects here. Over the next 5 weeks, I will share progress on my home office/craft room makeover as part of the One Room Challenge from Calling It Home. Last week I shared the Week 1: Introduction post. This week, I’m sharing the first project – a DIY peg board!
 DIY Peg Board
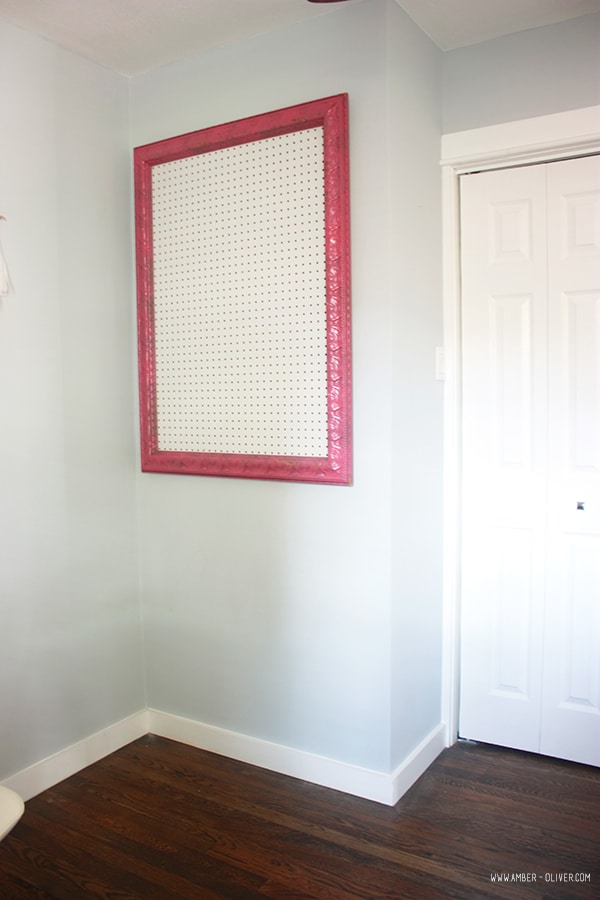
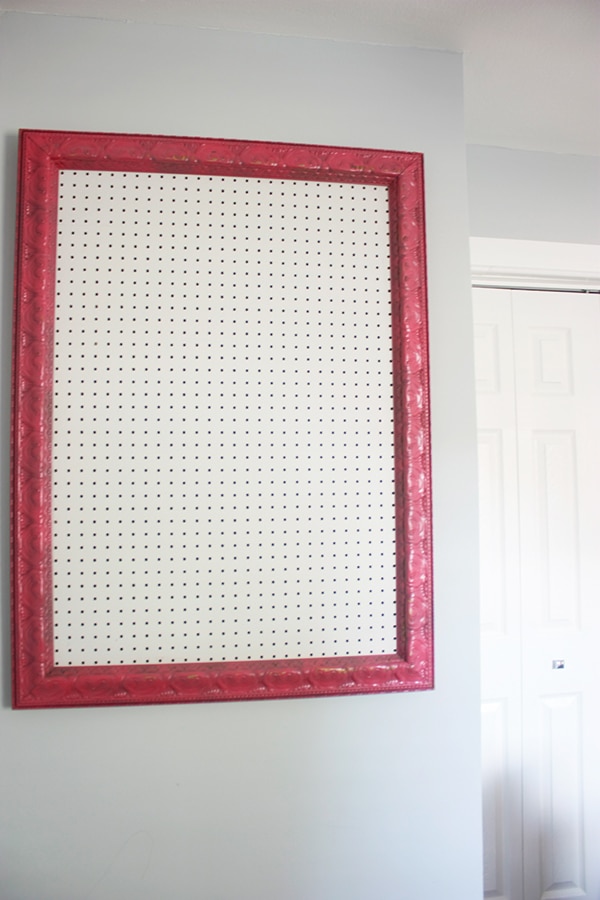
For this project, I started with a huge picture frame I got a few years ago. In our apartment, I used this as a jewelry hanger in my closet. (Instead of pegboard, I’d used fabric covered poster board.) For my office/craft room, I decided I wanted a peg board. This would serve as a sort of “command station” for all my craft supplies.
DIY Peg Board
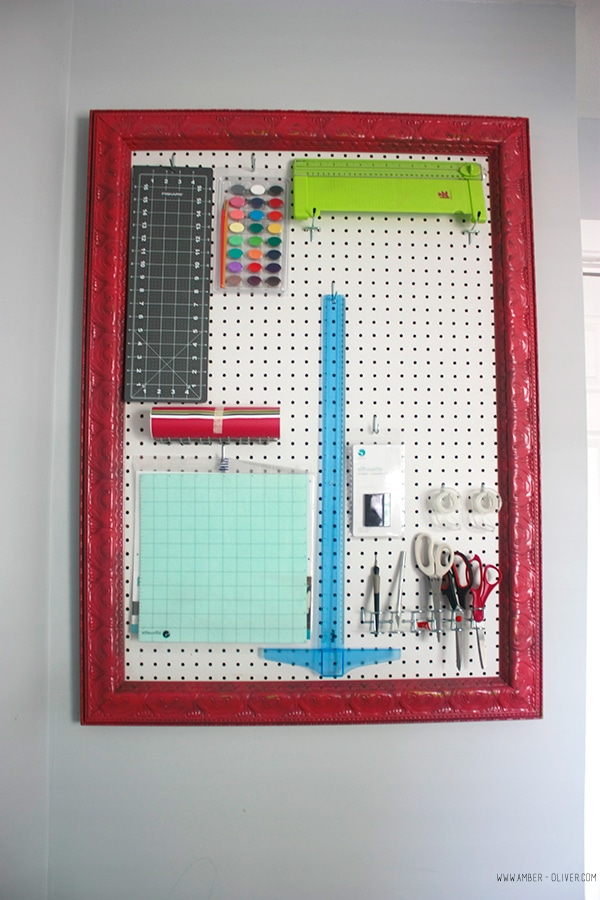
For my office/craft room, I decided I wanted a peg board. I wanted a sort of "command station" for my craft supplies. Here's a tutorial for a DIY peg board.
Materials
- Sheet of peg board
- Large picture frame (check thrift stores!)
- Wood glue
- Small wood pieces (I used 2 from our scrap pile)
- Peg Hooks
Tools
Instructions
- Paint your frame if needed. My frame was originally gold, and I wish now I’d left it alone! I spray painted it pink a few years ago, and I’m not 100% sure I will keep it pink but it works for now!
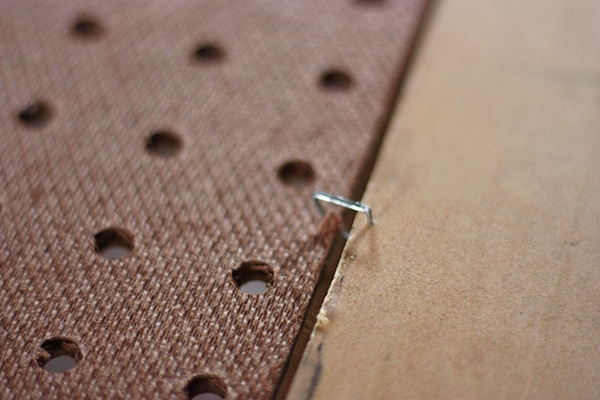
- Since it will need time to dry, you want to glue the small wood pieces on the back of the frame as soon as you can. Glue them with the wood glue, clamp them, then let dry. The wood pieces will keep your frame from sitting flush with the wall and will allow you to insert hangers into the peg board.

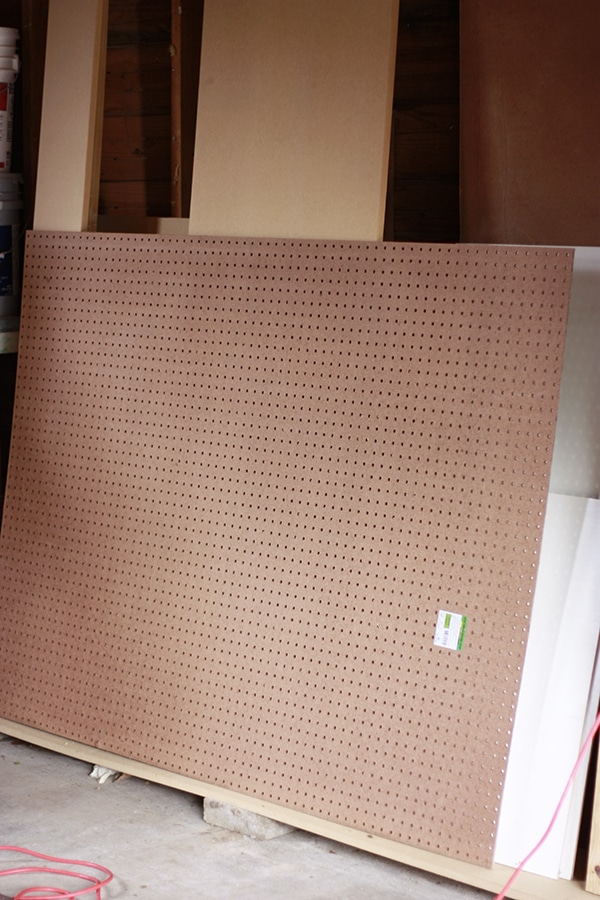
- Measure the opening in the frame, and cut the peg board with the circular saw. Be sure you wear your safety goggles and ear plugs.
- After you’ve cut the peg board, it should fit perfectly into the frame. I attached mine with a staple gun.
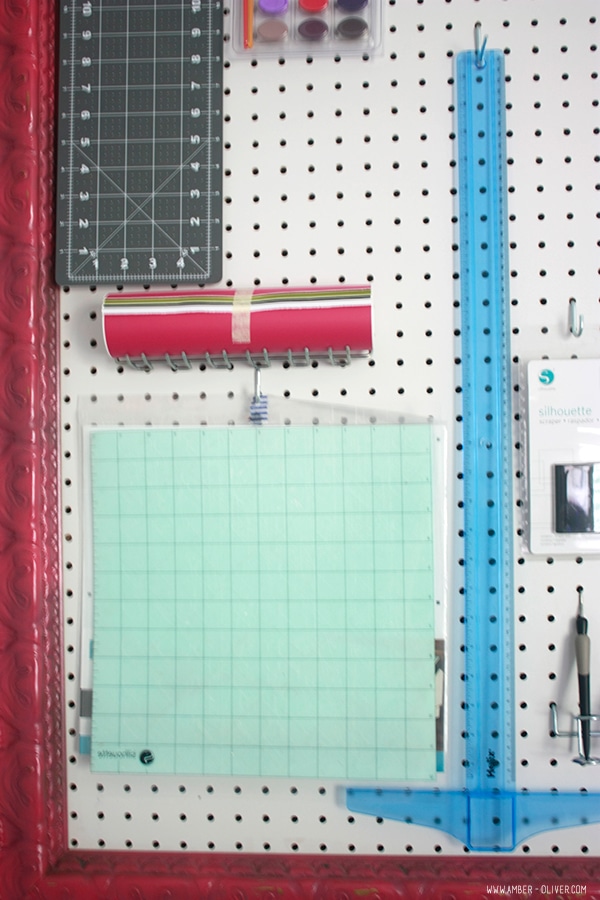
- After you’ve attached the wood pieces, cut the peg board, and inserted/stapled the peg board to the frame you are ready to hang! We’ve had this peg board in the garage for a while (we are also organizing the garage) and I didn’t realize one side was white. I’d planned to paint it and didn’t need to! You could customize this for any room and paint any color you want.
- Now comes the fun part: adding the peg hooks and hanging up your tools!


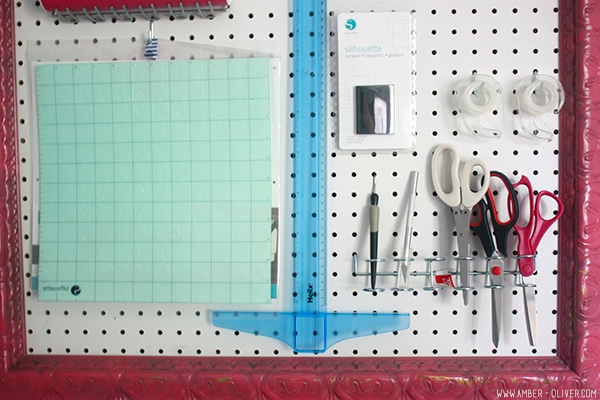
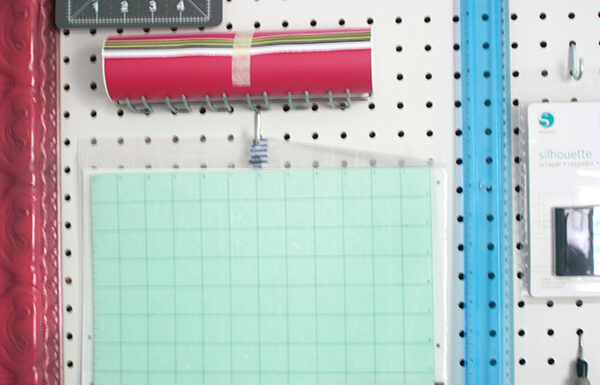
I intend to have a cart under the peg board with my Silhouette machine and was so glad to have a place for all my Silhouette accessories.
The One Room Challenge

Week 1: Introduction
Week 2: DIY Peg board
Week 3: Floor covering and Window Treatment (On hold due to personal issues)
Week 4: Organization
Week 5: Gallery Wall (DIY Acrylic Calendar)
Week 6: The big reveal!
I hope you’ll follow along here, as well as on Instagram and Facebook to see how progress on this room goes. Next week I plan on sharing a tutorial for doing a painted rug! I’m also hoping to have some colors finalized so I can find fabric for curtains. Stay tuned!

Follow me! INSTAGRAM | TWITTER | FACEBOOK | BLOGLOVIN
Michelle Heath says
I love that you framed your peg board, it looks so good. I can’t wait to see how you paint the rug next week!
Amber Oliver says
Thanks, Elle!
Laura Ingalls Gunn says
Amber I adore the direction that your room is headed towards! You did SO much better than I did in my room this week.
I would love for you to share this post at Thoughts of Home on Thursday. I think our readers would really enjoy it!
Good luck in the upcoming week!
Amber Oliver says
Thank you!
Kari @prairiegirlhome says
I love the DIY pegboard! My office/craft room is a complete disaster – I so need to do something similar to help with the mess!
Lizzie @ Living Pretty says
I have a pegboard planned for my ORC project too. Love how yours turned out!
Rachel @ TrailerTrashTreasureTrove says
Cute! Love that pegboard. That’s a pretty room to start with, and I’m looking forward to seeing what you do with it!
Rachel@TrailerTrashTreasureTrove