Can You Put Paper in Resin? The Answer is Yes! We’ll show you how to with this resin clipboard project!
If you are a fan of resin projects, you might have wondered if you can put paper in resin. The good news is, you can! Putting paper in resin is a great way to create unique and stunning art pieces that are sure to impress. In this blog post, we will guide you through the process of using paper in resin projects, the different types of paper that work best, and the best way to get the best results.
Porous Materials and Resin Projects
Before we dive into the details, let’s discuss why porous materials like paper work well with resin projects. Resin uses a chemical reaction that occurs when two substances are mixed together, typically a resin and a hardener. When the mixture is poured onto a flat surface, it begins to harden, creating a smooth and durable surface. However, when poured onto porous materials like paper, the resin seeps into the fibers, and can cause the paper to become saturated and warp. Additionally, the resin may cause the paper to become transparent, which can be desirable for certain art or craft projects It is important to choose the right paper and prepare it properly before pouring resin to achieve the desired results.
Types of Paper for Resin Projects
The type of paper you use in your resin projects is important. Thin paper like tissue paper or sticker paper is likely to rip or tear when wet with resin. Thicker paper like business cards or cardstock can hold up better but may create air bubbles. For the best results, use a high-quality photo paper or a paper with a weight of at least 80 pounds. This type of paper is thick enough to hold up to the resin, but not too thick to create air bubbles.

Sealing Paper for Resin
Sealing paper is an important step in preparing it for use in resin projects. Here are some tips on how to seal paper:
- Use Mod Podge: Mod Podge is a popular sealer and glue that is often used in decoupage projects. Apply a thin layer of Mod Podge to both sides of the paper and let it dry completely before using it in your resin project.
- Use a spray sealer: A spray sealer is a quick and easy way to seal paper. Simply spray the sealer onto the paper and let it dry completely. This will create a protective layer between the paper and the resin.
- Use decoupage glue: Decoupage glue is a type of adhesive that can also be used as a sealer. Apply a thin layer of decoupage glue to both sides of the paper and let it dry completely before using it in your resin project.
- Use acrylic paint: Acrylic paint can also be used as a sealer for paper. Apply a thin layer of acrylic paint to both sides of the paper and let it dry completely before using it in your resin project.
Remember, the key to sealing paper is to create a barrier between the paper and the resin. This will prevent any ink or carbon residue from bleeding into the resin and ruining your project. Experiment with different sealing methods to find the one that works best for your paper and project.

Preparing Paper for Resin Pour
To begin, start by preparing your paper for the resin pour. Place your paper flat on a work surface and seal it with a sealer to prevent the paper from absorbing the resin. This will also help to reduce the number of air bubbles that can form when the resin is poured.
Next, place your paper on a flat surface and cover it with a thin layer of resin using a popsicle stick or silicone brush. Be careful not to apply too much resin at once as this can cause air bubbles to form. If air bubbles do appear, you can use a heat gun to remove them.
After the resin has completely dried, you can add a second layer of resin to your paper art. You can use another piece of paper, a collage sheet, photo, or design transfer sheets to add texture and depth to your art piece. Be sure to seal the paper with a thin layer of resin to ensure that it is protected and that no paper fibers are sticking out.
Using Different Types of Resin
The type of resin you use in your paper projects will affect the finished product. There are different qualities of resin, including UV resin and epoxy resin, each with its own set of pros and cons. Epoxy resin is known for its clear finish and long-lasting protection. UV resin, on the other hand, dries quickly and is great for small projects.
If you are working with a larger piece of paper, you may need to use a larger amount of resin. Be sure to use a measuring cup to accurately measure the resin and hardener before mixing. Once mixed, pour the resin onto the paper and use a plastic spreader to distribute it evenly. Be sure to work quickly as resin can set fast.
When working with UV resin, it is important to protect your skin from the UV light. Wear gloves and work in a well-ventilated area to prevent any fumes from getting into your lungs.
Best Tips for Using Paper in Resin
There are a few tips that can help you achieve the best results when using paper in resin projects.
- Use a protective coating: To ensure that your paper project is protected, apply a sealer spray or brush on a layer of decoupage glue or acrylic paint. This will create a barrier between the paper and the resin, preventing any ink or carbon residue from bleeding into the resin.
- Use a smooth surface: When pouring resin onto your paper, be sure to use a smooth surface to prevent any uneven patches or brush strokes. A cookie sheet or plastic wrap can work well as a work surface.
- Experiment with paper samples: Test different types of paper and paper samples before starting your project. This will help you determine the absorption peak of the paper and the amount of resin you need to use.
- Use isopropyl alcohol: To remove any excess resin or air bubbles, use a small amount of isopropyl alcohol. This will help to smooth out the resin surface and create a professional finish.
- Use a small piece of paper: If you are using paper for the first time, start with a small piece to get a feel for the process. Once you have mastered the technique, you can move on to larger sizes and more complex paper projects.
Resin Clipboard

Can You Put Paper in Resin? The Answer is Yes! We'll show you how to with this resin clipboard project!
Materials
- EnviroTex Lite® Pour On High Gloss Finish
- Ultra Seal Multi-Purpose Sealer
- Clipboard
- Scrapbook Paper
- Mixing Cups
- Brushes
- Stir Sticks
Tools
- Heat Gun
Instructions
- Prepare your work surface. You'll need to elevate the clipboard (you can use small mixing cups) and will want to put down a cardboard box or something to work in that's disposable or easy to clean.
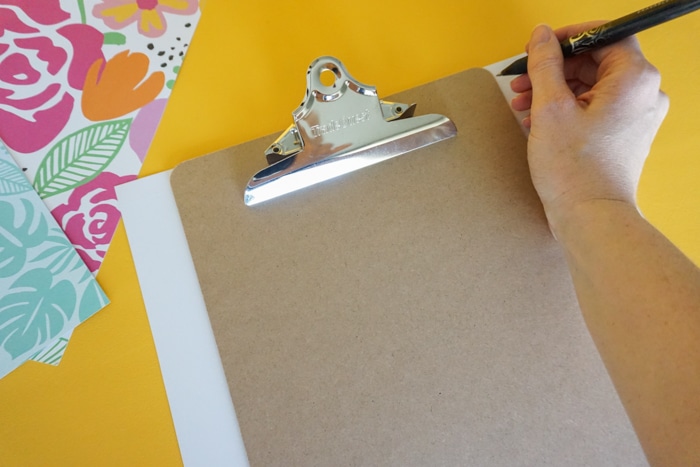
- Trace and cut out the paper you'd like to use or layout your design if you're using multiple sheets like photos etc.
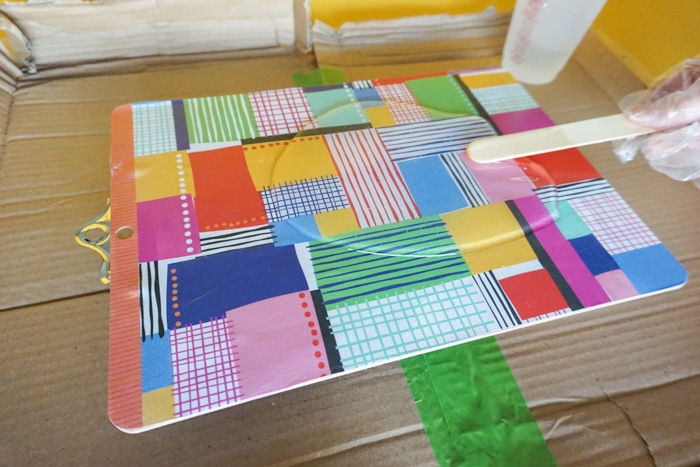
- Coat the back of the clipboard with a thin layer of Ultra Seal. Then apply your scrapbook paper, pressing out any bubbles that appear. Next, brush the ultra seal over the top then let dry completely.
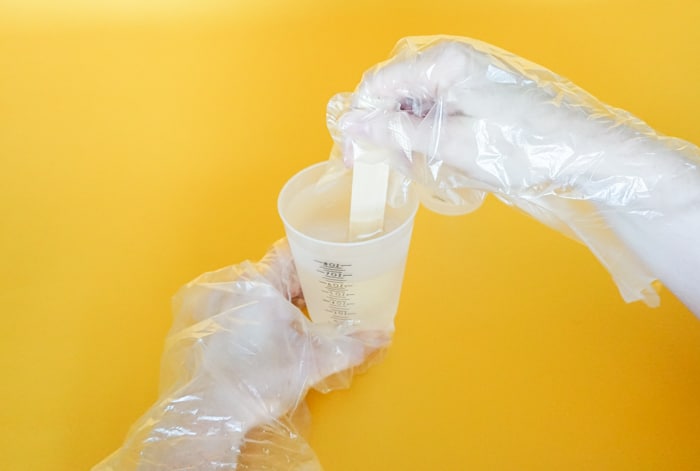
- Begin by preparing your resin. This is a multi-step process so don’t start mixing until you are ready to do the whole project from beginning to end! Start by mixing EQUAL parts of the Hardener and the Resin.
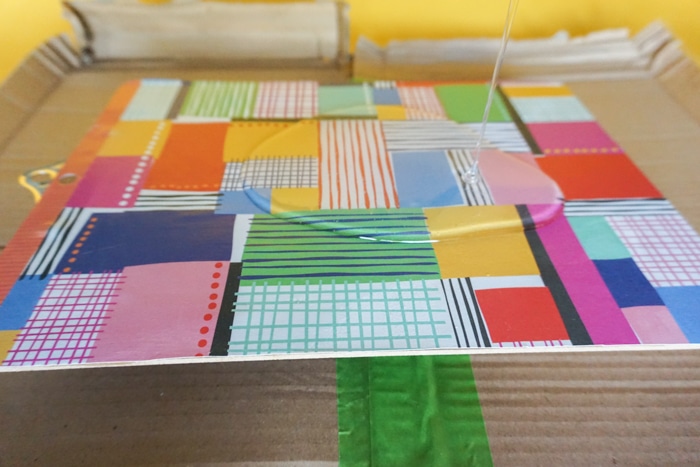
Start by mixing EQUAL parts of the Hardener and the Resin. Stir for two minutes (be sure to scrape the bottoms and sides) then pour from the first cup into a second and mix with a new stir stick for another minute. - Once it’s ready, pour it directly onto your clipboard back!
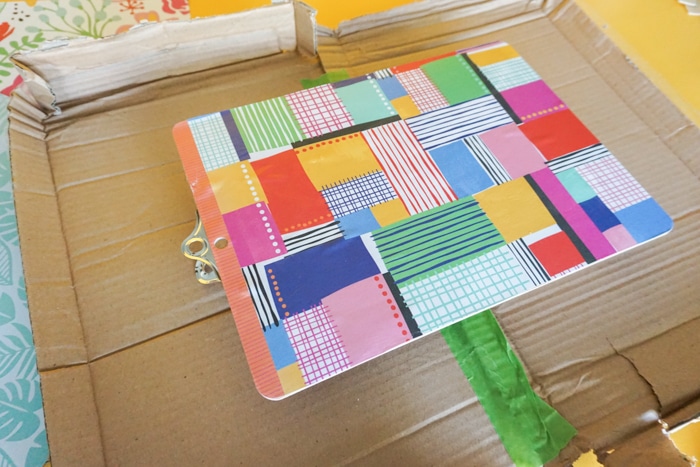
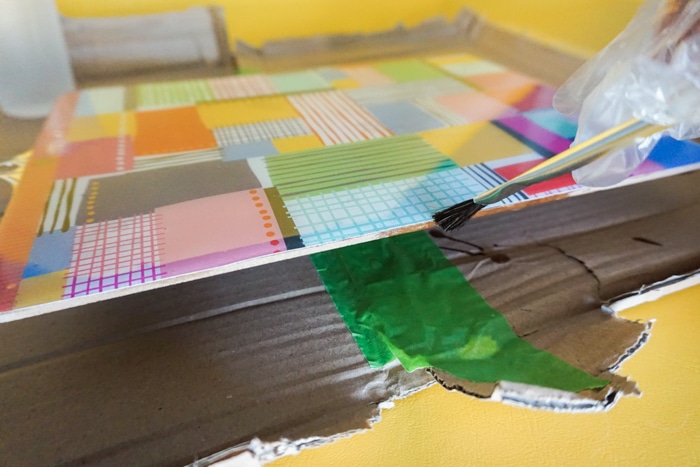
- After you’ve poured the resin, there will be drips! Use a brush to smooth those over the sides.
- After about 20 minutes, use a heat gun to pop any bubbles that appear.
- After your Resin Clipboard has had time to cure, it’ll be ready for your next meeting! You can get really creative with this project and use any design scrapbook paper that suits your style!
Notes
This project originally appeared on The Resin Crafts Blog.

In conclusion, putting paper in resin is a great idea for anyone who wants to create unique and stunning art pieces. With a little practice, you can achieve amazing results with this new way of creating resin crafts. So go ahead and experiment with different types of paper, and let your creativity run wild. With these best tips and techniques, you are sure to create beautiful and long-lasting resin creations that you can be proud of.





Leave a Reply