Last updated May 1st, 2025 at 08:17 pm
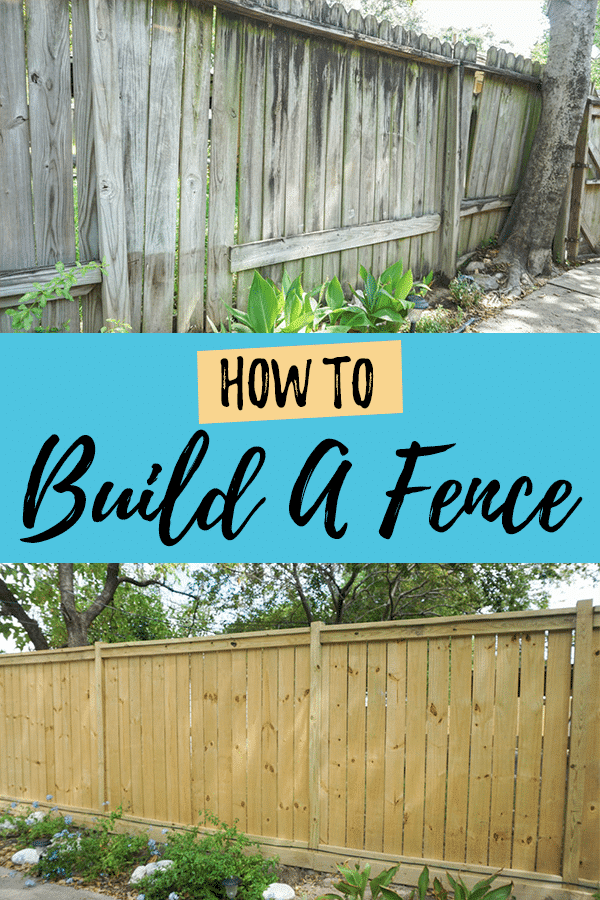
We had no idea how to build a fence when we started—but with a plan, some teamwork, and a whole lot of determination, this DIY wood fence turned out even better than we imagined!
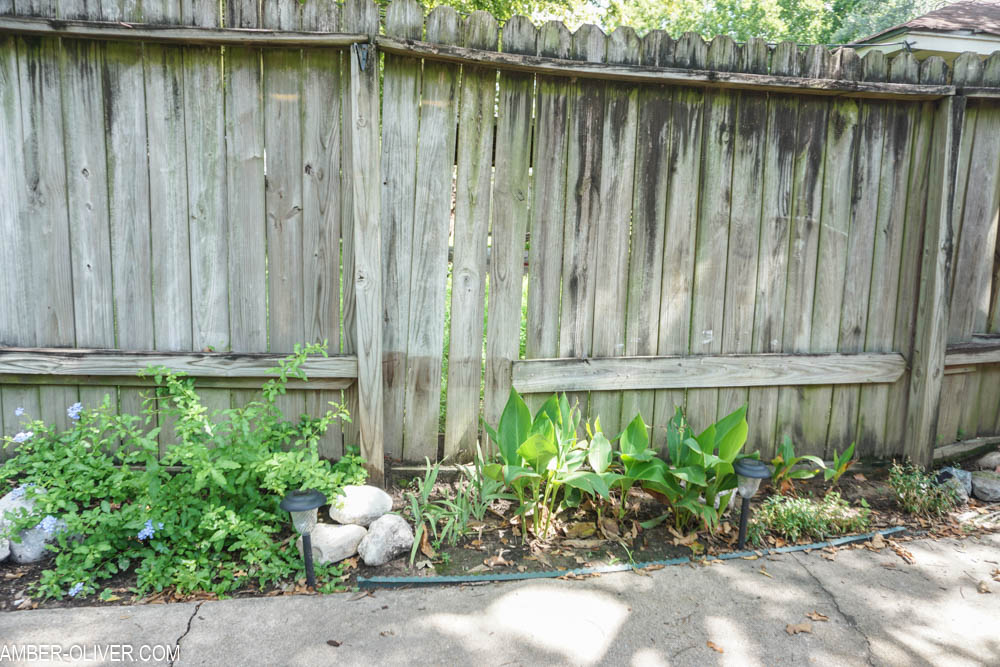
This was our BIG summer project—and spoiler alert: it was 100% worth it. We replaced the falling-down fence between our house and our neighbor’s with a sturdy, stylish new DIY wooden fence. Not only did we save thousands doing it ourselves, but we also upgraded our gate and added an automatic opener (fancy, right?). This beginner-friendly fence build gave our backyard a major glow-up—and we learned so much about how to build a wooden fence from scratch along the way!
Ready for the transformation? These before shots are rough—but they make the after even more satisfying!
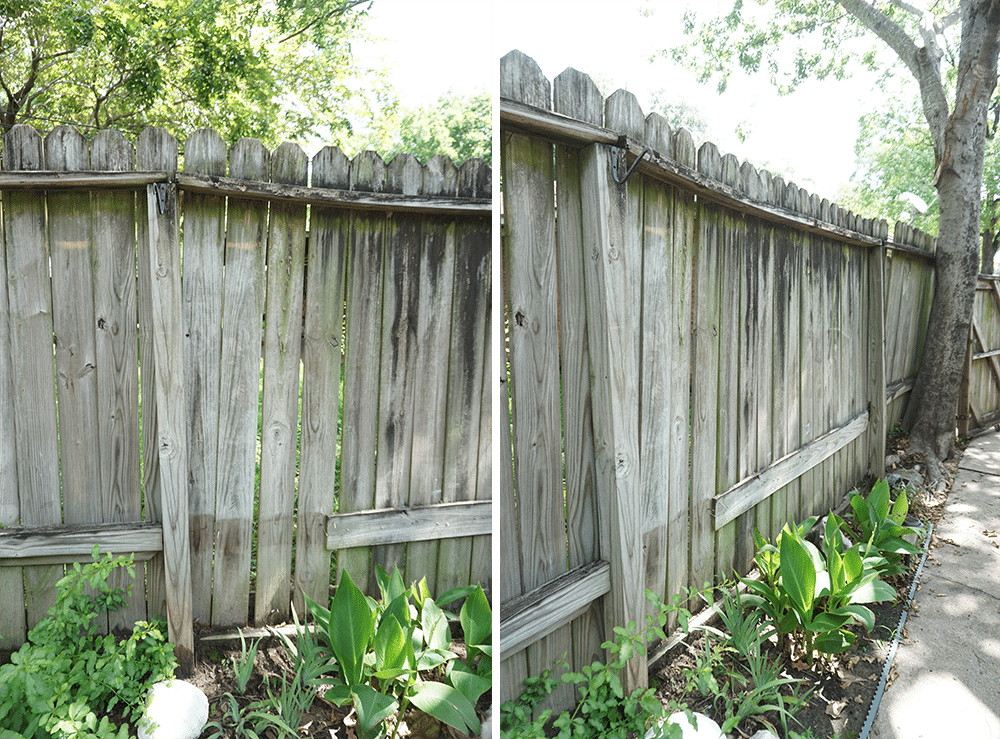
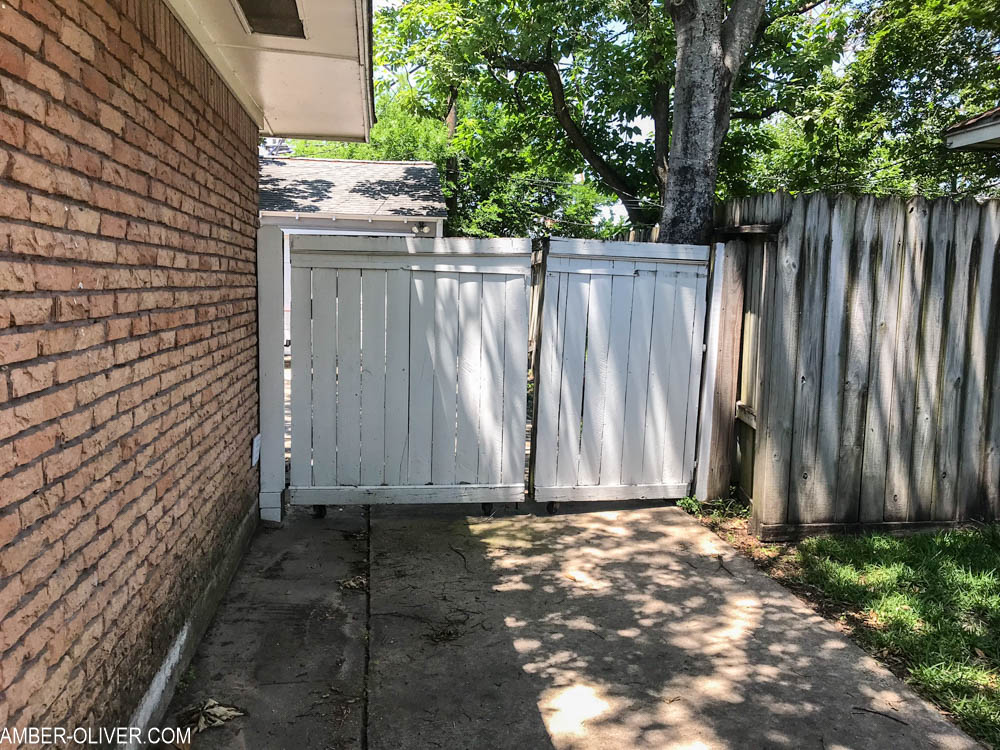
We had to take down the old fence before getting started, but if you’re starting from scratch, feel free to skip ahead! Either way, I’ll show you exactly how to build a wooden fence step-by-step—no contractor required.
How to Build a Fence
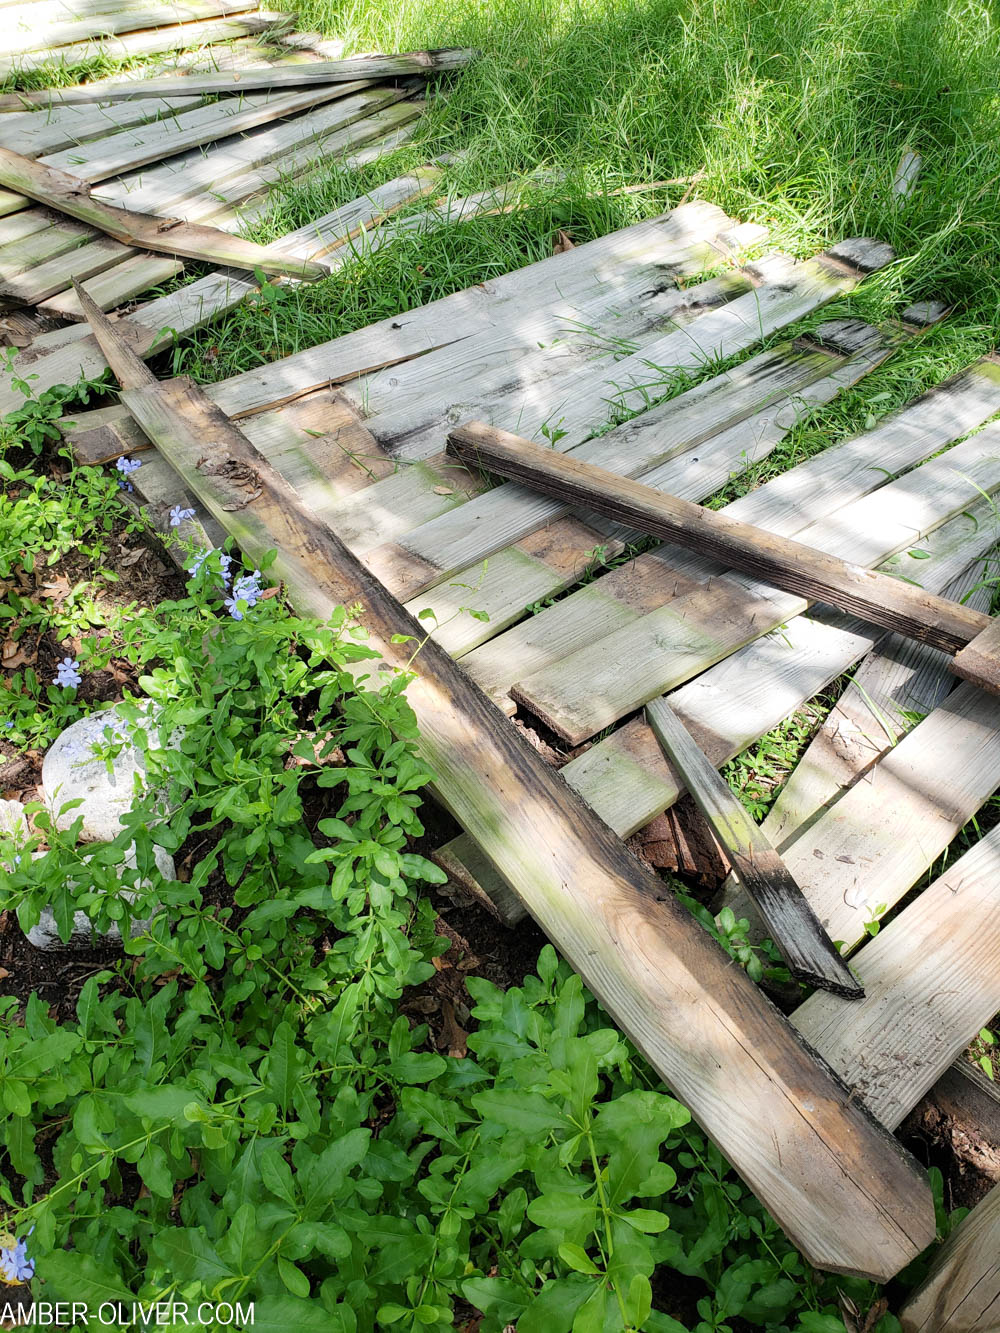
Step 1: Knock down old fence pickets
Since our old fence was barely standing, demo day was pretty easy. We started by knocking out the fence pickets using a hammer, but some were screwed in so we had to grab a drill. If you’re replacing an old wood fence, removing the pickets is a quick and oddly satisfying first step!
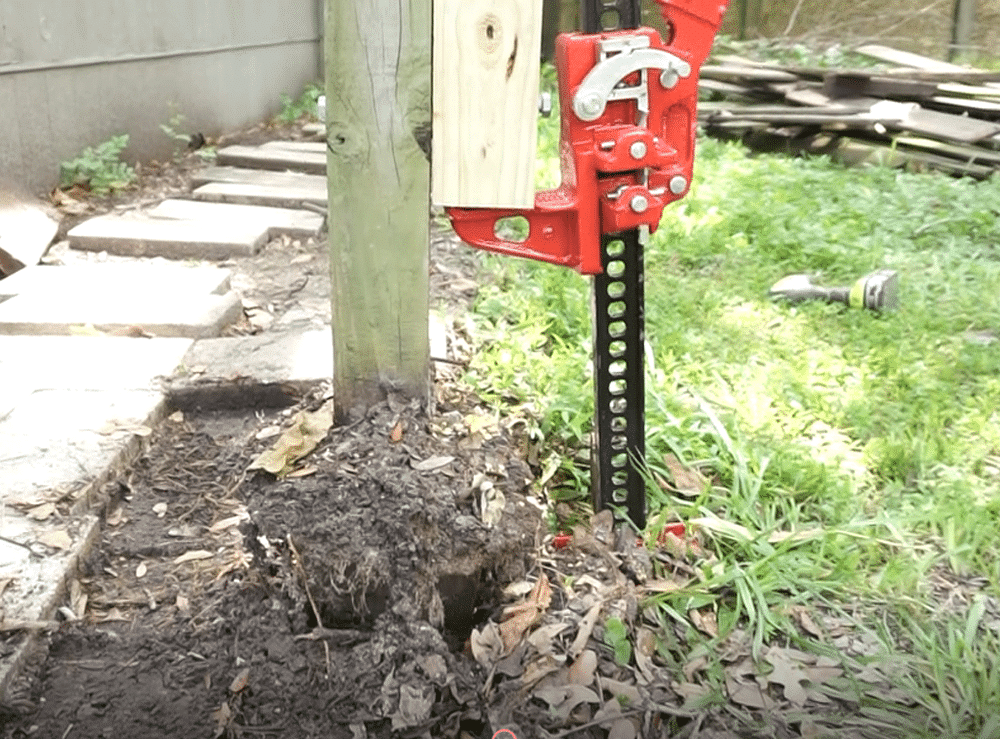
Step 2: Remove old posts
Our existing fence posts were completely rotted, so they had to go. We used a farm jack to lift the old posts out of the ground—highly recommend if you don’t want to dig endlessly or make a giant muddy mess. SO WORTH IT! The jack left clean holes, which we reused for the new 4x4s. We went with 10 foot treated wood posts to give our new DIY wood fence a solid foundation.
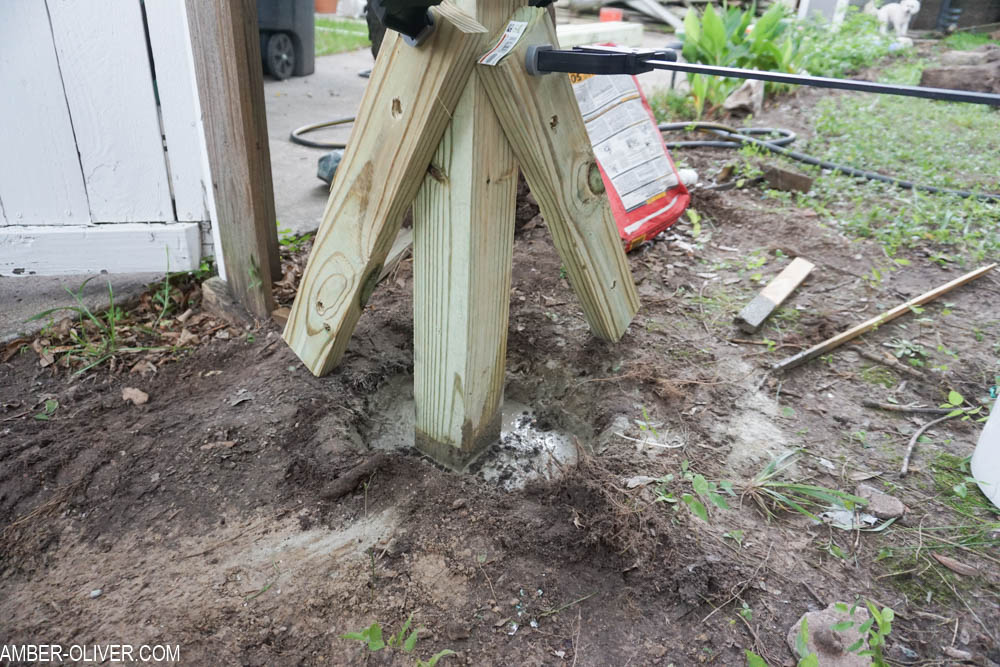
Step 3: Set new 4×4 posts for your DIY Fence
In most spots, we were able to reuse the original holes for our new 4×4 fence posts. In a few areas, we had to widen or deepen the holes to get the height and stability we needed. Pro tip: we used taller posts than necessary and cut them down at the end—it was way easier than trying to make every hole perfectly level. To set each posts, we poured in a bag of Fast-Setting Concrete Mix and added water. We started bracing them with scrap 2x4s but quickly realized the posts were sturdy enough without them.
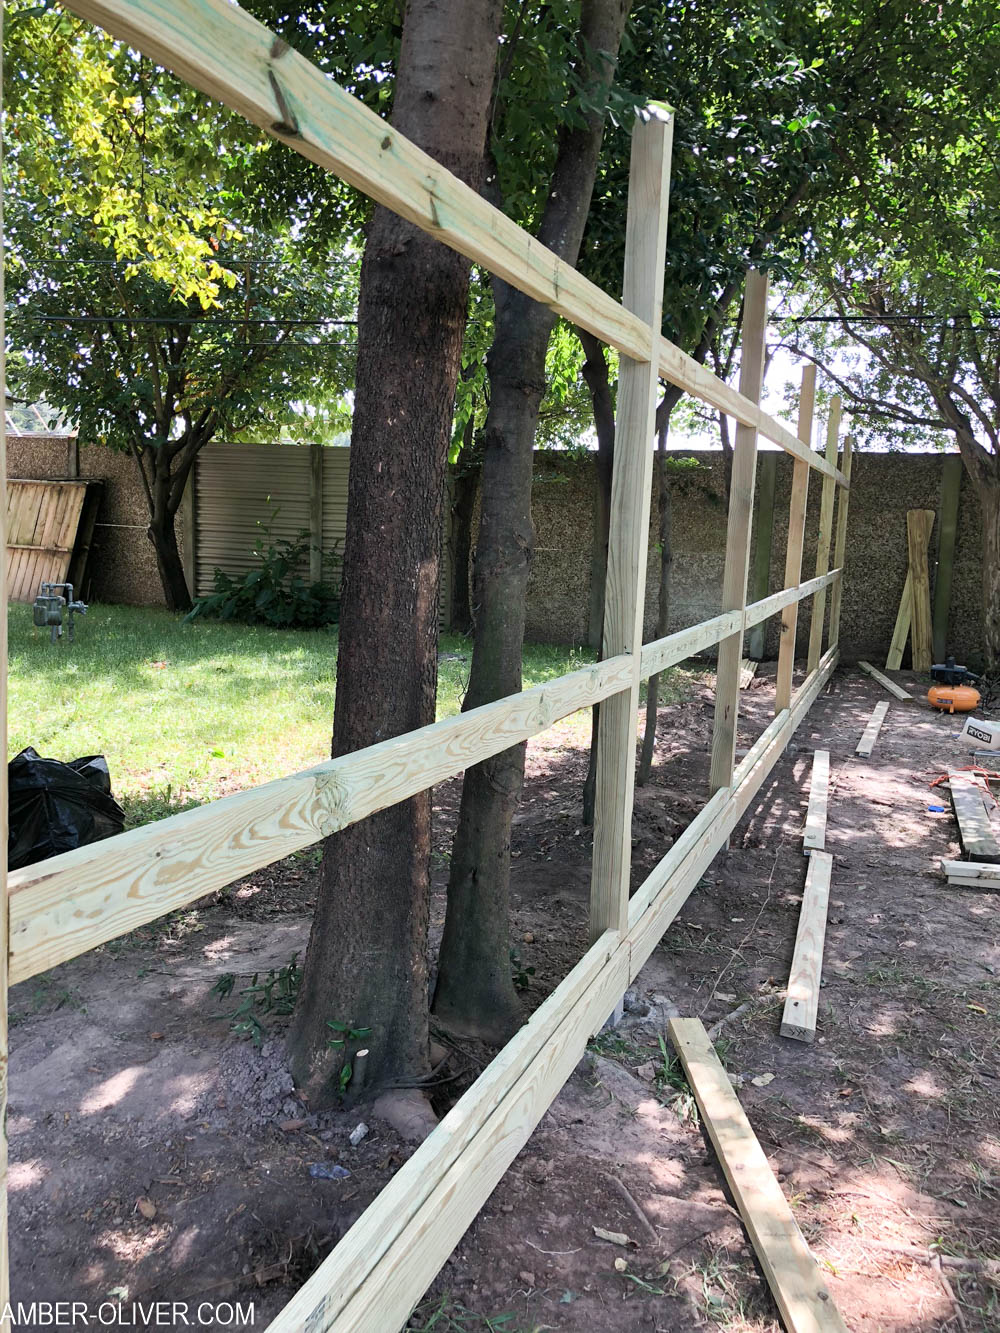
Step 4: Attach “rot boards”
Instead of starting with a basic 2×4, we added a “rot board” at the base of the fence. In Houston, rain and standing water are real issues—so this board is easy to replace if it ever gets damaged. Bonus: it gave us a little extra fence height for more backyard privacy. Be sure to level each one carefully—this bottom row sets the tone for the rest of your fence!
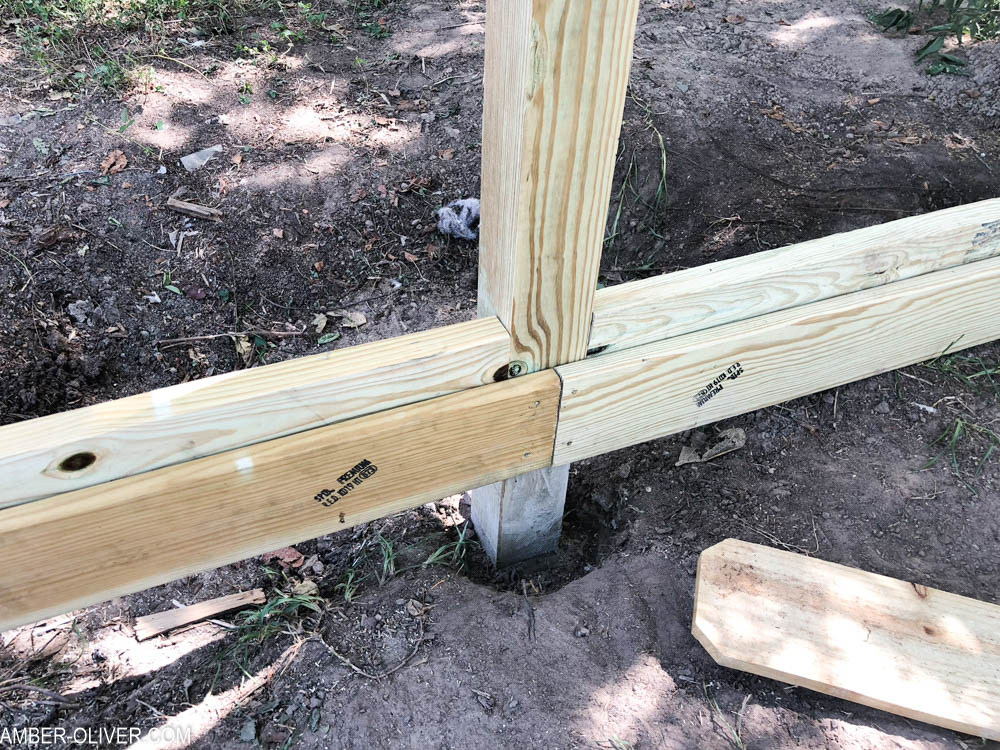
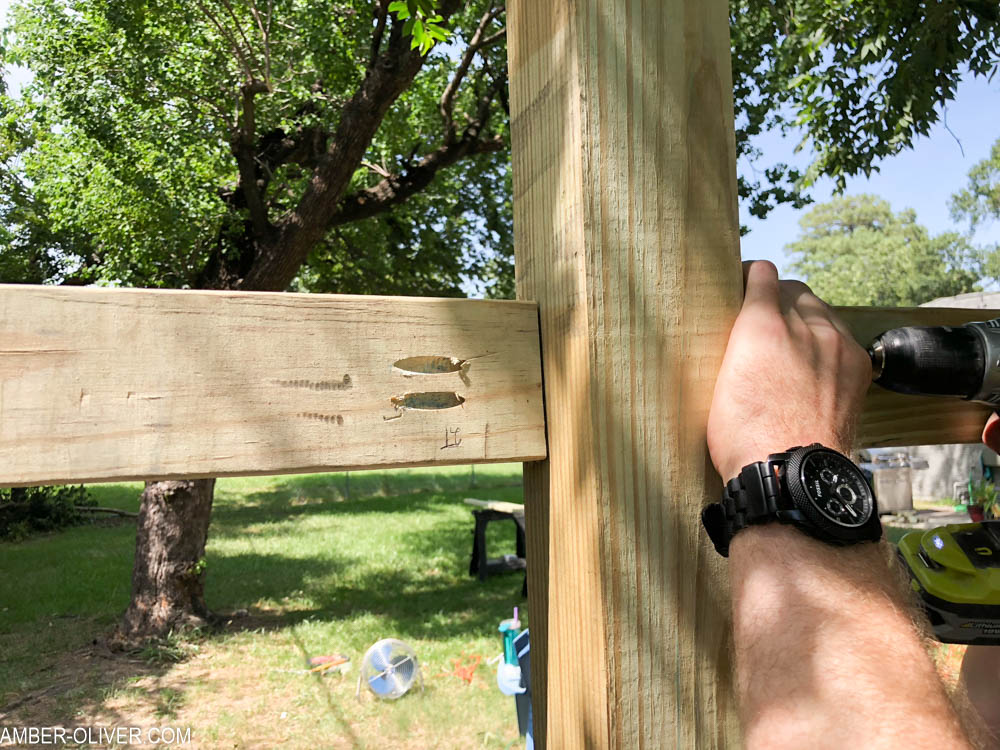
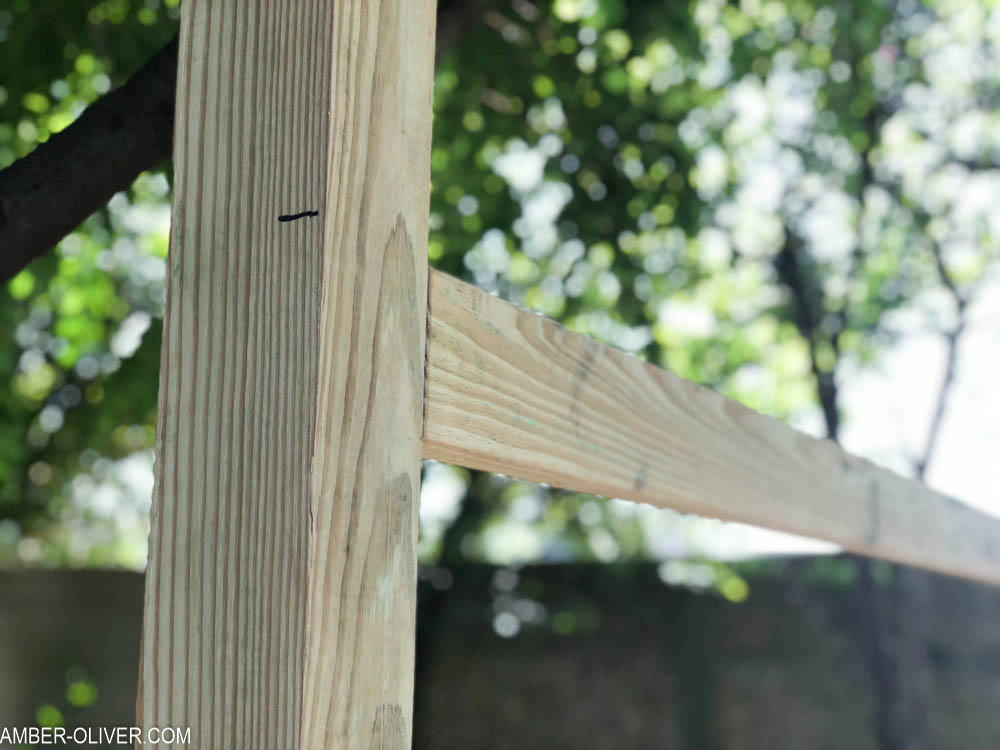
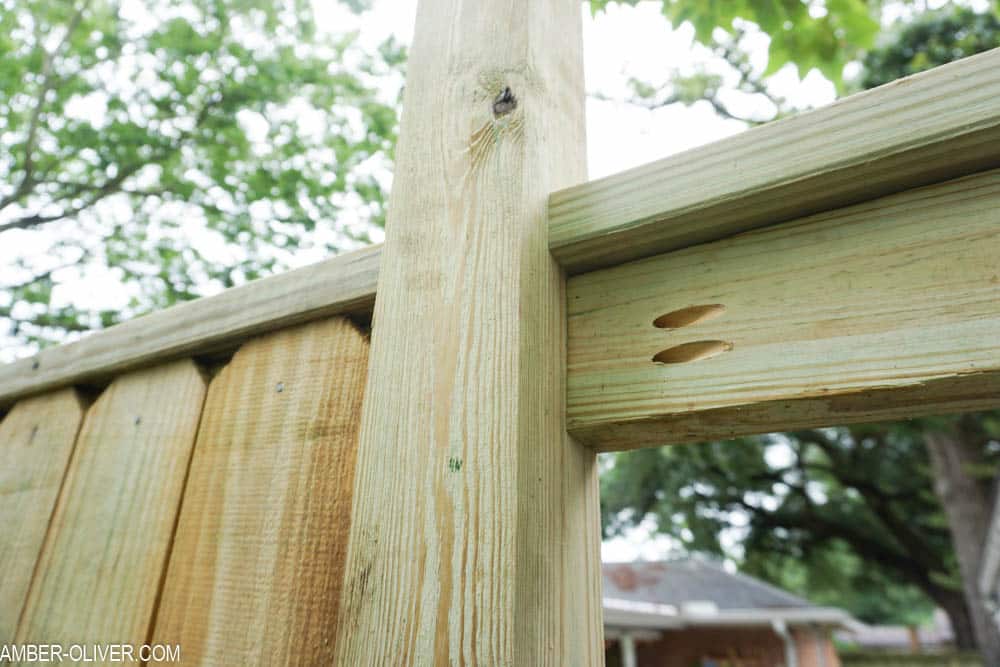
Step 5: Attach 2x4s
We used our Kreg Jig to make pocket holes in each of the horizontal 2×4 fence rails, which made it easy to attach them to the 4×4 posts. If you’re wondering how to build a fence that won’t sag—this is the key! We added top, middle, and bottom rails to make sure the pickets stayed straight and strong. Then, we topped it off with one more horizontal 2×4 to give it a clean, finished look.
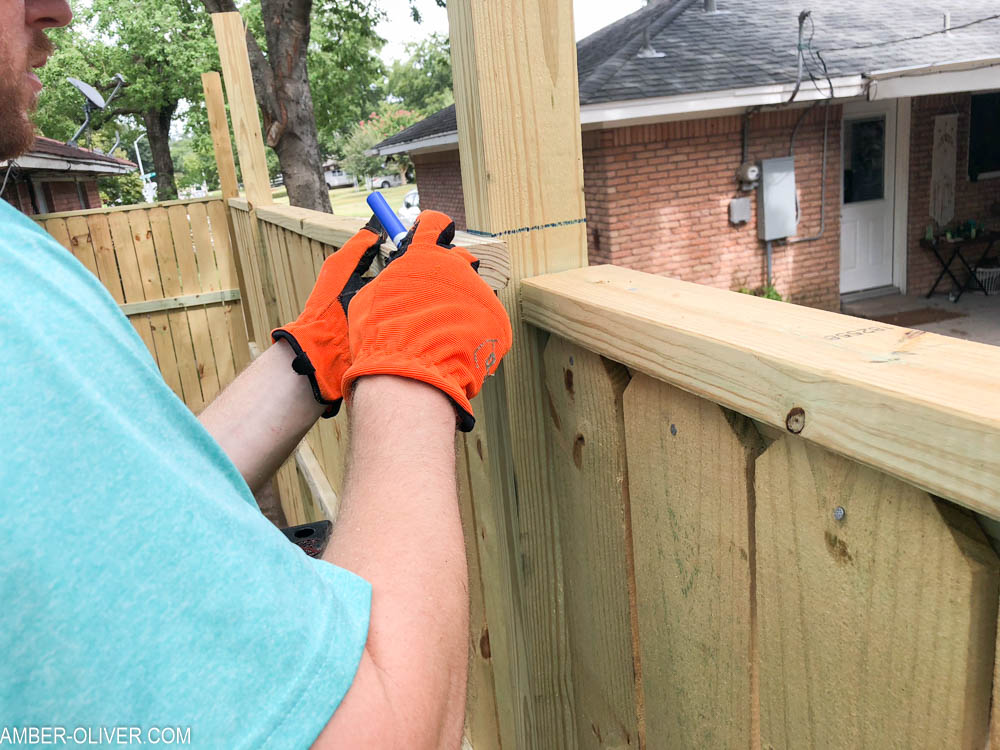
Step 6: Install the pickets
We used a scrap piece of 1/4-inch wood as a spacer to evenly install the pickets. Starting from one end, we placed each board flush with the top rail and nailed it in. We used a hammer and nails on our side, but our neighbor used a nail gun. Either method works—just keep those pickets straight and tight!
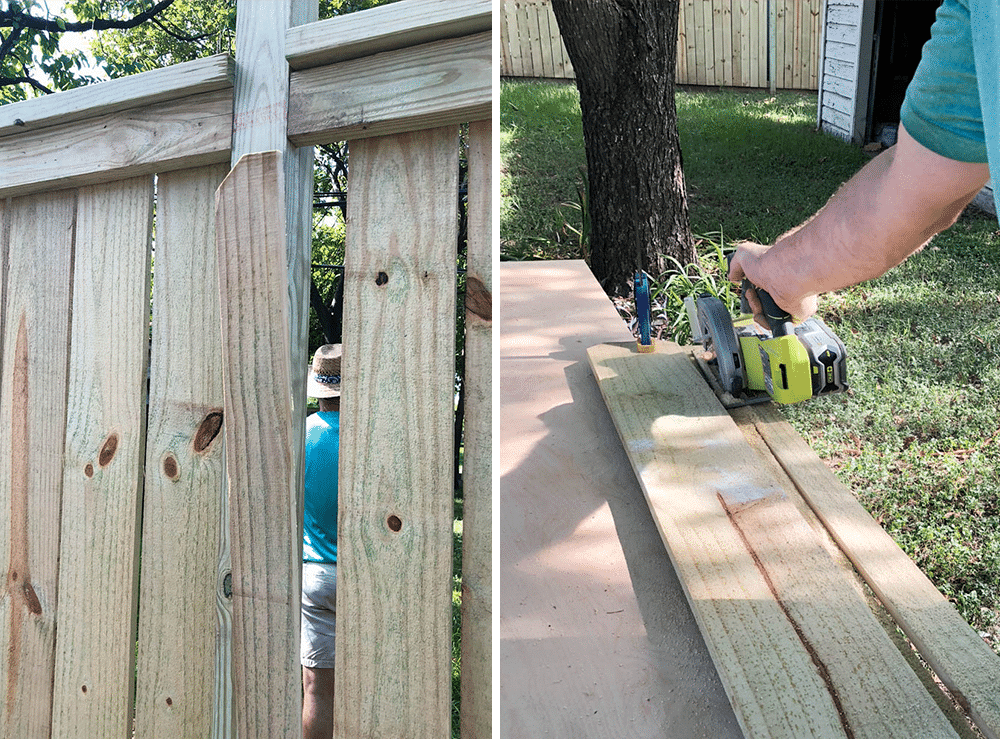
Step 7: Fill in end gaps
Most sections worked out evenly, but we did have a few odd gaps at the ends. Instead of shifting our spacing, we simply measured a and trimmed a picket to fit those smaller spots. The result looked much better than inconsistent gaps!
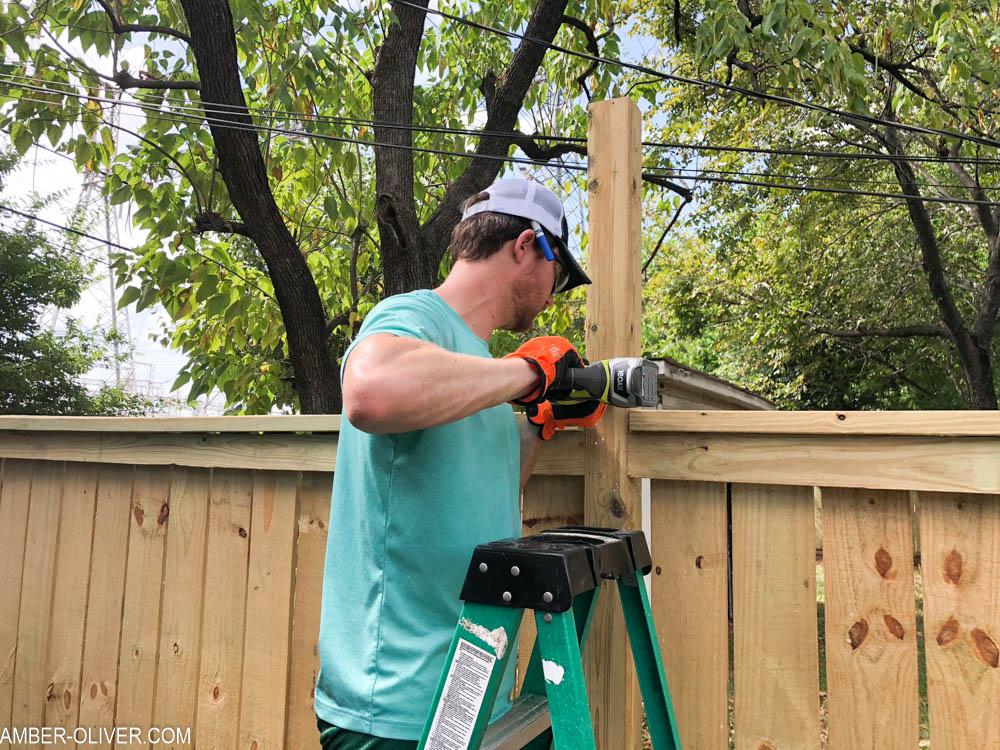
Step 8: Cut down 4×4 tops to finish your DIY Fence
Once everything was installed, we used a reciprocating saw to cut down the tops of the 4×4 posts. We marked each one using a scrap 2×4 so they’d all match. We’re still debating whether to add post caps—but honestly, they already look great!
Use your scrap wood or old pallet wood to create a DIY potting bench!
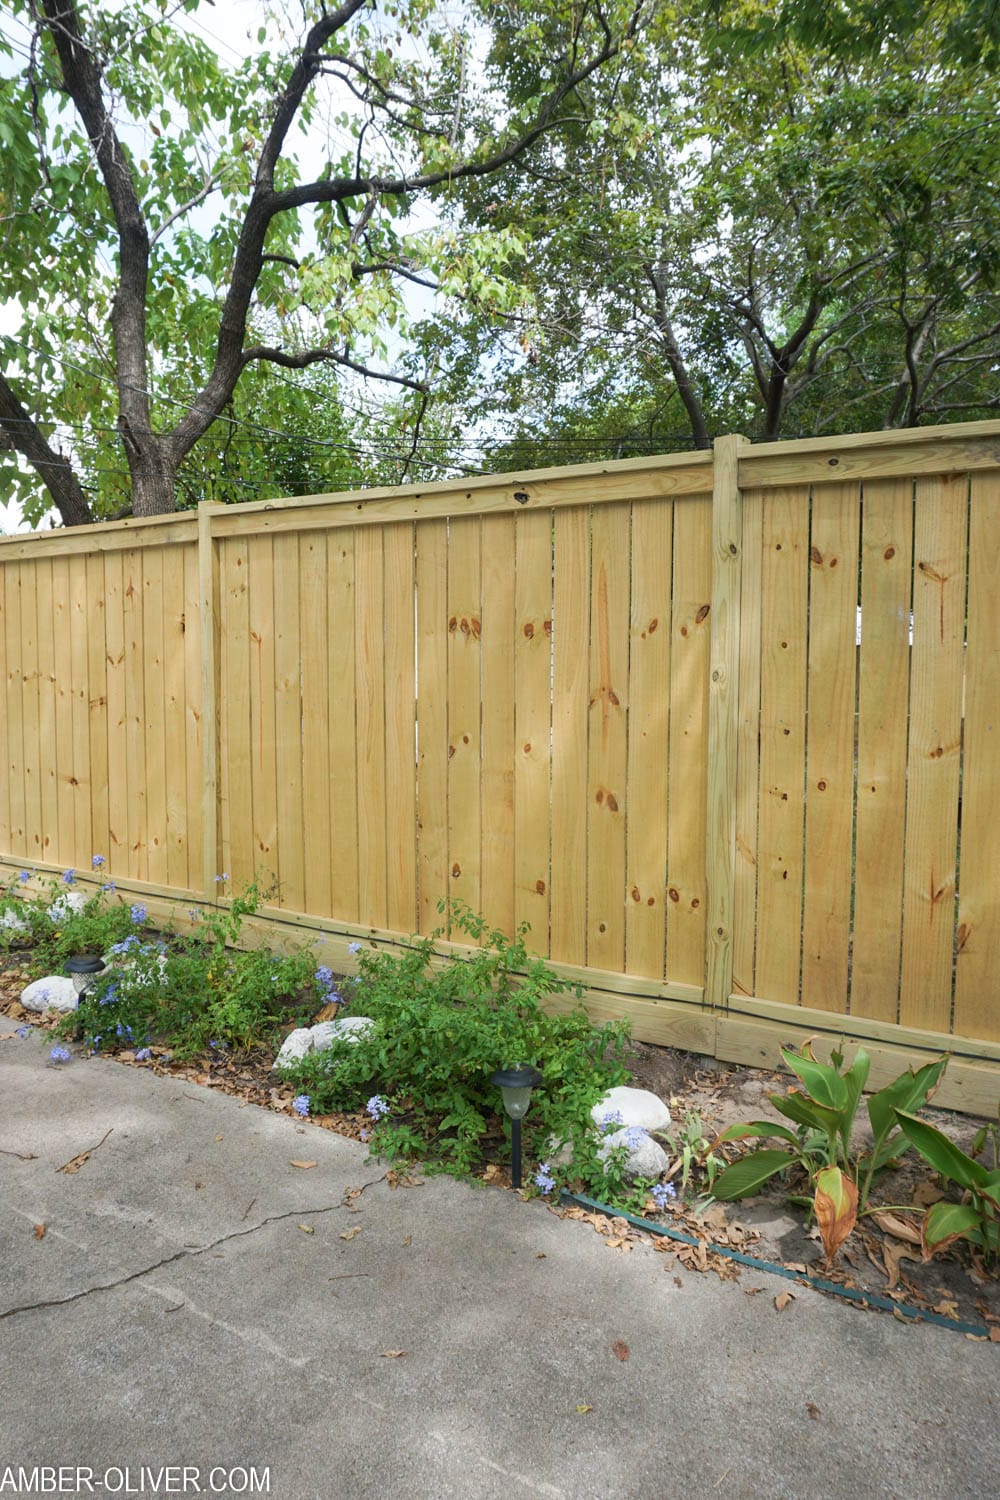
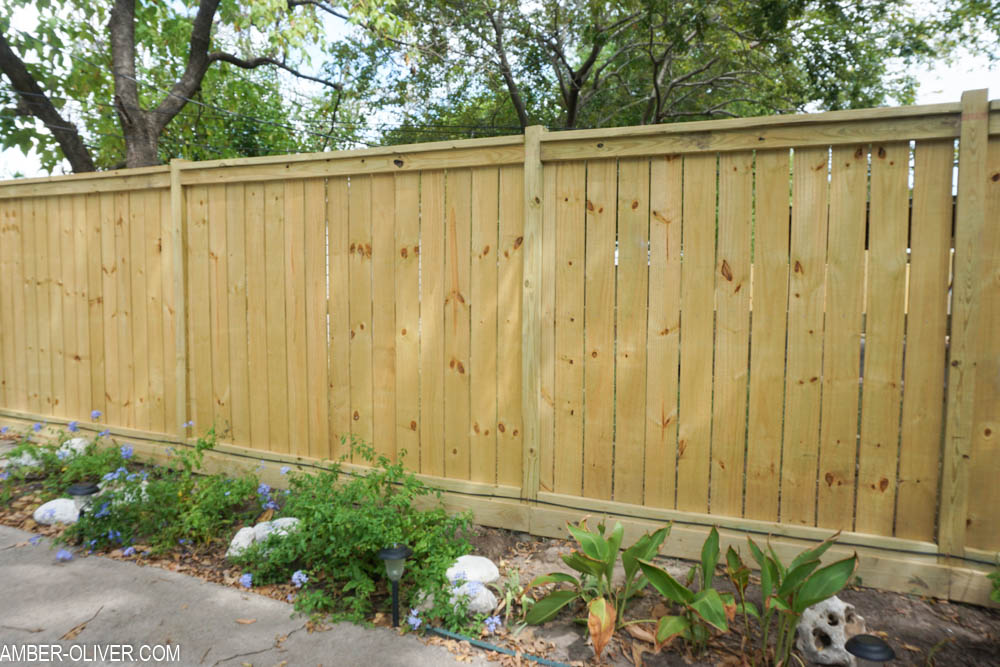
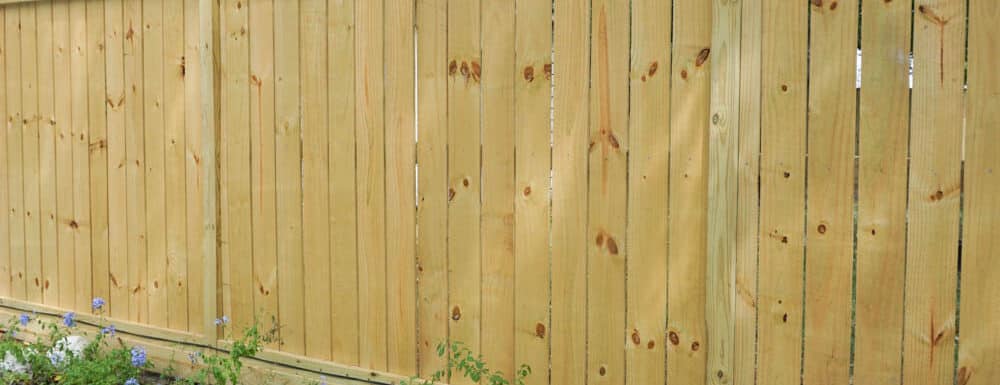
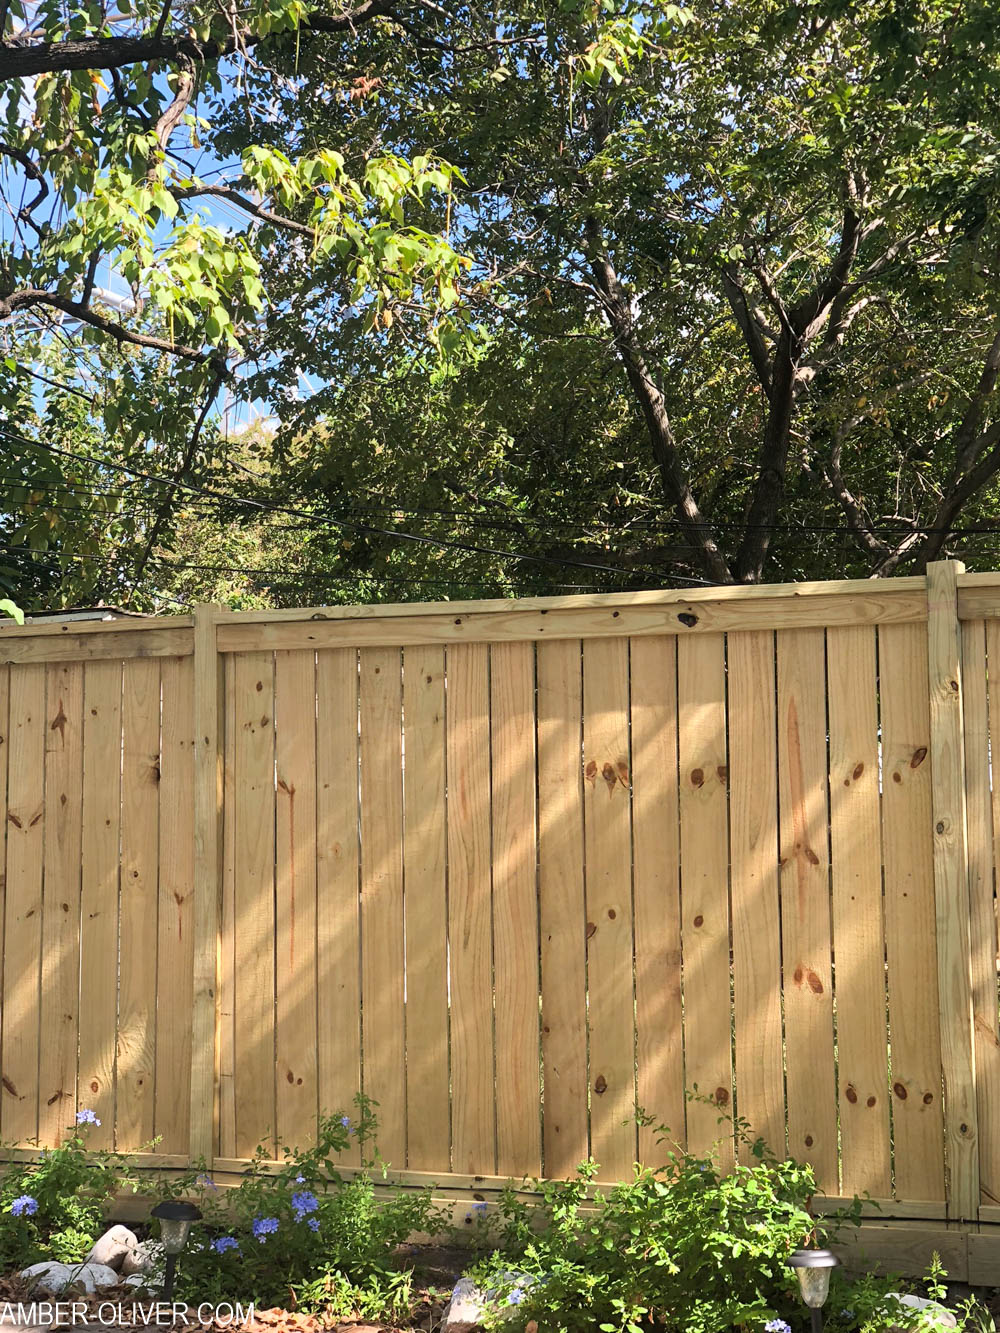
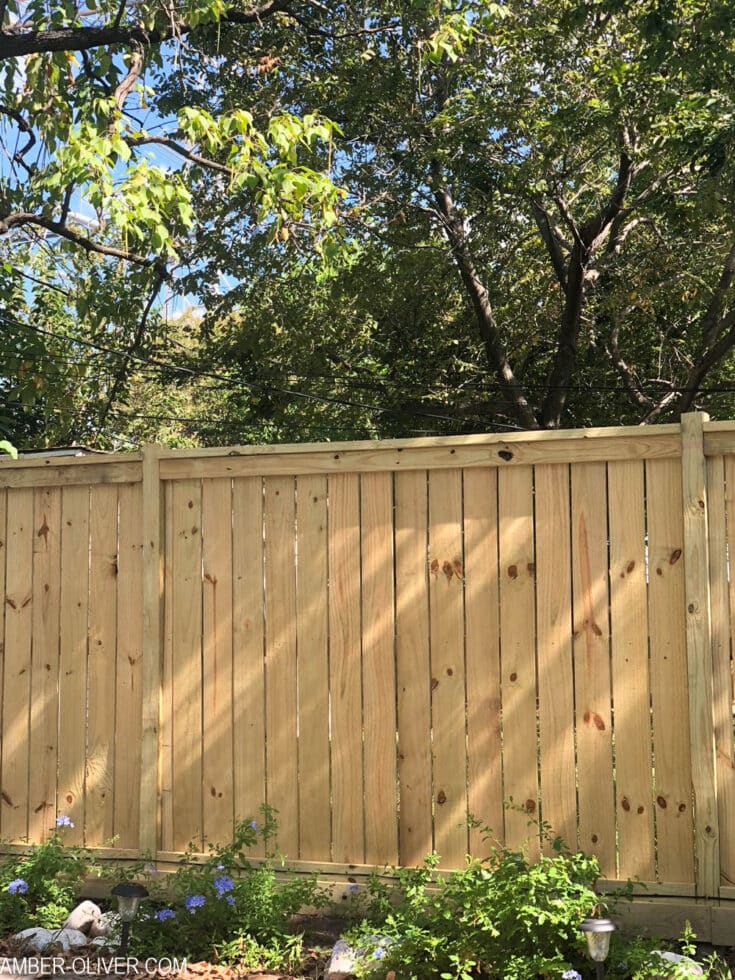
I love how our finished fence turned out—I couldn’t stop staring at it once it was done! It made such a big impact in our yard.
I love how our finished fence turned out—I couldn’t stop staring at it once it was done! It made such a big impact in our yard.
A few months after building our DIY fence, we decided to add stain to protect the wood and deepen the color. I’ve got a full tutorial on how to stain a wood fence quickly and easily, and even gathered 15 easy DIY fence projects if you need inspiration.
Even though we had zero fence-building experience when we started, we pulled it off—and you can too. If you’re thinking about how to build a wooden fence yourself, I hope this guide gives you the confidence to get started.
Now all we need is some cooler weather so we can pull out our DIY cornhole boards and enjoy the backyard!
How To Build a Fence
We had no idea how to build a fence, but we came up with an idea we loved and our DIY fence turned out better than we could have imagined!
Instructions
- Knock down old fence pickets
- Remove old posts
- Set new 4×4 posts for your DIY Fence
- Attach “rot boards”
- Attach 2x4s
- Put up fence pickets
- Add in odd end pieces
- Cut down 4×4 tops to finish your DIY Fence
Notes
The DIY fence we built was about 60 feet long.
Shop this project:

Don’t forget to PIN for later!
DIY ARCHIVES
View our collection of DIY projects!


Charlanne Pook says
Wow! This looks great!
Sara says
How much was your project?
Amber Oliver says
Hi! It was around $850 and we split the cost with our neighbor. We were quoted much, much higher than that!
Chelsea says
How big an area did you fence for that price?
Amber Oliver says
It was about 60 feet!
Sandra says
NIcely done. Big change.
Brandy says
Question on the middle 2×4 you had to keep the pickets from bowing… It shows in the picture that you have them placed towards the front side of the 4×4 post but then in the after picture you don’t see the middle 2×4 but you see the bottom and top one… did you weave the picket in? I was looking to see if there was an after picture of the other side of the fence but didn’t see one. Just curious becasue I LOVE the look of the fence and we are redoing ours and want to follow this but confused as to where the other 2×4 is 🙂 or did you put another 2×4 on the top and bottm and sandwhich the pickets between them? Hope this makes sense.
Amber Oliver says
Hi Brandy! Sorry that was a bit confusing! So the “after” photos you see are from our back porch (so our side of the fence). You can see it in the top left corner of this photo:
https://amber-oliver.com/wp-content/uploads/2018/09/how-to-build-a-fence-24.jpg
So you’ll put the pickets up last, after you’ve put these boards in: https://amber-oliver.com/wp-content/uploads/2018/09/how-to-build-a-fence-18.jpg
Just make sure the cross boards are flush with one side of the posts.
I hope this makes sense! Please let me know if you have any more questions!!
Julie says
Amber your fence looks great!!!! I am looking to replacing my old fence probably next spring. I love how this looks and like the idea of the rot board and the board on top of the pickets for a smooth look.
I also need some clarification on the middle 2×4 – I read your reply to Brandy and looked at the photos again and am still confused. I also used the photo you used in the reply to point my confusion. Photo – https://photos.app.goo.gl/ZuncXHCYL3K1tCuy9
Please help thanks!!!
Amber Oliver says
Hi Julie!!
So originally we didn’t plan for the middle board. So the pickets were put up FIRST then the horizontal middle board was added later because the pickets started to bow out. So we learned from our mistake and I advise to put the horizontal middle board up FIRST and make sure it’s flush with one side of the posts before putting the pickets up on the other side! I hope this all makes sense!!!
Michael Mahoney says
This fence looks amazing, congratulations on a great job. I’m currently doing my back yard fence with our neighbor and we are also using Kreg pocket holes to attach the rails to the fence. I’ve read different advice about using pocket holes. Apparently they can cause splitting during wood movement? Others say its not a problem. Its been a few years with your fence now do you notice any issues we should be aware of? Thanks for the great tutorials and photos!
Amber Oliver says
Thank you, Michael! Happy to report zero problems over here after nearly 5 years!
Sage says
Wow, I am so impressed with how this turned out! My wife and I considered building our fence ourselves and then decided to hire a company to install composite fencing. It turned out beautiful and we’re really happy with the results, but I would’ve loved to do something like this. It just wasn’t practical with our timeline. Excellent job and thank you for sharing your process!
Brooke says
Your fence looks beautiful! We are about to do our own and wondering if your used quickcrete concrete and how much per post? The information online varies widely! Thank you 😊 🙏🏻
Amber Oliver says
Hi! We need about 2 bags per post!