

If you’re short on counter space but big on style, a DIY macrame fruit hammock is the perfect solution. This simple and functional project uses just a few basic knots and supplies—and adds a cute boho touch to any small kitchen or apartment.
If you’re anything like me, you’re always looking for ways to free up counter space—especially if you live in a small kitchen or a small apartment. One of the cutest and most functional ideas I’ve come across recently is a DIY macrame fruit hammock. It’s a great way to keep your produce fresh, add a little boho flair to your kitchen, and turn basic supplies into a finished work of art!
This macrame fruit hammock tutorial is beginner-friendly and doesn’t require any fancy knots or complicated tools. All you need are some simple macrame supplies, a little bit of patience, and maybe an audiobook playing in the background.
Whether you’re a macrame lover or this is your very first DIY project, this is a great macrame project to try out. Plus, it makes a great gift—especially for new homeowners or that friend who’s obsessed with boho hammocks and handmade goods on Etsy.
Let’s dive into this complete guide to making your very own original macrame fruit hammock.
What is a Macrame Fruit Hammock?
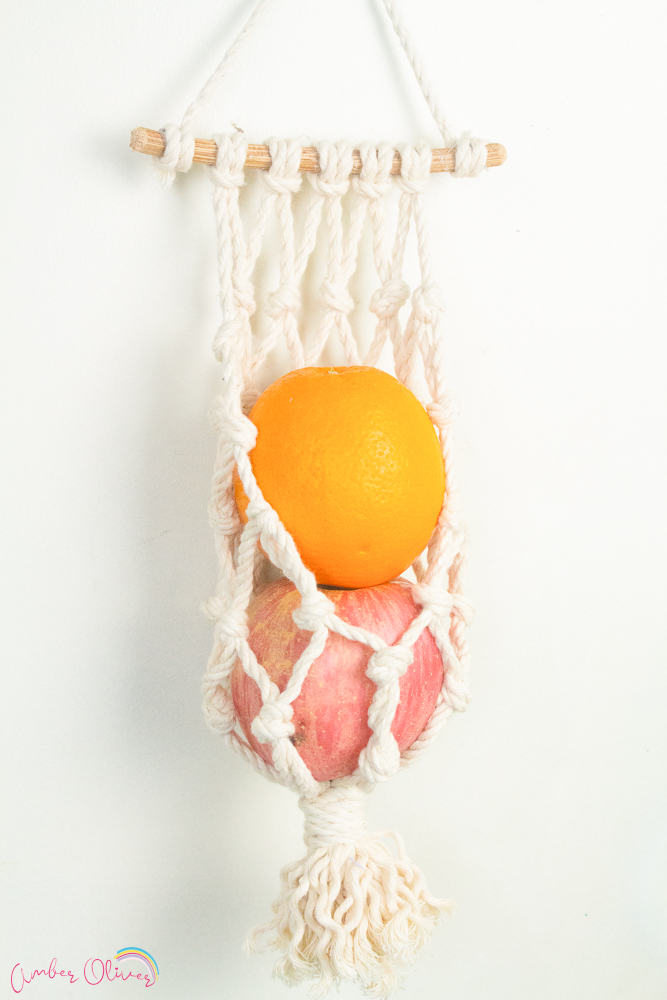
A macrame fruit hammock is a suspended fruit basket made using macrame cord and basic macrame knots. It usually hangs underneath a cabinet or shelf and cradles your fruits and veggies like a tiny, chic hammock. It’s the perfect way to use vertical space in smaller spaces, especially if you’re short on room or want to keep produce off your countertops.

You can customize it with free macrame patterns, add beads or colors, or keep it super simple and neutral. It’s a nice balance of functional and decorative—and I’d argue it’s way more fun than a standard countertop veggie hammock or metal bowl.
Macrame Fruit Hammock Materials
Here’s what you’ll need to get started (I’ve linked a few of my favorite products with affiliate links, so feel free to shop if you’re building your craft stash!):
Simple Macrame Supplies:
- Macrame Rope – 3–5 mm cotton rope works best (you can also try standard baker’s twine for a mini version!)
- Wooden dowels or a dowel rod – this acts as the top support
- Scissors
- Optional: Command Hooks (for under-cabinet mounting)
Pro tip: You can also use a macrame stick (natural wood branch) if you’re going for a rustic vibe!
How to Make a Macrame Fruit Hammock: Step-by-Step Tutorial
Here’s how to turn your supplies into a cute and functional hanging fruit basket.

Step 1: Attach Your Cords
Take 5 long cords and fold them in half. Use the lark’s head knot to attach each folded cord to your wooden dowel or macrame stick.

You should now have 10 hanging strings (2 strands per knot).

Make sure all your cords are roughly the same length and hanging evenly—these will form the body of the hammock.
Step 2: Tie the First Row of Knots
Using basic knots, tie each adjacent pair of strings together—this is usually done with a square knot. Leave the outermost strings free for now; we’ll come back to them!

This first round of knots will help create the netting of the hammock.
Step 3: Fill in the Rows
Now take another cord and tie it to the outer strings on each side of the first row.

This gives you 3 strings on your first “column” and last one.
Imagine each string down is numbered. Tie string 1 and 2 together (from the first “column) then string 3 (from the 1st) to the 4th string (it’s the 1st on the second column) and continue across.

You can alternate directions or add decorative knots like the double half hitch knot to add texture. Keep your long ends of the cord organized so you don’t get tangled.

Once you make it all the way across, go a few inches below that row and start again.

Add the new string on, then work from left to right to tie each pair of strings together. Keep going until you have the size you want!

Step 4: Close the Ends
Now take the two outer strings on each end and tie them together to bring the sides of the hammock together.

This gives the structure its final shape.

Take one more cord and wrap it around the bottom to bundle all the strands together into a clean finish.

Secure with a double knot, trim the excess, and fluff out your new hammock!

Hanging Your Fruit Hammock
To install your cabinet macrame fruit hammock, you can:
- Screw small hooks into the underside of your cabinet
- Use Command Hooks for a no-damage solution
- Hang it from a shelf or inside a pantry if you want it tucked away
Just make sure it’s level and can hold the weight of the fruit. I recommend placing lighter items like lemons, limes, or avocados—not heavy pineapples or melons.

Styling Ideas and Customization
There are so many ways to make this your own. Try:
- Dyeing your mm cotton rope for a pop of color
- Adding wood or acrylic beads to the design
- Using colored macrame cord to match your kitchen
- Making it extra wide for more fruit
- Adding tassels to the ends
You can also look up macrame hammock patterns online or follow our video tutorial if you’re more of a visual learner. I found that watching someone tie the knots helped a lot when I was getting started.

Why You’ll Love This Easy Project
Here’s why I think this macrame fruit hammock is a must-try:
- It’s the perfect addition to any small kitchen
- Great for renters—no tools needed if you use Command Hooks
- Makes a thoughtful, handmade great gift
- Helps support your small business if you sell handmade items
- Fun weekend diy project for anyone new to macrame
- Can be made with just a few dollars in supplies
- Adds charm and color to your home instantly!
Plus, once you finish your first one, you’ll probably want to make more. Trust me—your bananas will never sit in a boring metal bowl again!

CRAFTS ARCHIVES
View our collection of Crafts projects!


Leave a Reply