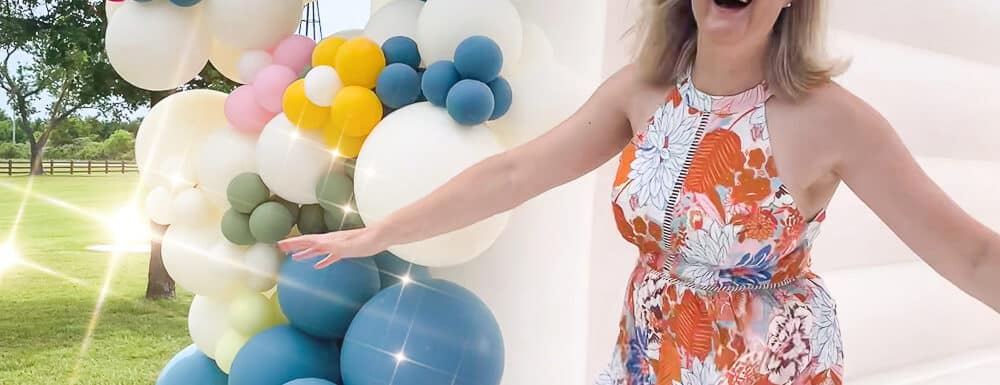
Elevate any party or event with this tutorial that shows you how to make a DIY easy balloon arch garland for any occasion!
Planning a baby shower, birthday party, or bridal shower? Looking to create a stunning backdrop for a photo booth or dessert table? Look no further than this easy balloon garland! Balloon arches have become increasingly popular in party decor, and for good reason. They are fun, versatile, and make a big impact without requiring much time or effort.
In this blog post, we will guide you through a step-by-step tutorial on creating your very own DIY balloon arch using an electric balloon pump, balloon tape, and a variety of balloon sizes and colors. We created our first balloon arch for our Harry Potter Baby Shower and and it was a great addition! With our helpful tips and tricks, you’ll be able to create a stunning balloon garland that will leave your guests in awe.
Supplies and Tools for a Balloon Arch
Before we dive into the step-by-step tutorial, let’s go over the supplies and tools you’ll need to create your balloon arch quickly and easily. The number one thing we recommend is an electric pump! Here’s a detailed supply list to ensure you have everything on hand:
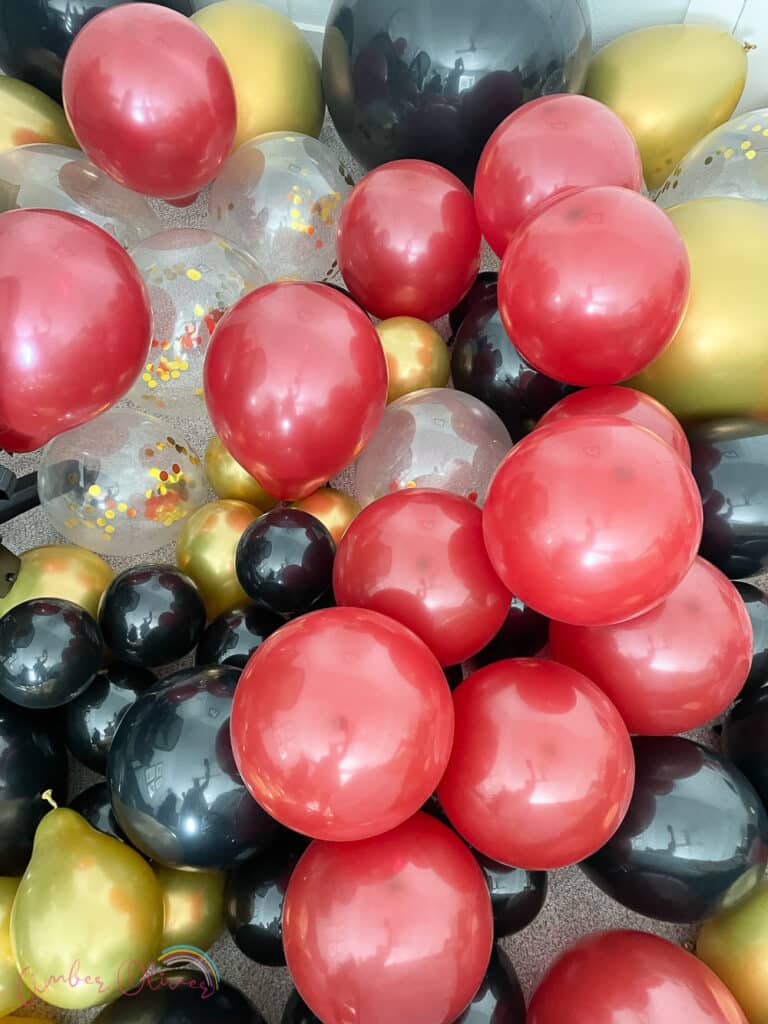
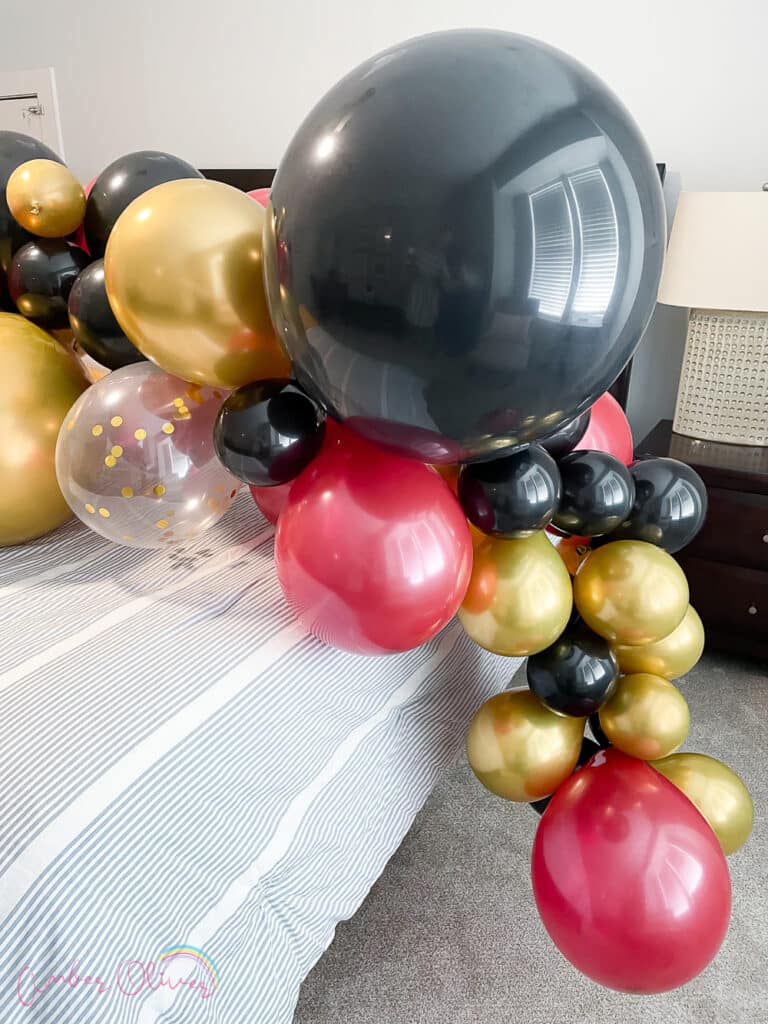
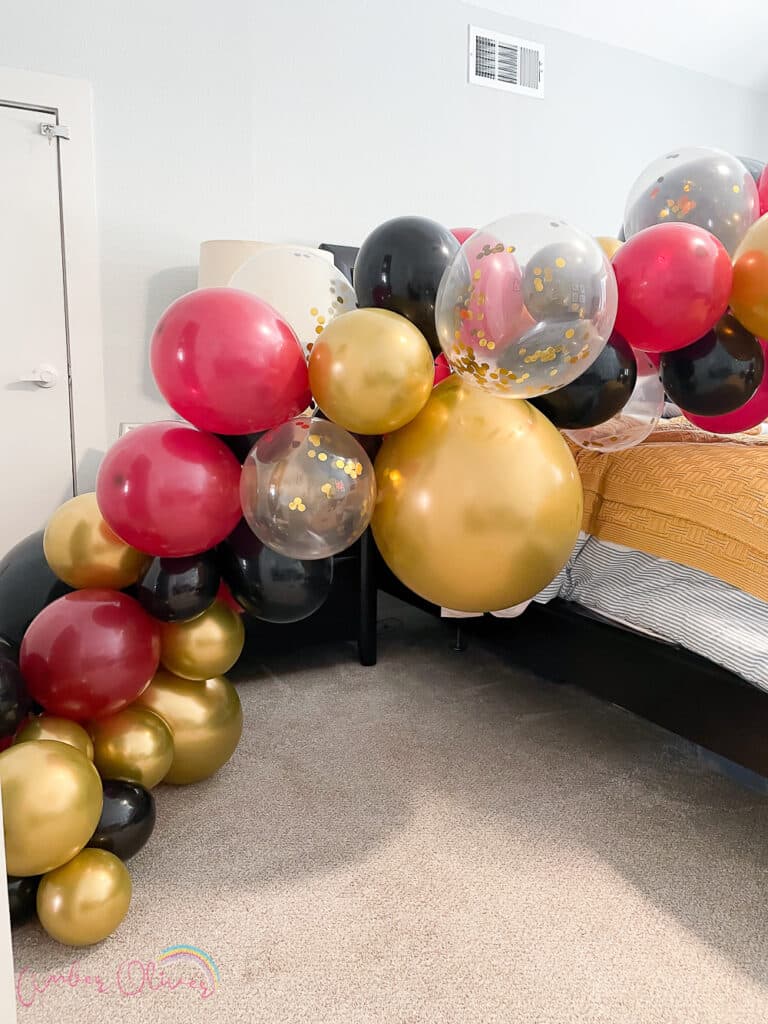
- High-quality balloons: Latex balloons in different balloon colors and variety of sizes are essential for a visually appealing balloon garland. Opt for a color scheme that matches your party theme or go for a variety of colors for a vibrant look. We had more than 4 different sizes and this is the easy way to make your DIY balloon garlands look PROFESSIONAL!
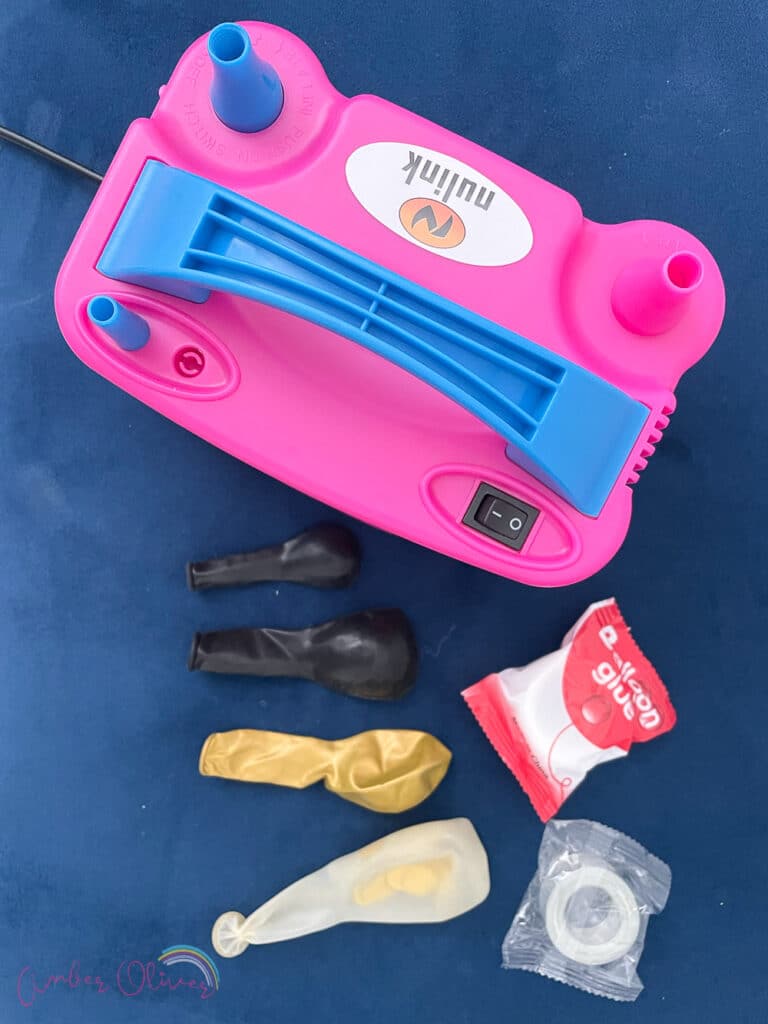
- Electric balloon pump: Save your breath and invest in an electric balloon pump. It will make the inflation process quick and effortless, allowing you to focus on the fun part of decorating. Because you aren’t using helium balloons, you don’t have to wait until the day of the party to inflate. You can blow up the balloons days before (which is a great idea to save time!) and they will still look great!
- Balloon tape or decorating strip: This handy tool is the secret to creating a uniform and sturdy balloon arch. It has evenly spaced holes where you can insert the knotted ends of the balloons.
- Command hooks or strips: These will serve as anchor points for your balloon arch. Ensure they can hold the weight of the arch and adhere to your chosen surface.
- Fishing line or clear thread: This will be used to secure the ends of the arch and create a hanging mechanism. This is also a great alternative if you don’t want to buy a balloon garland kit. Just make a small hole in the bottom knot of the balloons and string them together!
- Optional: PVC pipe, chicken wire, zip ties, low-temp glue gun, command strips, faux flowers, fresh flowers, and additional decorative elements.
Now that we have all the necessary supplies, let’s move on to the step-by-step tutorial to create your own DIY balloon arch!
Balloon Arch Step-by-Step Tutorial
Step 1: Plan and Prepare Before you start inflating balloons, it’s essential to plan the size and design of your balloon arch. Consider the space you have available, the desired height and width, and the color palette you want to achieve. Take measurements and decide on the number of balloons you’ll need. A good rule of thumb is to use around 10-12 balloons per foot of arch.
Pro tip: Use a mix of larger and smaller balloons to add depth and visual interest to your arch.
Step 2: Inflate the Balloons: Now it’s time to bring those balloons to life! Grab your electric balloon pump and start inflating the balloons, being mindful of their sizes. Inflate a variety of balloons in different colors, ensuring they are fully inflated but not overinflated. You want them round, not oblong. This will give your balloon arch a dynamic and organic look!
Pro tip: To save time, consider inflating a handful of balloons in advance and storing them in large plastic bags until you’re ready to assemble the arch.
Step 3: Prepare the Balloon Arch Tape: Take your balloon tape or decorating strip and unroll it to the desired length for your arch. Balloon tape usually has evenly spaced holes that will hold the knotted ends of the balloons. Insert the knot of each inflated balloon into a hole, alternating colors and sizes to create a visually appealing pattern. Make sure you space out your larger balloons and small balloons. Don’t think too much here – just alternate colors and sizes! They will roll and twist to move into place on their own.
Pro tip: If you don’t have balloon tape, you can use a long piece of fishing line or clear thread as an alternative. Simply tie a small knot at the end of each balloon, leaving a short tail, and string them onto the fishing line, spacing them evenly.
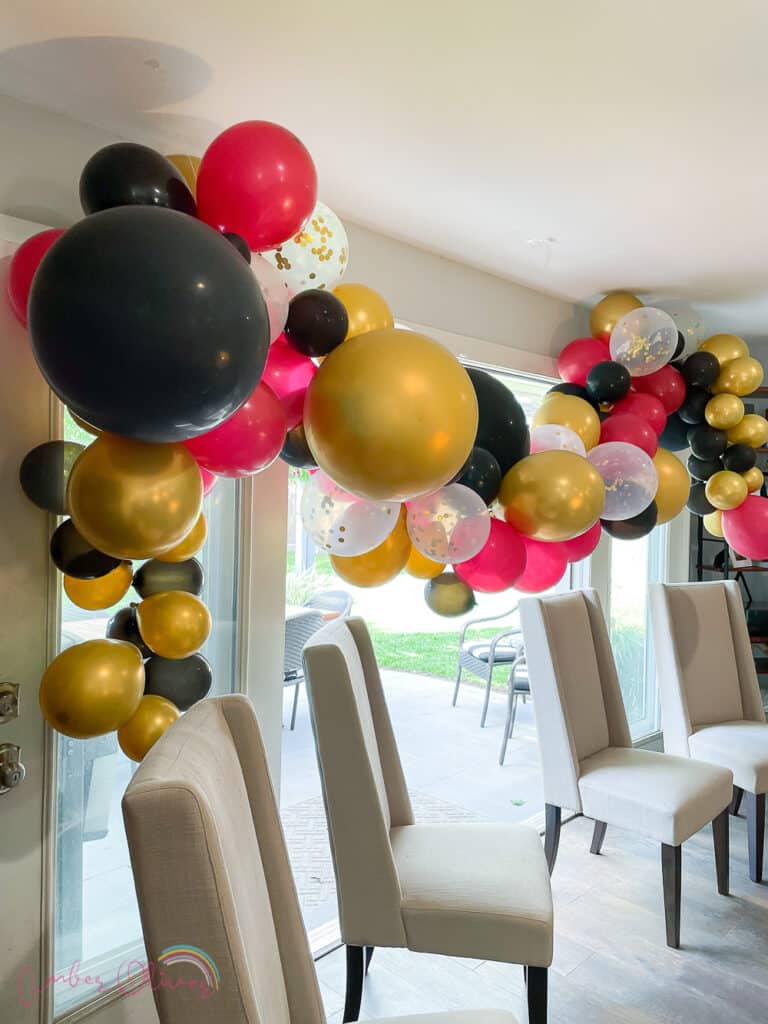
Step 4: Secure the Arch: Once you have attached all the balloons to the balloon tape or fishing line, it’s time to secure the arch in place. Use command hooks or strips to anchor the ends of the arch to the desired surface. Ensure the hooks or strips are firmly attached and can support the weight of the balloons. We had all our inflated balloons ready the day before the party to make sure we had enough time on the day of the party.
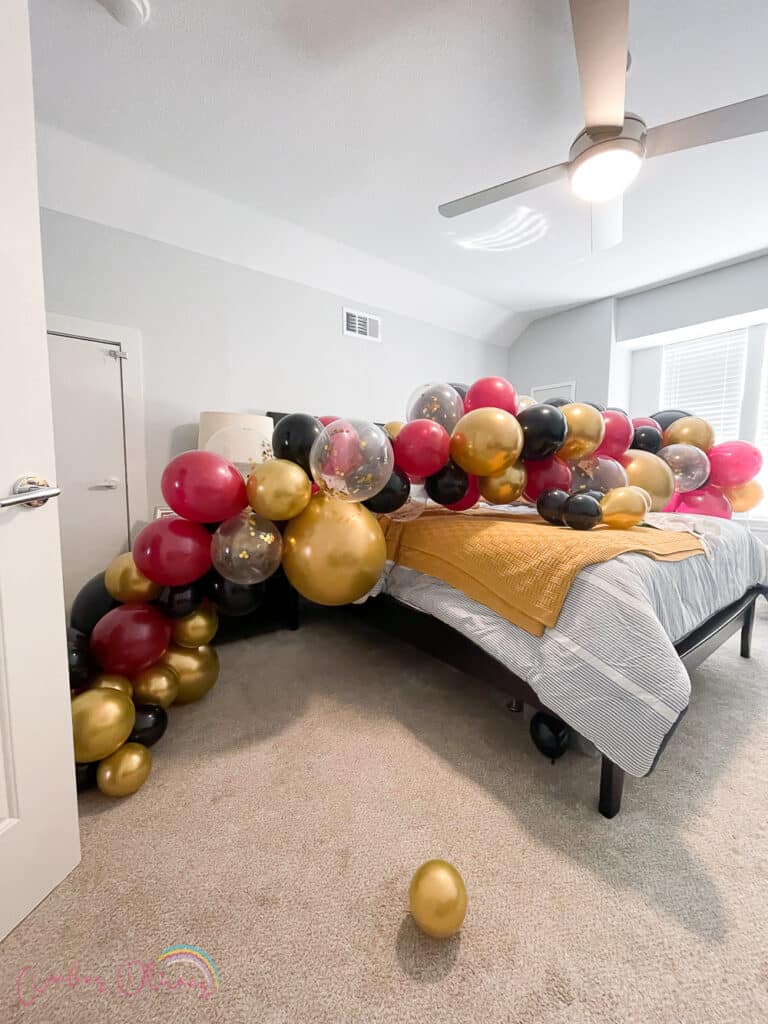
Pro tip: If you’re working with a larger arch or want extra stability, you can insert the ends of the balloon arch into a PVC pipe secured with a heavy base or use chicken wire to create a frame to hold the balloons. Our arch was about 15 feet and could have benefitted from this!
Step 5: Add Additional Decorations: Now that your balloon arch is in place, it’s time to add some extra flair. Consider incorporating fresh flowers or faux flowers into your arch to add a touch of elegance. You can use low-temp glue gun, small zip ties, or use glue dots to attach the flowers to the arch, creating a stunning combination of balloons and blooms.
Pro tip: To create a cohesive look, choose flowers or accessories that complement the color scheme of your balloons.
Step 6: Fine-tune and Perfect: Take a step back and assess your balloon arch. Make any necessary adjustments to ensure the arch is evenly balanced and the colors are distributed harmoniously. You can twist the balloons gently to reposition them or add additional balloons where needed. Glue dots make it super easy to stick extra balloons in any holes or gaps you see once your arch is hung.
Shop Balloon Arch Supplies:

The end result of your DIY balloon arch will be a show-stopping centerpiece that adds a splash of color and a festive atmosphere to your party. Whether it’s a baby shower, birthday party, or dinner party, your balloon arch will impress your guests and create lasting memories.
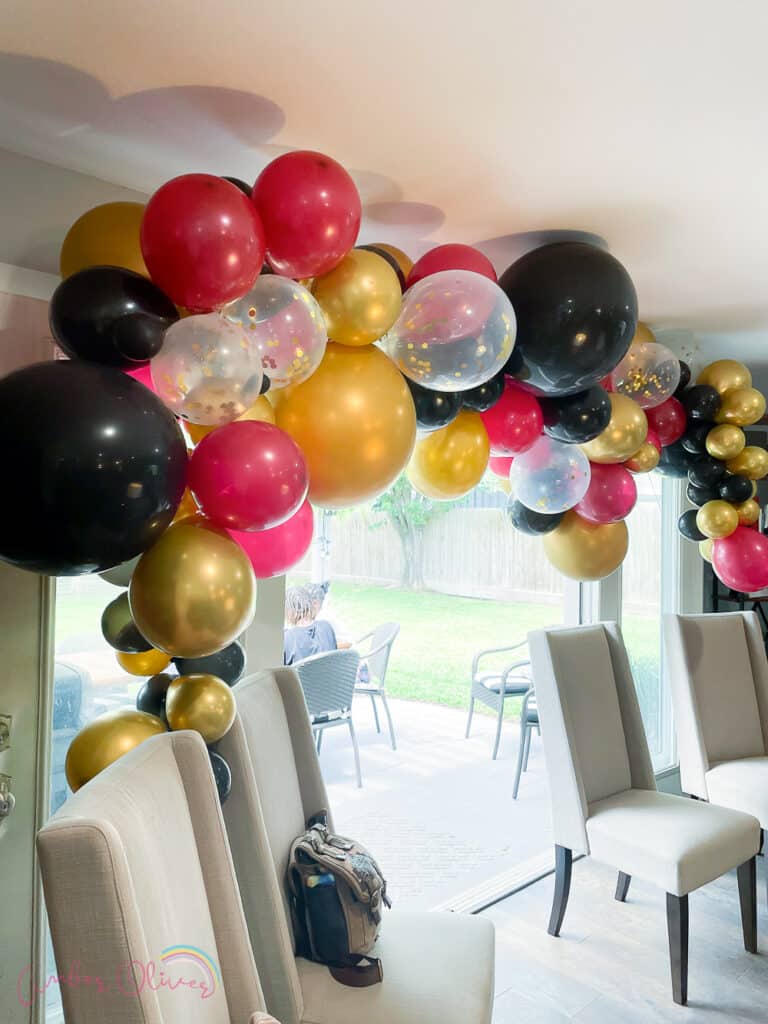
Creating your own balloon arch doesn’t have to be a daunting task. With the right supplies, a little creativity, and our step-by-step tutorial, you can effortlessly design your own balloon garland for any occasion. Remember to consider your color palette, play with different sizes of balloons, and secure your garland properly.
The best thing about balloon arches is that they offer endless possibilities for customization and are very inexpensive. This makes them the perfect addition to any event or party. So go ahead, grab your balloons, pump up the fun, and create your own stunning balloon arch that will leave everyone in awe!
DIY ARCHIVES
View our collection of DIY projects!

baldis basics online says
This DIY balloon arch garland looks amazing! I love how simple the steps are, and I can’t wait to try it for my next party. Thanks for sharing such a fun and creative idea!
lEvEl dEvIl 2 says
This balloon arch garland idea is fantastic! I love how simple and quick it looks to put together. Definitely going to try this for my next party! Thanks for the great tips!
dg says
This balloon arch garland is such a fun idea for parties! I love how simple the steps are. I can’t wait to try this for my upcoming event. Thanks for sharing!
Goa says
This balloon arch garland idea is fantastic! I love how simple and quick the steps are. Can’t wait to try this for my next party – it will definitely add a fun touch to the decor! Thank you for sharing!
Golo says
This is such a great tutorial! I never thought making a balloon arch could be this easy. I’m planning a party next week, and I can’t wait to try this out. Thanks for the clear instructions and tips!
KK says
This balloon arch garland idea is fantastic! I love how simple and quick the steps are. Can’t wait to try it for my upcoming party! Thanks for sharing!
91 Club says
This balloon arch garland idea is brilliant! I love how easy you made the steps to follow. Can’t wait to try it for my next party! Thanks for the inspiration!
Tt789 says
Loved this tutorial! The step-by-step instructions were super easy to follow, and the tips for choosing balloon colors really helped to elevate my party decor. Can’t wait to try making my own balloon arch for the next celebration!
ri188 says
This balloon arch garland looks amazing and so easy to make! I love that it can add such a fun touch to any party. Can’t wait to try it out for my upcoming celebration! Thanks for sharing these helpful tips!